Repair the Pump Lower
18 311882U
Repair the Pump Lower
n
1. Relieve the pressure. Follow Pressure Relief
Procedure, page 14.
1. Allow the fluid in the system to cool.
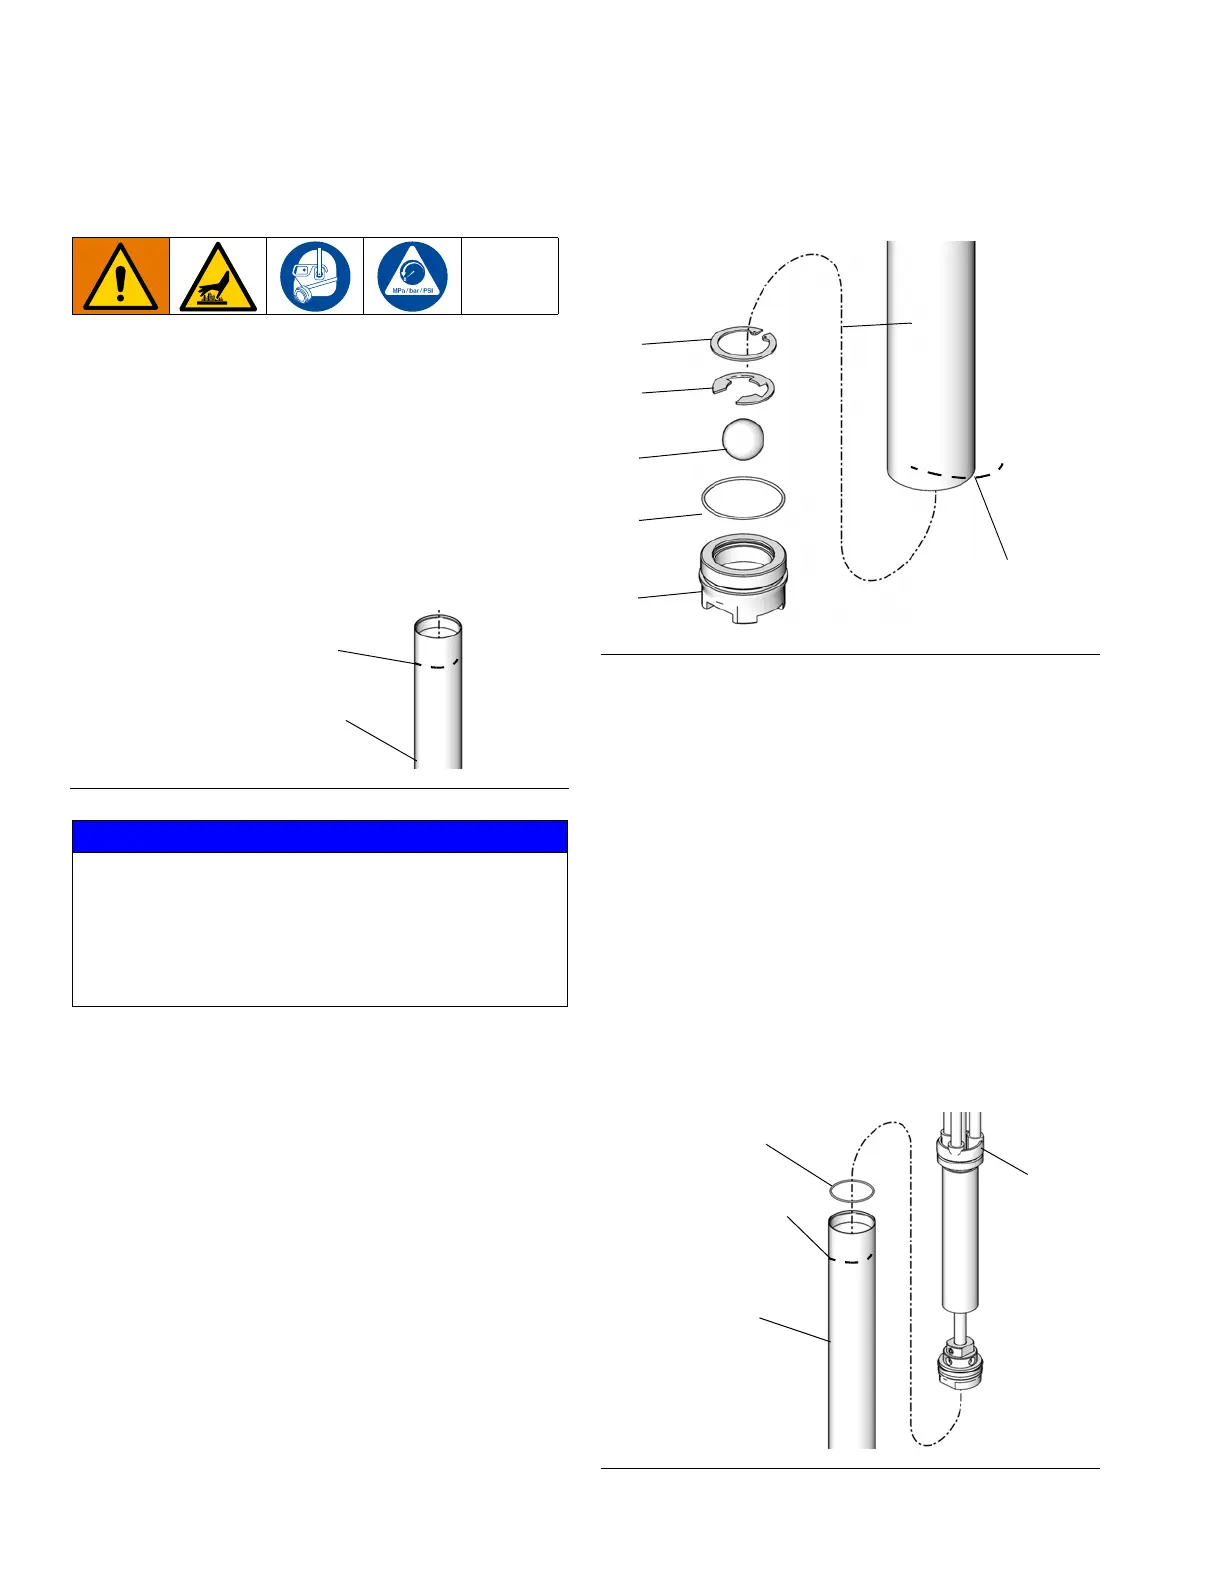
2. Use a chain wrench near the top of the suction tube
at the point indicated in F
IG. 16, and a wrench on
the flats of the foot valve (45) to loosen the foot
valve from the suction tube (44). To prevent
damage to the suction tube, do not remove the foot
valve until instructed to do so in step 4.
3. With the foot valve still in place to support the
suction tube, use a chain wrench near the bottom of
the suction tube at the point indicated in F
IG. 17, to
loosen the suction tube (44) from the pump body
(34).
4. Remove the foot valve assembly from the suction
tube (44).
5. Remove retaining ring (46), snap ring (47), ball (71),
and o-ring (38*) from foot valve (45). Inspect all
parts for damage. See F
IG. 17.
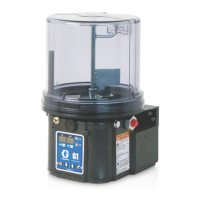
6. Remove suction tube (44) from pump body (34).
See F
IG. 18.
7. Inspect o-ring (38) on pump body and suction tube
for damage. See F
IG. 18.
FIG. 16
NOTICE
When removing the suction tube, be very careful not
to bend, dent, or damage it. To avoid damage, use
the chain wrench only at the top and bottom of the
suction tube as indicated in F
IG. 16 and FIG. 17. Do
not apply the wrench to the middle of the suction
tube.
44
Apply chain wrench
approximately here
FIG. 17
FIG. 18
ti9903
46
47
71
*38
45
Apply chain wrench
approximately here
44
44
ti9976
38
34
Apply chain wrench
approximately here