Home
Grandstream Networks
IP Phone
GXV3370
Grandstream Networks GXV3370 User Manual
4
of 1
of 1 rating
116 pages
Give review
Manual
Specs
To Next Page
To Next Page
To Previous Page
To Previous Page
Loading...
P
a
g
e
|
1
10
GXV3370 User Gui
de
V
ers
ion 1.0.0.16
Figure 1
12
:
GX
V3370 Bluetooth
- Paired Device
Unpair a Bluetooth Device
1.
In the Bluetooth settin
gs, tap on
button
corr
esponding to the
Bluetooth de
vice.
2.
Select
Unpair
.
Bluetooth Settings Shortcut
User can enter the B
luetooth settings b
y sliding the Sta
tus Bar
, then
long Press on the
Bluetooth icon.
Figure 1
13: Bluetooth Sett
ings Shortcut
110
112
Table of Contents
Default Chapter
3
Fcc Statement
3
Ce Declaration of Conformity
4
Gnu Gpl Information
6
Table of Contents
7
Document Purpose
16
Change Log
17
Firmware Version 1.0.0.16
17
Welcome
18
Product Overview
19
Feature Highlights
19
Table 1: GXV3370 Features in a Glance
19
GXV3370 Technical Specifications
20
Table 2: GXV3370 Technical Specifications
20
Getting Started
22
Equipment Packaging
22
Table 3: Equipment Packaging
22
Figure 1: GXV3370 Package Content
22
Description of the GXV3370
23
Front View
23
Table 4: GXV3370 Front View
23
Figure 2: GXV3370 Front
23
Back View
24
Table 5: GXV3370 Back View
24
Figure 3: GXV3370 Back View
24
Side View
25
Connecting and Setting up the GXV3370
25
Using the Phone Stand
25
Table 6: GXV3370 Side View
25
Figure 4: GXV3370 Side View
25
Using the Slots for Wall Mounting
26
Figure 5: Built in Stand and Mounting Slots on GXV3370
26
Figure 6: Tab on the Handset Cradle
26
Connecting the GXV3370
27
Figure 7: GXV3370 Back / Side View
27
Getting to Know Gxv3370
28
Use the Touchscreen
28
Figure 8: GXV3370 Default Home Screen
28
Figure 9: GXV3370 Onscreen Menu
29
Figure 10: GXV3370 Finger Gestures on the Touch Screen
29
Use the Desktop
30
Desktop Menu
30
Add Widget to Desktop
31
Figure 11: GXV3370 Desktop Menu
31
Manage Desktop Items
32
Figure 12: Add Widget to the Desktop
32
Figure 13: Open Clock Widget
32
Figure 14: Resize Digital Clock Widget
33
Figure 15: Move Clock Widget
33
Set Wallpapers
34
Manage Running Applications
34
Figure 16: GXV3370 Choose Wallpaper
34
Idle Screen
35
Switch Idle Screens
35
Figure 17: GXV3370 Recent Applications
35
Figure 18: GXV3370 Switch Idle Screens
35
Set up Idle Screen
36
Figure 19: Set up Home Idle Screen
36
Use the Status Bar
37
Figure 20: Add an Idle Screen
37
Figure 21: Delete an Idle Screen
37
Figure 22: GXV3370 Top Status Bar
38
Figure 23: Status Bar - more Options
38
Figure 24: GXV3370 Top Status Bar - Notification
39
Figure 25: GXV3370 Top Status Bar - Get more Information
39
Notifications in Status Bar
40
Figure 26: GXV3370 Top Status Bar - Wi-Fi
40
Table 7: GXV3370 Status Bar Notification Icons
40
Figure 27: System Settings in Status Bar
42
System Settings in Status Bar
42
Use the GXV3370 Keys
43
Keypad Shortcut Functions
43
Table 8: GXV3370 Keys
43
Figure 28: GXV3370 Keys
43
Use the On-Screen Keyboard
44
Figure 29: GXV3370 Onscreen Keyboard - English Keyboard
45
Figure 30: GXV3370 Onscreen Keyboard - Lowercase and Uppercase
45
Figure 31: English Keyboard - Number and Symbols
45
Use the Message Waiting Indicator
46
Table 9: GXV3370 MWI LED Status
46
Figure 32: English Keyboard - more Symbols
46
Make Phone Calls
47
Register SIP Accounts
47
Account Status
47
Figure 33: GXV3370 Account Widget
47
Configure SIP Account
48
Figure 34: GXV3370 Dial Screen
48
Dial a Number Directly
49
Figure 35: Disable Video Call Feature on Dial Screen
49
Redial
50
Dial a Number Via Contact
50
Dial a Number Via Call History
50
Figure 36: GXV3370 View Contacts
50
Answer a Call
51
Single Incoming Call
51
Figure 37: GXV3370 Call History
51
Figure 38: Single Incoming Call - Audio
51
Figure 39: Single Incoming Call - Video
52
Figure 40: Single Incoming Call - Preview-1
52
Multiple Calls/Call Waiting
53
Figure 41: Single Incoming Call - Preview-2
53
Figure 42: Call Waiting
53
Call Progress Status
54
Call Hold
54
Figure 43: Touch to Return to Call Screen
54
Figure 44: Call on Hold
54
Call Recording
55
Mute
55
Figure 45: GXV3370 Call Recording
55
Figure 46: GXV3370 Call Mute
55
Turn on Video During Audio Call
56
Figure 47: Turn on Video During Audio Call
56
Figure 48: Accept Video During Audio Call
56
Switch Audio Channel During Call
57
Figure 49: Switch Audio Channel During Call
57
Call Transfer
58
Blind Transfer
58
Figure 50: Blind Transfer
58
Attended Transfer
59
Figure 51: Attended Transfer
59
Figure 52: Attended Transfer - Transferring
60
Figure 53: Attended Transfer - Split
60
Figure 54: Attended Transfer
61
7-Way Conference
62
Initiate Conference
62
Figure 55: Add Conference Members from Dial Screen
62
Figure 56: Add Conference Members from Dial Screen 2
62
Figure 57: GXV3370 Conference Screen
63
Remove Party from Conference
64
Figure 58: GXV3370 Conference - Add Existing Call to Conference
64
Figure 59: 3-Way Conference Call Established
64
End Conference
65
Hold and Resume Conference
65
Auto Conference Mode
65
Figure 60: GXV3370 Conference - Remove Party from Conference
65
Missed Call
66
DND (Do Not Disturb)
66
Figure 61: Missed Call Screen
66
Voicemail/Message Waiting Indication
67
Figure 62: Enable/Disable DND
67
Call Forward
68
Figure 63: Retrieve Voicemail
68
Figure 64: Unconditional Call Forward
68
Figure 65: Call Forward - Unconditional
69
Figure 66: Call Forward - Time Based
69
Call Features
70
Table 10: GXV3370 Feature Code
70
Figure 67: Call Forward - Busy/No Answer/Dnd
70
Contact
73
Local Contacts
73
Add Single Contacts
73
Figure 68: GXV3370 Contacts
73
Import/Export Contacts
74
Figure 69: GXV3370 Contacts - Add New Contact
74
Figure 70: Add to Contacts from Dial Pad
74
Figure 71: GXV3370 Contacts - Import Contacts
75
Download Contacts
76
Figure 72: GXV3370 Contacts - Export Contacts
76
Search Contacts
77
Use Contacts
77
Figure 73: GXV3370 Contacts - Download Contacts
77
Figure 74: GXV3370 Contacts - Search Contacts
77
Add Contacts to Favorites
78
Figure 75: GXV3370 Contacts - Select Contacts
78
Make a Call to Contacts
78
Select Contacts
78
Edit Contacts
79
Figure 76: Add Contacts to Favorites
79
Send Contacts to Desktop Shortcut
79
Add Contacts to Blacklist
80
Add Group
80
Share Contacts Via Bluetooth
80
Add Contacts to Group
81
Contacts Storage Status
81
Figure 77: GXV3370 Contacts - Add New Group
81
Figure 78: GXV3370 Contacts - Storage Status
82
Harassment Interception
83
Blocked Contacts
83
Block History
83
Figure 79: List of Blocked Contacts
83
Delete Block History
84
Edit Blacklist
84
Figure 80: Block History
84
Figure 81: GXV3370 Blacklist - Add Number to Blacklist
85
Figure 82: Manually Add Number to Blacklist
85
Intercept Anonymous Calls
86
Figure 83: Intercept Anonymous Calls
86
Call History
87
Local Call History
87
Figure 84: GXV3370 Call History
87
Call History Options
88
Delete Call History
88
Dial out from Call History
88
Figure 85: GXV3370 Call History - Options
88
Call History Details
89
Figure 86: GXV3370 Call History - Details
89
File Manager
90
Files Operations
90
Copy and Paste Files
90
Figure 87: GXV3370 File Manager - Copy File
90
Move Files
91
Figure 88: Paste File
91
Figure 89: GXV3370 File Manager - Move
91
Send Files
92
Figure 90: GXV3370 File Manager - Options
92
Delete Files
93
Rename a File
93
Figure 91: Delete File(S) Via File Manager
93
File Categories
94
Figure 92: Rename File
94
Gs Market
95
Figure 93: GS Market - Onscreen Menu
95
Camera
96
Take Picture
96
Record Video
96
Figure 94: GXV3370 Camera
96
Angle Adjustment
97
Gallery
97
Figure 95: Recent Pictures and Videos Page
97
Figure 96:Edit Picture
98
Figure 97: Access to the Gallery
98
Figure 98: GXV3370 Gallery
99
Figure 99: GXV3370 Gallery - Picture Options
99
Screensaver
100
Figure 100: Screensaver Settings
100
Figure 101: Use Network Images
101
Figure 102: Network Image Path
101
Browser
102
Figure 103: GXV3370 Web Browser
102
Figure 104: GXV3370 Browser Menu Options
102
Figure 105: Open New Window in Browser
103
Figure 106: GXV3370 Web Browser-Bookmarks
103
Action Url
104
Connecting Gxv3370 to Gds3710 Door System
105
Connect to Network and Devices
106
Ethernet
106
Wi-Fi
106
Turn On/Off Wi-Fi
106
Connect to Wi-Fi Networks
106
Figure 107: GXV3370 Connect to Wi-Fi
107
Figure 108: GXV3370 Connect to Wi-Fi-Show Advanced Options
107
Wi-Fi Settings Shortcut
108
Figure 109: Wi-Fi - Add Network
108
Figure 110: Wi-Fi Settings Shortcut
108
Bluetooth
109
Turn On/Off Bluetooth
109
Figure 111: Wi-Fi Shortcut - Wi-Fi List
109
Change Bluetooth Device Name
110
Pair GXV3370 with a Bluetooth Device
110
Unpair a Bluetooth Device
111
Bluetooth Settings Shortcut
111
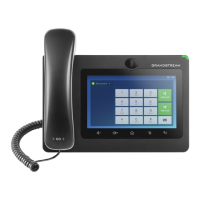
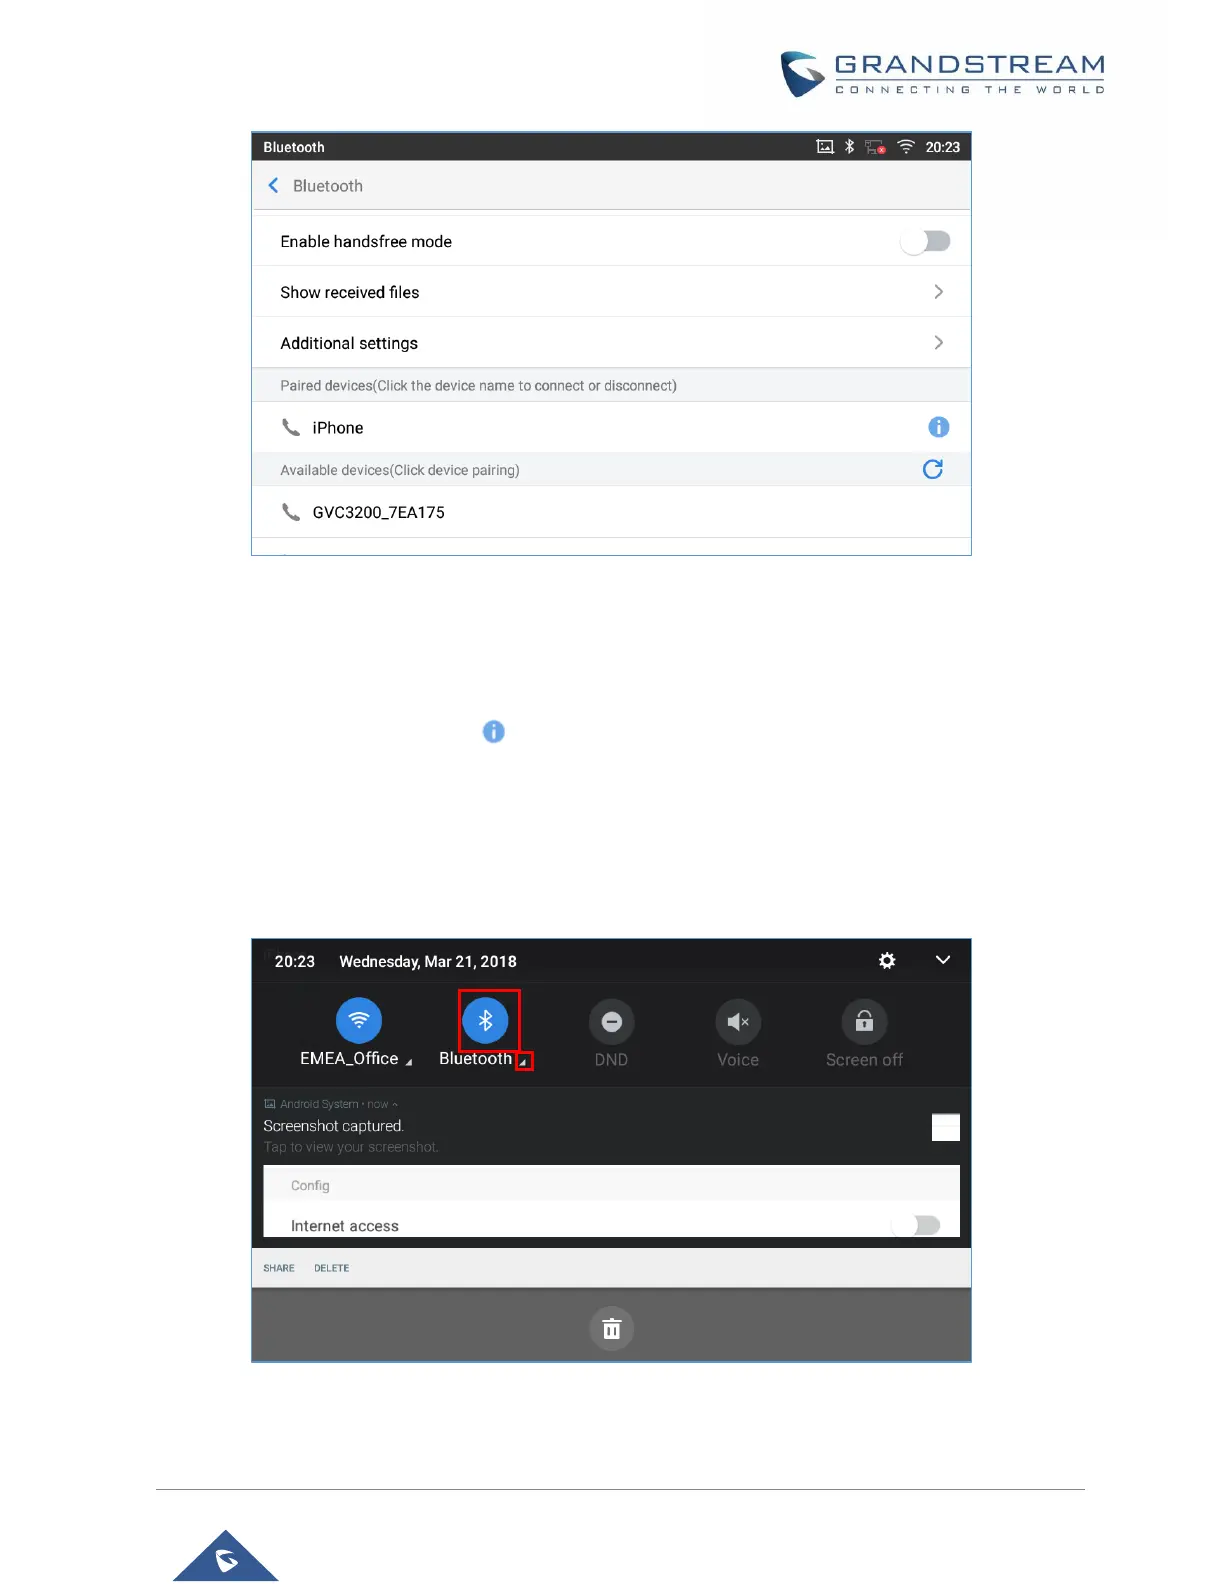
Figure 112: GXV3370 Bluetooth - Paired Device
111
Figure 113: Bluetooth Settings Shortcut
111
EHS Headset
112
Figure 114: Bluetooth Setting Shortcut 2
112
USB Headset
113
Figure 115: EHS Headset
113
Figure 116: USB Headset Connected
113
Usb
114
Figure 117: USB Headset Used for Call
114
Figure 118: Switch between Speaker and USB Mode
114
SD Card
115
Figure 119: USB Storage Device Connected to GXV3370
115
Experiencing the Gxv3370 Application Phone
116
GXV3370 User Guide Version
116
Other manuals for Grandstream Networks GXV3370
Administration Guide
92 pages
Security Guide
27 pages
Configuration Guide
11 pages
Bluetooth User Guide
11 pages
Wi-Fi Guide
17 pages
Quick Installation Guide
29 pages
4
Based on 1 rating
Ask a question
Give review
Questions and Answers:
Need help?
Do you have a question about the Grandstream Networks GXV3370 and is the answer not in the manual?
Ask a question
Grandstream Networks GXV3370 Specifications
General
Brand
Grandstream Networks
Model
GXV3370
Category
IP Phone
Language
English
Related product manuals
Grandstream Networks GXV3380
133 pages
GXV33 Series
116 pages
Grandstream Networks GXV3240
179 pages
Grandstream Networks GXV3275
189 pages
Grandstream Networks GXP1628
50 pages
Grandstream Networks GXP2170
108 pages
Grandstream Networks GXP1610
43 pages
Grandstream Networks GXP1625
50 pages
Grandstream Networks GXP1620
18 pages
Grandstream Networks GXP2135
108 pages
Grandstream Networks GXP1450
80 pages
Grandstream Networks GXP2130
98 pages