Grandstream Networks, Inc. GXW4024 User Manual Page 18 of 35
Firmware 1.0.1.8 Last Updated: 5/2008
C
ONFIGURING GXW4024 WITH WEB BROWSER
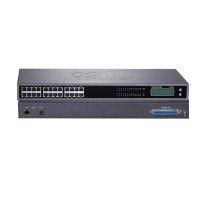
GXW4024 has an embedded Web server that will respond to HTTP GET/POST requests. It also has
embedded HTML pages that allow users to configure the GXW4024 through a Web browser such as
Microsoft’s IE and AOL’s Netscape. There are six (6) screenshots that the end user should become
familiar with during the configuration process. Download these pages now
http://www.grandstream.com/user_manuals/GUI/GUI_GXW40xx.rar
and review the term definitions
found in Tables 7 – 11.
A
CCESS THE WEB CONFIGURATION MENU
The GXW4024 HTML configuration menu can be accessed via LAN port:
1. Assuming the network having DHCP server and the GXW4024 get IP via DHCP.
2. Connect an analogue phone to ANY FXS port, using IVR (Press *** then 002) to get the IP
address of the box, then type the IP into Browser to access the box.
3. Access the GXW4024 Web Configuration page via the following URL: http://GXW4024 -IP-
Address (the GXW4024 IP-Address is the IP address obtained from IVR).
NOTE: If using a web browser to enter the configuration page, strip the leading “0”s (i.e. if the IP address
is: 192.168.00
1.014, please type in: 192.168.1.14).
Once the HTTP request is entered and sent from a Web browser, the user will see a log in screen. There
are two default passwords for the login page:
User Level: Password: Web pages allowed:
End User Level 123 Only Status and Basic Settings
Administrator Level admin Browse all pages
Only an administrator can access the “ADVANCED SETTINGS” configuration page.
1. There are six different tabs (Status, Basic Settings, Advanced Settings, Profile 1, Profile 2 and
FXS Ports) on the top of the screen (after login). To open each page, click on the tab.
2. Click on Profile 1 to enter your SIP Server/ SIP Proxy/Registrar information. Enter the IP Address
(or FQDN) of the Server under: SIP Server and/or Outbound Proxy.
3. Click on FXS ports to enter the extensions or account information. You will need to fill in the
following information for each extension. Once the extensions are configured, you are finished.
FXS
Port
SIP User
ID
Auth ID Authentication
Password
Name Profile
1 601 601 *** Ext 1 Profile1
2 602 602 *** Ext 2 Profile1
3 603 603 *** Ext 3 Profile1
4 604 604 *** Ext 4 Profile1
5 605 605 *** Ext 5 Profile1
6 606 606 *** Ext 6 Profile1
7 607 607 *** Ext 7 Profile1
.. … … *** … …
24 624 624 *** Ext 24 Profile1
4. Click Update after changing any settings and then Reboot to confirm changes.
5. After reboot, check the Status Page to confirm the extensions are successfully registered. You
can now use your standard phones connected to ports FXS1 to FXS24 to make calls.
 Loading...
