Configuring GXW400X with WEB BROWSER
The GXW400X series gateway has an embedded Web server that allows users to configure the GXW400X
through a web browser.
Access the Web Configuration Menu
The GXW400X HTML configuration menu can be accessed via LAN or WAN port:
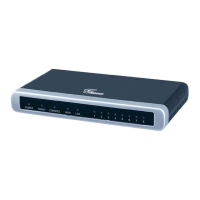
From the LAN port (For GXW4004/8 only):
1. Directly connect a computer to the LAN port.
2. In Windows, open a ‘Command Prompt’ window
3. Type in “ipconfig /release”, the IP address etc. becomes 0.
4. Type in “ipconfig /renew”, the computer gets an IP address in 192.168.2.x segment by default
5. Open a web browser, type in the default gateway IP address. http://192.168.2.1. You will see the
login page of the device.
From the WAN port (For GXW4004/8 only):
The WAN port HTML configuration option is disabled by default from factory. To access the HTML
configuration menu from the WAN port:
1. Follow table 4 to find the WAN side IP address.
2. Open a web browser, type in the WAN side IP address – for example: http://GXW400X -IP-Address
(the GXW400X IP-Address is the WAN IP address for the GXW400X).
NOTE:
WAN side HTTP access is disabled by default for security reasons. You can enable HTTP access on the
configuration page by setting “WAN side HTTP access” to be YES.
Initial access to the configuration pages is always from the LAN port. The instructions are listed above.
The IVR announces 12 digits IP address, you need to strip out the leading “0” in the IP address. For ex.
IP address: 192.168.001.014, you need to type in http://192.168.1.14 in the web browser.
Once the HTTP request is entered and sent from a web browser, the user will see a log-in screen. There are two
default passwords for the login page:

 Loading...