Electrical
32
8 Electrical
8.1 General Requirements
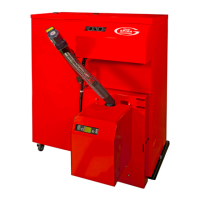
The Grant SPIRA Condensing Wood
Pellet boiler requires a 230 V ~50 Hz
electrical supply. The unit should be
connected to a mains power supply
that is protected by a 30mA RCD.
For the UK, the electrical installation
must be carried out by a competent
installer in accordance with the
requirements of the Electricity at work
Regulations 1989 and BS7671:2008 –
IEE Wiring Regulations 17th Edition
(including all amendments)
If installed in the Republic of Ireland, the
wiring installation must comply with all
ETCI rules.
All the wiring and supplementary earth
bonding external to the boiler must be
in accordance with the current I.E.E.
wiring regulations.
Any heating system controls, e.g. room
thermostat , frost thermostat, etc.
connected to this boiler must be
suitable for use on mains voltage.
8.2 Hopper Electrical
Connections
7.2.1 Single Boiler Hopper
(with a single auger) – in either a left
hand or right hand version as required,
to supply a single boiler.
This hopper is fitted with three pre-
wired flying leads with factory-fitted
plugs:
• 4-way plug – for connection of the
permanent live, earth and neutral
and also the switched live from the
heating controls system.
• 5-way plug – to connect the hopper
to the boiler.
• 6-way plug – to connect either a
bulk pellet store auger or Grant
SPIRA-VAC vacuum system to the
hopper and boiler.
Refer to Figure 8-7 for hopper wiring
diagram.
8.2.2 Double Boiler Hopper
(with two augers) – to supply two
boilers in a ‘double boiler’ installation.
This hopper is fitted with four pre-wired
flying leads with factory-fitted plugs:
• 4-way plug – for connection of the
permanent live, earth and neutral
and also the switched live from the
heating controls system.
• Two 5-way plugs – one to connect
to each of the two boilers.
• 6-way plug – to connect either a
bulk pellet store auger or Grant
SPIRA-VAC vacuum system to the
hopper and boiler.
Refer to Figure 8-8 for double hopper
wiring diagram.
8.2.3 For Installations with a Bulk
Pellet Store only
Both single boiler and double boiler
hoppers are supplied with the 6-way
plug parked inside the wiring enclosure.
See Figure 8-1.
If a bulk pellet store is to be used:
• Remove the wiring centre cover
from the rear of the hopper.
• Unclip the 6-way plug from
diaphragm switch bracket.
• Pass the 6-way plug lead through
the grommet just below the wiring
centre cover.
• Set the toggle switch on the
diaphragm switch bracket to ‘BULK
STORE’. See Figure 8-1.
• Replace the wiring centre cover and
fasten in place using the screws
previously removed.
• Connect the 6-way plug to the
corresponding 6-way connector on
the pre-wired flying lead fitted to
either the bulk pellet auger or Grant
SPIRA-VAC system.
• If using the Grant SPIRA-VAC
system, refer to the installation
instructions supplied with the
system for further details on its
installation and operation.
8.2.4 For Installations using the
Pellet Hopper only
When used without a bulk pellet store,
the pellet hopper has the facility for the
connection of a 230V ‘low pellet’
indicator lamp (not supplied). This will
indicate to the householder that the
pellets in the hopper have reached the
minimum level and the hopper needs to
be topped up.
The indicator lamp should be
positioned so it can be easily viewed by
the householder. See either Figure 8-7
or 8-8, as applicable, for the connection
details.
If a bulk store is used, with either the
Grant SPIRA-VAC system or a Grant
bulk auger, a ‘low pellet’ indicator lamp
cannot be fitted to the pellet hopper.
8.3 Boiler Plug Connections
Before making any electrical
connections to the hopper (by
connecting the 4-way plug and socket
together) ensure that all the plug
connections have been correctly made
between the hopper, boiler and (if fitted)
the bulk pellet supply system, as
follows:
1. Fit the 5-way plug from the flue fan
and solenoid valve into the socket
at the top right rear of the boiler.
See Figure 8-2. Ensure it is fully
pushed home.
2. Fit the 5-way plug from the hopper
into the socket at the top left rear of
the boiler. See Figure 8-3. Ensure it
is fully pushed home.
Figure 8-1: Hopper selector switch
Figure 8-2: Flue fan/solenoid valve
plug connection

 Loading...