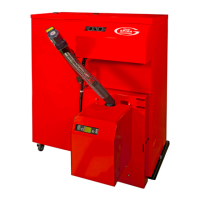
Boiler Servicing
54
11 Boiler Servicing
11.5 Combustion Ventilation
Check that the combustion air supply
conforms to the relevant requirements
of The Building Regulations Approved
Document J, for solid fuel appliances
with a draught stabiliser. Refer to
Section 6.1.
Check that all ventilation openings are
free from any obstructions, both inside
and outside. If necessary remove any
blockages (e.g. fluff, dog hair, leaves,
etc.).
11.6 Boiler
11.6.1 Contro Panel
Unscrew and remove the six self
tapping screws securing the boiler
control panel cover and lift the cover off
the control panel.
Proceed as follows:
• Check both the overheat
thermostat probe and thermistor
bulb are fully inserted in the boiler
waterway pocket, and the retaining
clip is fitted. Refer to Figure 11-6.
• Check the condition of thermistor
cable and thermostat capillary, i.e.
not damaged, broken or kinked.
• Grease the edge of the shaker
motor cam with high temperature
grease. Refer to Figure 11-7.
Refit the control panel cover and secure
with the six screws previously removed.
11.6.2 Heat exchangers
To gain access to the top of both heat
exchangers. (Refer to Figure 11-7):
• Remove the boiler top casing panel.
• Unscrew and remove the two nuts
securing the front access panel and
remove it from the top of the
primary heat exchanger.
• Unscrew and remove the two nuts
securing the rear access cover and
remove it from top of the secondary
(condensing) heat exchanger.
11.4.3 Draught Stabiliser
Check draught stabiliser damper is free
to move. Remove draught stabiliser
from fan box and clean if required.
Refer to Figure 11-2.
Re-fit draught stabiliser to fan box and
check damper is free to move.
Draught stabiliser setting must be
checked when boiler is operational.
Refer to Section 11.9.
11.4.4 Flue Fan
Unscrew the four screws securing the
flue fan to the fan box and remove the
fan. Clean any ash deposits from the
fan blades and mounting plate. Refer to
Figure 11-3.
Refit fan to fan box and secure with
screws. Ensure that it is correctly sealed
to the fan box on the neoprene gasket.
Refit the 5-way (on the lead from the
flue fan and solenoid) into the socket at
the right rear of the boiler. Refer to
Figure 11-2.
Figure 11-4: Draught stabiliser
Figure 11-6: Boiler control panel
(cover removed)
Figure 11-7: Shaker motor cam location
Figure 11-8: Top of heat exchangers
Figure 11-5: Flue fan
When cleaning the fan blades ensure
they are all thoroughly cleaned.
Uneven cleaning will result in the fan
being ‘out of balance’ and could
cause damage to the fan motor.
!
CAUTION
Failure to maintain a clean flue can
result in the emission of flue gases
into the dwelling or damage from
potential fire in the flue.
!
WARNING
Ensure the electrical supply to the
hopper and boiler is isolated by
disconnecting the 4-way plug from
the socket (on the flying lead) at the
rear of the hopper.
!
WARNING

 Loading...