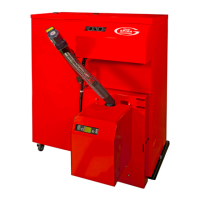
Boiler Servicing
56
11 Boiler Servicing
11.6.3 Combustion Chamber
Disconnect the pellet delivery hose from
the burner pellet feed tube. Then fully
open the combustion chamber door on
the front of the boiler and clean as
follows:
• Before moving the combustion
chamber baffle (located in the top of
the combustion chamber) remove
all ash deposits from the upper
surface using a vacuum. Refer to
Figure 11-8.
• Remove and inspect the baffle and
clean off any remaining deposits
using a brush and vacuum.
• Check the baffle condition and
replace if necessary.
• Clean the underside of upper rear
section of the primary heat
exchanger (at the rear of
combustion chamber) BEFORE
replacing baffle.
• Clean down the combustion
chamber side, back and base
surfaces, removing all ash deposits.
• Clean any ash deposits from the
top of the burner hood and the
inner face of the combustion
chamber door.
• Clean out the burner brazier to
remove as much loose ash as
possible using a vacuum.
• Refit the combustion chamber
baffle in position ensuring it is
seated correctly on the fixing
brackets. Refer to Figure 11-8.
• Refit the ash pan in the base of the
combustion chamber.
• Grease the front cleaning door latch
mechanism and close the door.
11.7 Burner Brazier
11.7.1 Removal of Burner
To clean the burner thoroughly it will be
necessary to remove it from the boiler,
as follows:
• Disconnect the three plugs from the
left side of the burner. Refer to
Figure 11-9.
• Remove the steel clip from the burn
back thermostat (on the pellet feed
pipe) and disconnect the lead from
the thermostat terminals.
• Remove the red burner cover by
loosening the four M5 screws (two
each side of the cover) and lifting it
off the burner.
• Whilst supporting the burner,
unscrew and remove the two M8
burner securing nuts, one on each
side of the burner.
Refer to Figure 11-10.
• Carefully withdraw the burner from
the combustion chamber door
taking care not to damage the
burner door gasket.
• Place the burner on a suitable
bench (e.g. portable ‘workmate’
type bench or similar) to work on.
11.7.2 Cleaning Burner Brazier
Dismantle and clean the burner as
follows:
• Remove the burner hood by
loosening the two M5 bolts
(highlighted below) each side of the
brazier. Slide the forwards and then
up to disengage the hood from the
burner. Refer to Figure 11-11.
• Clean and inspect the hood for any
damage or distortion. Replace if
necessary. Remove all ash deposits
and check that all air holes (on the
inside surface of the hood) are clear.
Ensure the electrical supply to the
hopper and boiler is isolated by
disconnecting the 4-way plug from
the socket (on the flying lead) at the
rear of the hopper, before proceeding.
!
WARNING
Ensure that electrical supply to the
hopper and boiler is isolated by
disconnected at the 4-way plug from
the socket (on the flying lead) at the
rear of the hopper, before proceeding.
!
WARNING
Figure 11-9: Combustion chamber
baffle
Figure 11-10: Burner plugs
Figure 11-11: Burner fixing nuts
Figure 11-12: Removal of burner hood
Extreme care is required when
empting the ash pan as smouldering
ash could be present and cause
serious damage to persons or
property. Ensure the ash is disposed
of in a safe manner.
!
CAUTION

 Loading...