GRISWOLD PUMP COMPANY Pump Operation Page 19
Installation, Operation and Maintenance Manual
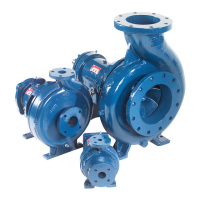
Griswold Model 811
Griswold Pump Company Pump Operation Page 21
7. Start pump. As soon as the driver comes up to full speed, gradually open the discharge
valve allowing the system to fill and stabilize at the pump’s operating capacity and head.
8. Listen for any untoward noise, check for any significant vibration or indications of
binding. If any of these are observed, the pump should be stopped immediately and a
thorough check of the installation should be made to determine the cause. Correct any
fault(s) prior to re-starting the pump.
9. Check the shaft seal. If pump has mechanical seal(s), there should be no visible leakage.
If pump has packing, there should be a steady leakage stream. Packing leakage should be
reduced GRADUALLY by tightening the gland nuts ¼ turn at a time until a leakage rate
of 40-60 drops per minute is achieved. This may take several hours and several
adjustments.
Once the pump and motor have reached stabilized operating temperatures, final alignment should
be checked.
1. Stop the pump.
2. Lock out the power source.
3. Immediately remove the coupling guard and coupling spacer.
4. Check alignment as described in the “Installation page 12” section.
5. Make any necessary alignment corrections.
6. Re-install coupling spacer and coupling guard.
 Loading...