GRISWOLD PUMP COMPANY Installation Page 7
Installation, Operation and Maintenance Manual
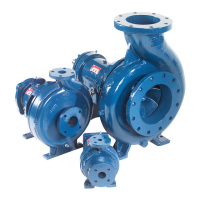
Griswold Model 811
Griswold Pump Company Installation Page 9
Before the baseplate is installed, it is advisable to thoroughly clean
the underside to enable the grouting to adhere to it. Do not use oil-based cleaners since
grout will not bond to it.
Installing and Grouting Base
Once the concrete pad has cured, the baseplate can be carefully lowered over the anchor bolts.
Place shims or tapered wedges under the baseplate at each of the anchor bolt positions to provide
about 0.75" – 1.50" clearance between the base and the foundation. Adjust shims/wedges to level
the baseplate. Since there may be some flexibility in the baseplate, we must perform an
initial alignment prior to grouting to ensure that a final alignment can be achieved. See
section covering Alignment of Pump/Driver Shafts. Potential problems here include bowing
and/or twisting of the baseplate. If gross misalignment is observed, shims/wedges may have to
be added under the mid-point of the base or the shims/wedges at the corners may have to be
adjusted to eliminate any twist. If the driver feet are bolt-bound for horizontal alignment, it may
be necessary to loosen the pump hold-down bolts and shift the pump and driver to attain
horizontal alignment. When alignment has been achieved, lightly tighten the anchor bolts. The
anchor bolts should not be fully tightened until the grout has set.
Grouting furnishes support for the pump unit baseplate providing rigidity, helping to dampen any
vibration and serves to distribute the weight of the pump unit over the foundation. To be
effective, grouting must completely fill all voids under the baseplate. For proper adhesion or
bonding, all areas of the baseplate that will be in contact with the grout should be thoroughly
cleaned. See note above. The grout must be non-shrinking. Follow the directions of the grout
manufacturer for mixing. Proceed with grouting as follows:
1. Build a sturdy form on the foundation around the baseplate to contain the grout.
2. Soak the top of the concrete foundation pad thoroughly. Remove surface water before
pouring.
3. Pour the grout through the hole(s) in the top and/or through the open ends of the channel
steel baseplate, eliminating air bubbles by tapping, using a vibrator or pumping the grout into
place. If necessary, drill vent holes into the top of the base to evacuate air.
4. Allow grout to set completely, usually a minimum of 48 hours.
5. Tighten foundation anchor bolts.
6. Re-check alignment to ensure that there have been no changes.
7. After the grout has dried thoroughly, apply an oil base paint to shield the grout from air and
moisture.
You may then proceed to connect suction and discharge piping
If the size of the equipment or the layout of the installation require it, grouting can be
done in two steps as long as the first step is allowed to cure completely before the second