-26-
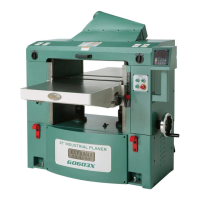
G0603X 25" Extreme Series Planer
To add or subtract distance from the current
position of the table:
1. On the digital keypad, press the MANUAL/
SINGLE key
to select SINGLE mode—
the light on the key will be off.
2. Press the +/- key
—an LED in the top
target window will blink.
Note: When the +/- key
is pressed once,
the default is to add the value in the top LED
target window. To toggle this value to be
subtracted, press the
+/- key
again—a
minus sign will appear at the left edge of the
top LED target window.
3. Using the numerical keypad, enter the value
to be added to or subtracted from the table
position shown in the bottom LED window.
4. Press the ENTER key a
to accept this
value—the light on the START
key
will
blink.
5. Press the START key
to move the table
to the desired location.
Note: Pressing the STOP key
will halt
the table movement and cancel the program
-
ming.
The digital control provides ten preset values
to be stored in permanent memory for use with
frequently used table positions. These values are
associated with the “0” through “9” keys on the
digital keypad.
To enter a preset target value into memory:
1. On the digital keypad, press the MANUAL/
SINGLE key
to select SINGLE mode—
the light on the key will be off.
2. Press the following keys one at a time:
a. The “F” key
.
b. The “5” key
.
c. The “5” key
again.
d. The ENTER key
.
Note: If this procedure is successful, an LED
in both the top target window and the bot
-
tom actual window will blink, and
“ProG” will
appear in the top target window.
3. Press a key from “0” to “9” to store the target
value—the number of the key pressed will
appear to the right of “
ProG” in the top target
window.
4. Using the numeric keypad, enter the table
position to be stored and press the ENTER
key
.
5. Repeat Steps 3–4 to store additional values.
6. When finished, press the EXIT key
—the
readout windows will return to normal.
Note: You may cancel and exit this procedure at
any time by pressing the EXIT key
.
To move the table to a stored preset position:
1. On the digital keypad, press the MANUAL/
SINGLE key
to select SINGLE mode—
the light on the key will be off.
2. Press the key on the numeric keypad that
stores the table position value you wish to
use—that value will appear in the top target
window and the light on the START key
will blink.
3. Press the START key
to move the table
to the preset position.
Note: You may press the STOP key
anytime
the
START key
light is blinking to cancel the
process and return the digital control to normal.

 Loading...