-38-
Model G0886 (Mfd. Since 01/19)
Using Proximity Sensor in Auto
Operation Mode
4. Push hydraulic pump button to turn
hydraulic pump ON.
5. Set headstock to required height for workpiece
(refer to Setting Headstock Height on
Page 36).
6. Make sure operation mode switch is set to
manual
mode and feed roller switch is set
to OFF
.
7. Extend workpiece past blade the same length
of pieces needed. Measure from outside
of blade to end of workpiece, as shown in
Figure 48.
8. Push vise close button
to clamp workpiece.
9. Position proximity sensor so arrow on sensor
head points directly at end of workpiece, as
shown in Figure 48. Sensor head needs to
be within
1
⁄4" of material for detection.
10. If needed, open coolant valves.
11. Push blade start button
to start cutting
operation. Processed material will slide down
chute after cut is made.
12. Set feed roller switch to FWD
, and push
feed system button
. Feed rollers will
advance workpiece until it reaches proximity
sensor.
13. Repeat Steps 11–12 as needed to complete
cutting operations
1. Make sure master power switch is turned
OFF.
2. Place workpiece between jaws. Use roller
stands or tables to support long pieces.
3. Turn master power switch ON.
4. Push hydraulic pump button
to turn
hydraulic pump ON.
5. Set headstock to required height for workpiece
(refer to Setting Headstock Height on
Page 36).
6. Make sure operation mode switch is set to
auto
mode and feed roller switch is set to
FWD
.
7. Extend workpiece past blade the same length
of pieces needed. Measure from outside
of blade to end of workpiece, as shown in
Figure 48.
8. Push vise close button
to clamp workpiece.
9. Position proximity sensor so arrow on sensor
head points directly at end of workpiece, as
shown in Figure 48. Sensor head needs to
be within
1
⁄4" of material for detection.
10. If needed, open coolant valves.
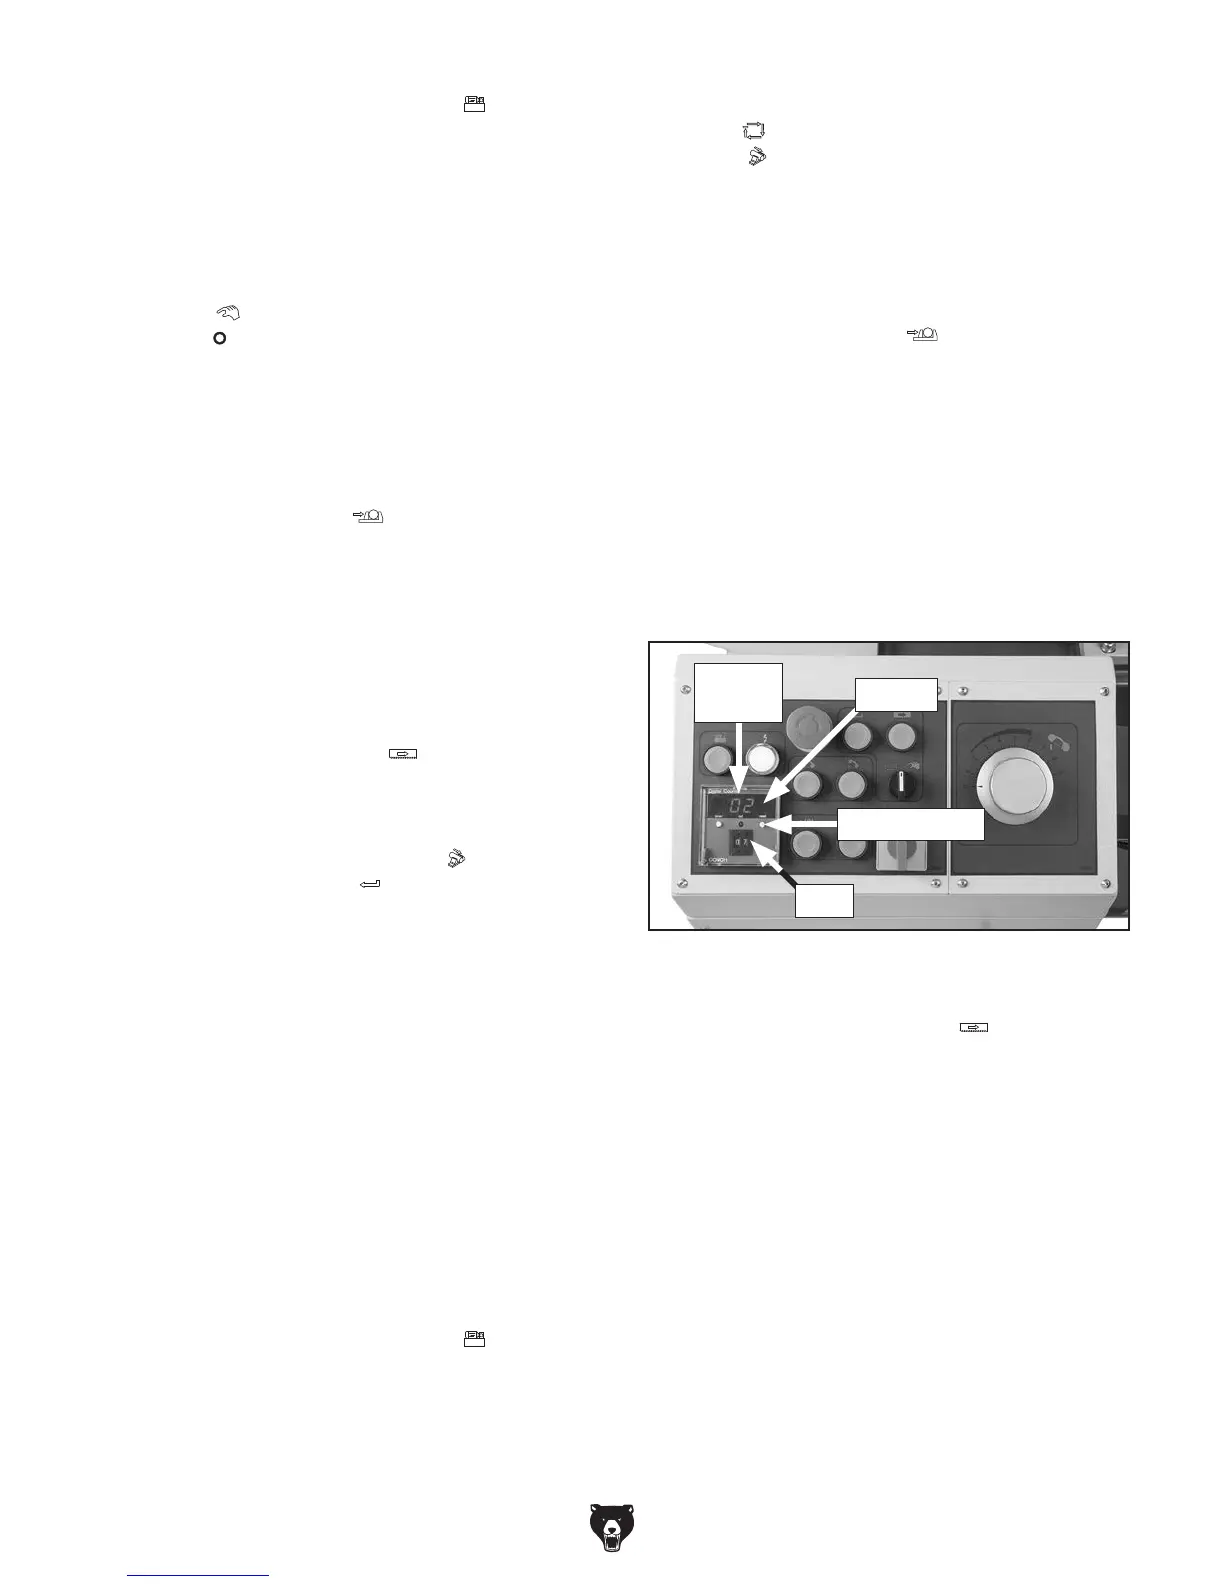
11. Use tabs on digital counter (see Figure 49) to
set the number of cuts to be made.
12. Push blade start button
to start cut-
ting operation. During cutting operation, feed
roller will automatically advance workpiece
until it reaches proximity sensor, and digital
counter will display number of cuts completed
(see Figure 49). Cutoff pieces will slide down
chute after each cut is made.
13. When cutting operation is complete, press
RESET button on digital counter to clear
display.
Figure 49. Digital counter set to 7 with 2 cuts
completed.
Digital
Counter
Tabs
Reset Button
Display
 Loading...