English (GB)
10
8.6.2 Checking by means of a standard instrument
If the measured value is Ω, disconnect the conductors from IO
113.
If the measured value is mA, disconnect conductor 6 (9) from P5
and connect the standard instrument to 6 (9) and P5.
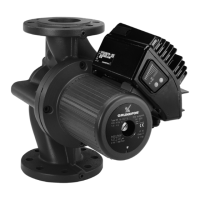
Fig. 4 Pump with Pt1000 sensor
Fig. 5 Pump with PTC sensor
The figures in the following tables refer to figs 4 and 5.
Pt1000 and thermistor
PTC sensor
WIO sensor
Moisture switch
9. Dismantling and assembling the product
9.1 Checking and replacing the cable
Make sure that the cable is not sharply bent or pinched and that
the cable sheath has no visual defects.
9.1.1 Removing the cable
1. Loosen and remove the union nut from the cable plug (181),
using a spanner (E).
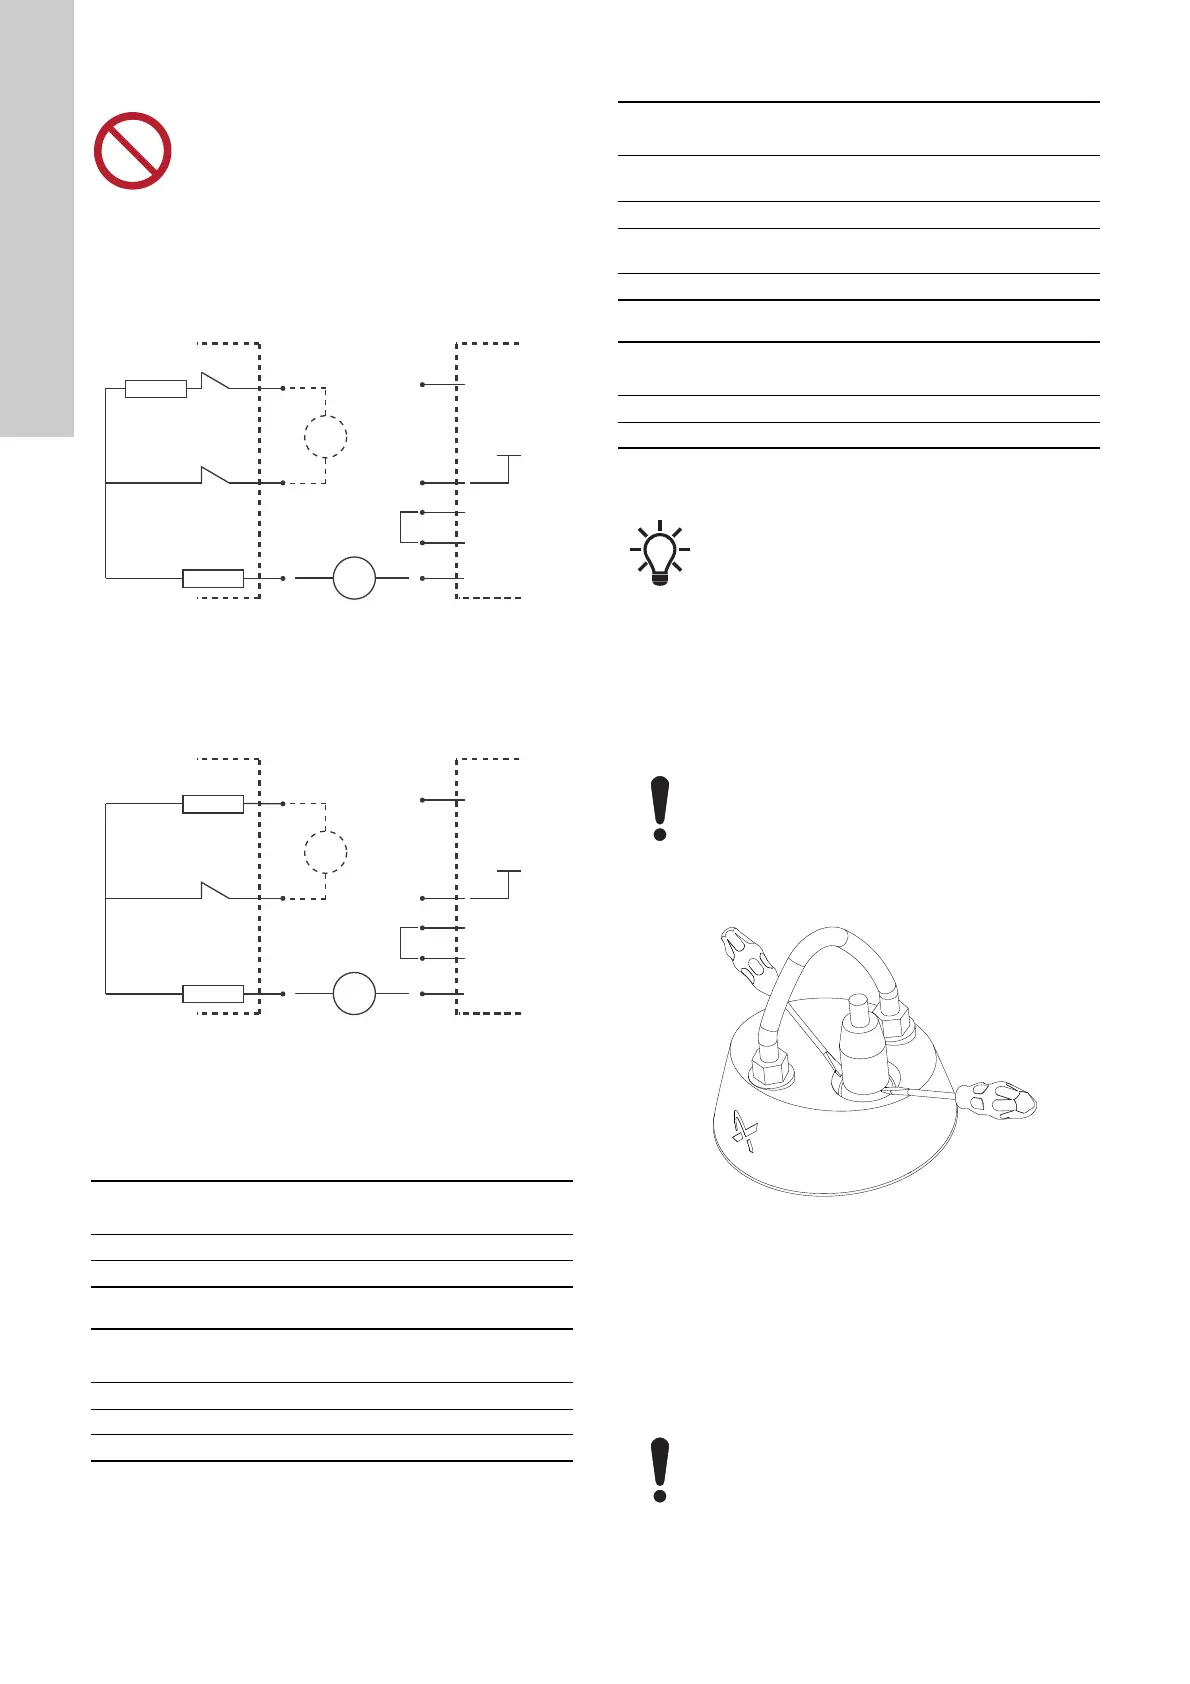
2. Loosen the cable plug (181) carefully, using two screw
drivers. See fig. 6.
Fig. 6 Loosening the cable plug
3. Remove the cable plug (181). Be careful not to damage the
pins inside the cable plug and in the pin housing.
9.1.2 Fitting the cable
1. Fit the O-ring (198).
2. Fit the outer plug part (181).
3. Fit the union nut of the plug and tighten it with the spanner (E)
for cable plug (181).
Do not use a megaohmmeter for checking the sensor
as this will damage the control circuit.
TM04 7039 1410TM04 7040 1410
4
(7)
5
(8)
6
(9)
P5
IO 113
Value Response
●● - - 400 Ω OK
●● - - > 3000 Ω Alarm
4
(7)
5
(8)
6
(9)
P5
IO 113
Value Response
●● - - 400 Ω OK
●● - - > 3000 Ω Alarm
●● -- 0 Ω Alarm
PUMP
IO 113
Pt1000
T
M
WIO
4 (7)
6 (9)
5 (8)
Ω
mA
P5
P4
P3
P2
Internal
+15 V
10-core cable
T = Thermal switch
M = Moisture switch
PUMP
IO 113
PTC
M
WIO
4 (7)
6 (9)
5 (8)
Ω
mA
P5
P4
P3
P2
P1
Internal
+15 V
10-core cable
T = Thermal switch
M = Moisture switch
4
(7)
5
(8)
6
(9)
P5
IO 113
Value Response
--●●
4 mA (new
oil)
OK
--●●3.5 mA (air) Alarm
--●●
22 mA
(water)
Warning
--●● 0 mA Warning
4
(7)
5
(8)
6
(9)
P5
IO 113
Value Response
●● -- 0 Ω Alarm
--●● 0 mA Warning
Service videos are available as guidance in Grundfos
Product Center or YouTube.
When removing the union nut, make sure that the
cable plug cannot rotate. Otherwise, it can detach the
wires from the pin housing.
TM06 9213 1917
When tightening the union nut, make sure that the
cable plug cannot rotate. Otherwise, it can detach the
wires from the pin housing.
 Loading...