English (GB)
19
10. Start-up
10.1 Starting up the SE1 pump
1. Remove the fuses and check that the impeller can rotate
freely. Turn the impeller by hand.
2. Check the condition of the oil in the oil chamber. See also
section 8.4 Checking and changing the oil.
3. Check that the system, bolts, gaskets, pipes and valves, etc.
are in correct condition.
4. Check the direction of rotation.
See section 10.3 Checking the direction of rotation.
5. Mount the pump in the system.
6. Switch on the power supply.
7. Check whether the monitoring units, if used, are operating
satisfactorily.
8. For pumps with sensor: Switch on IO 113 and check that there
are no alarms or warnings. See section 8.6 Checking the
sensors.
9. Check the setting of the air bells, float switches or electrodes.
10. Open the isolating valves, if fitted.
11. Check that the liquid level is above the upper edge of the
clamp on the pump. If the level is below the clamp, add liquid
to the pit until the minimum level is obtained.
12. Remove trapped air from the pump housing by tilting the
pump, using the lifting chain.
13. Start the pump and let the pump run briefly. Check whether
the liquid level is falling. A correctly vented pump quickly
lowers the liquid level.
After one week of operation or after replacement of the shaft seal,
check the condition of the oil in the chamber. For pumps without
sensor, check the condition of the oil by taking a sample of the oil.
See section 8.4 Checking and changing the oil for procedure.
10.2 Starting up the SEV pump
1. Remove the pump from the system.
2. Check that the impeller can rotate freely. Turn the impeller by
hand.
3. Check the condition of the oil in the oil chamber. See also
section 8.4 Checking and changing the oil.
4. Check whether the monitoring units, if used, are operating
satisfactorily.
5. Check the setting of the air bells, float switches or electrodes.
6. Check the direction of rotation. See section 10.3 Checking the
direction of rotation.
7. Submerged pumps
– Start the pump above water level and lower the pump into
the pit to avoid that air is trapped in the pump housing.
8. Dry-installed pumps with positive inlet pressure
The pump is installed in a pump room next to the pit.
– Open the isolating valve on the inlet side.
– Loosen the vent screw until water comes out of the vent
hole, then tighten the vent screw again.
– Open the isolating valve on the outlet side and start the
pump.
9. Dry-installed pumps with inlet pipe and foot valve
– Open the isolating valve on the outlet side to allow the water
above the valve to run backwards to prime the inlet pipe.
– Loosen the vent screw until water comes out of the vent
hole, then tighten the vent screw again.
– Start the pump.
10. Dry-installed pumps with inlet pipe and foot valve,
without or with short outlet pipe
We recommend that you use a vacuum system.
– Keep the isolating valve on the outlet side closed.
– Start the vacuum system until liquid has been sucked in and
the pump has been vented.
– Open the isolating valve on the outlet side and start the
pump.
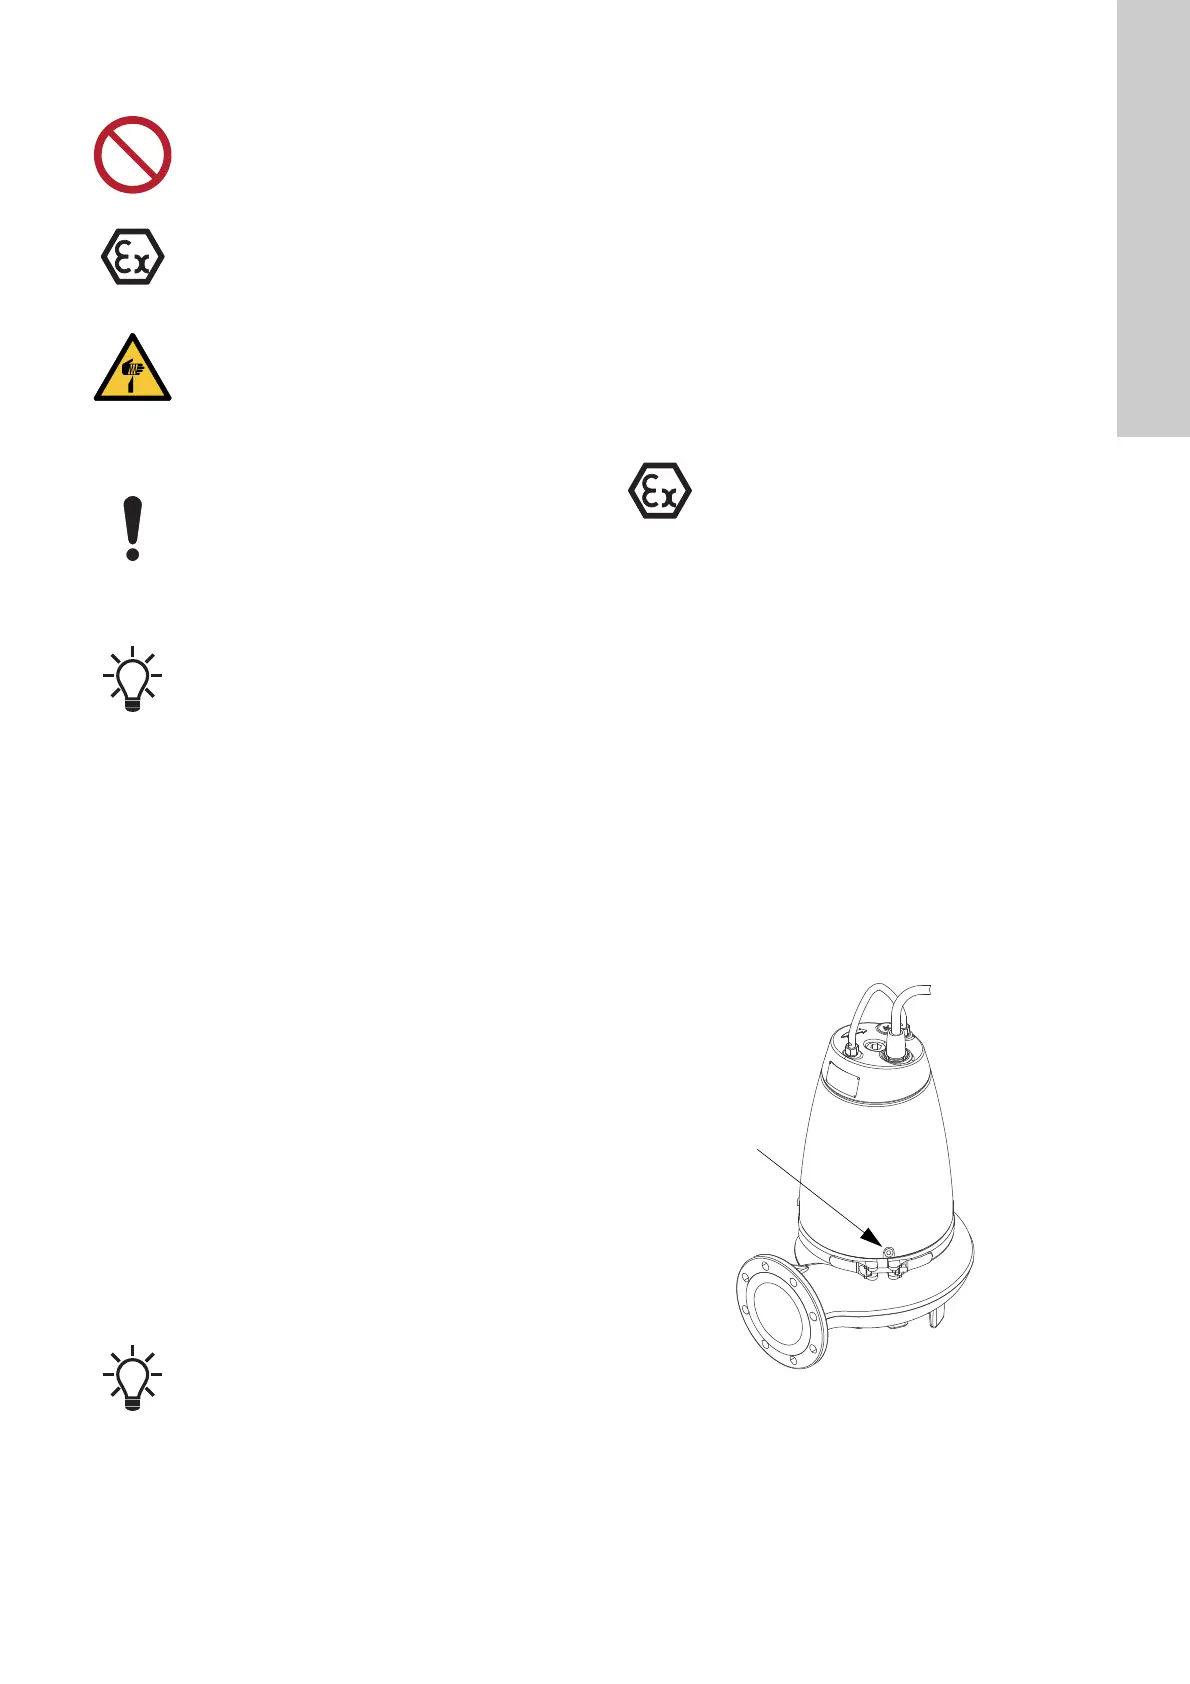
Fig. 21 Position of the air vent screw
The pump must not run dry.
Do not start the pump if the atmosphere in the pit is
potentially explosive.
CAUTION
Sharp element
Minor or moderate personal injury
- Wear protective gloves to avoid being cut by the
sharp edges of the impeller.
The pumps are fitted with impellers of S-tube
®
design. S-tube
®
impellers are wet balanced which
will reduce the vibration during operation. If the
pumps are started with the pump housing full of air,
the vibration level will be higher compared to normal
operation.
Local balancing of S-tube
®
impellers will damage the
wet balancing and lead to higher vibration level
during operation.
If the pump has not been in operation for some time,
vent it to let out any explosive gasses gathered in the
pump.
See step 12 below.
In case of abnormal noise or vibrations from the
pump, other pump failure, power supply failure or
water supply failure, stop the pump immediately.
Do not attempt to restart the pump until the cause of
the fault has been found and the fault corrected.
Check that there is positive inlet pressure before
starting up the pump.
TM04 4139 0809
 Loading...