English (GB)
14
9.4 Dismantling
For position numbers, see section 12. Drawings.
9.4.1 Removing the pump housing
1. Loosen the clamp (92).
2. Remove the screw (92a).
3. Lift the pump approximately 5 cm.
4. Remove the pump housing (50) by lifting the pump by the
lifting bracket (190) using a crane and knocking on the pump
housing (50).
5. Check that the pin (6a) is attached to the intermediate ring
(155).
9.4.2 Removing the impeller
1. See section 9.4.1 Removing the pump housing.
2. Place the pump in horizontal position.
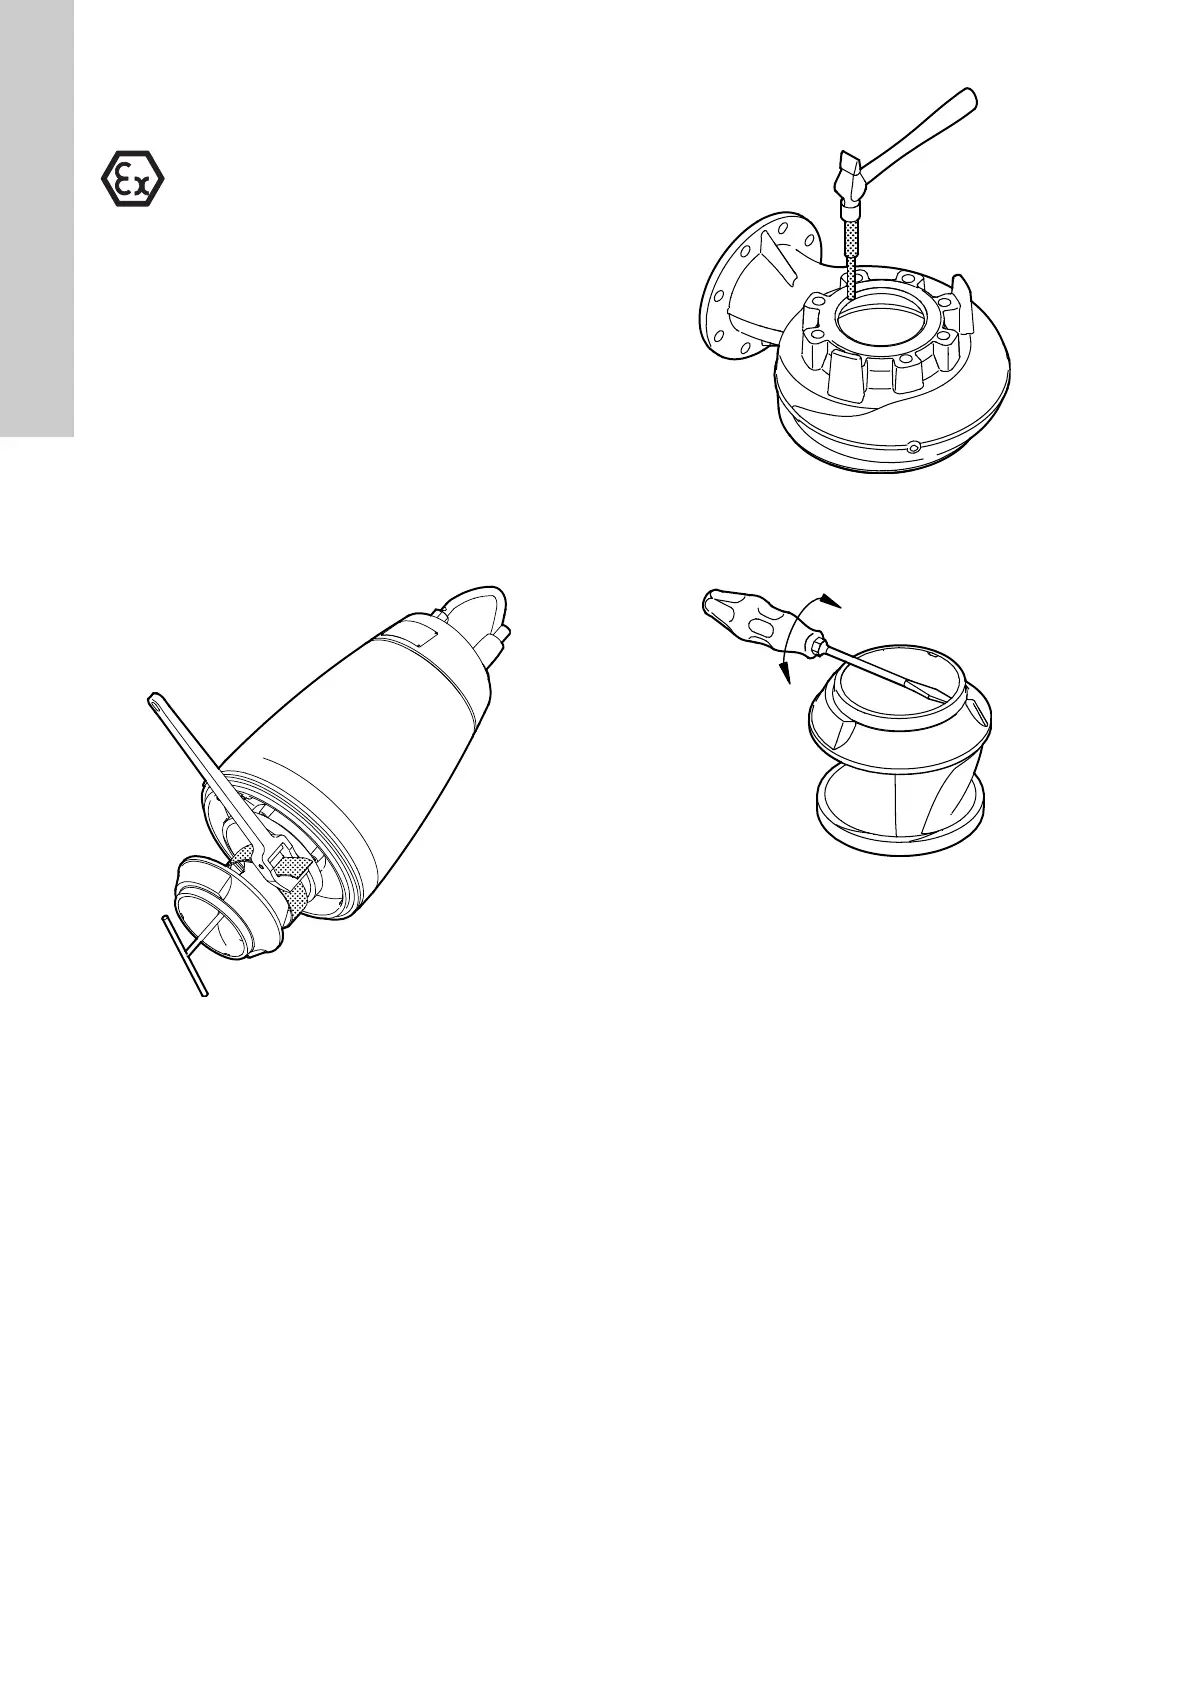
3. Secure the impeller (49) by means of a strap wrench. See fig.
12.
Fig. 12 Removing the impeller
4. Remove the screw (188a) and washer (66).
5. Loosen the impeller (49) with a light blow on the edge.
6. Remove the impeller (49).
7. Remove the key (9a) and the corrugated spring (157).
9.4.3 Removing the seal ring and wear ring
This section applies only to SE1 pumps.
1. See section 9.4.2 Removing the impeller.
2. Turn the pump housing upside down.
3. Knock the seal ring (46) out of the pump housing, using a
punch. See fig. 13.
Fig. 13 Removing the seal ring
4. Clean the pump housing where the seal ring was fitted.
5. Remove the wear ring (49c), using a screwdriver. See fig. 14.
Fig. 14 Removing the wear ring
6. Clean the impeller (49) where the wear ring was fitted.
9.4.4 Removing the shaft seal
Step 1 is only valid for SE1 pumps.
1. See section 9.4.3 Removing the seal ring and wear ring.
2. Drain the oil. See section 8.4 Checking and changing the oil.
3. Remove the screws (187).
4. Remove the cover for oil chamber (58), using a puller.
5. Remove the O-ring (107).
6. Remove the screws (186).
In case of sensor version, the WIO sensor including the
bracket is detached together with the screw (186). See
section 9.3.2 Replacing the water-in-oil sensor (WIO).
7. Fit the screw (188a) in the end of the shaft and remove the
shaft seal (105), using the puller.
8. Remove the O-ring (153b).
9. Remove the O-ring (37) from the intermediate flange (155).
10. Remove the screw (188a) from the shaft end.
Except for replacement or dismantling of pump
housing, shaft seal, impeller, seal ring and wear ring,
all other service work must be carried out by
Grundfos or an Ex-approved service centre.
TM02 8407 5103
TM02 8420 5103TM02 8422 5103
 Loading...