The H3C S1600V2 Switch Series Installation Guide provides comprehensive instructions for the installation, power-on, maintenance, and troubleshooting of the S1600V2 switches. This document is essential for network planners, field technical support and servicing engineers, and network administrators working with these switches.
Function Description
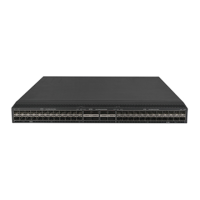
The H3C S1600V2 Switch Series are network switches designed for indoor installation. They facilitate network connectivity and data transfer within a local area network (LAN). The series includes both Non-PoE and PoE (Power over Ethernet) models, catering to various network requirements. PoE models are capable of supplying power to connected devices over the Ethernet cable, simplifying deployments for IP cameras, wireless access points, and other PoE-compatible devices. The switches are suitable for environments where temperature and humidity are controlled, such as central equipment rooms, IDC equipment rooms, and mobile cabins with air conditioners.
Important Technical Specifications
The S1600V2 series comprises several models, categorized into Non-PoE and PoE variants.
-
Non-PoE Models:
- S1600V2-6P (Product Code: LS-1600V2-6P-GL)
- S1600V2-10P (Product Code: LS-1600V2-10P-GL)
- S1600V2-18P (Product Code: LS-1600V2-18P-GL)
- S1600V2-26P (Product Code: LS-1600V2-26P-GL)
-
PoE Models:
- S1600V2-6P-HPWR (Product Code: LS-1600V2-6P-HPWR-GL)
- S1600V2-10P-HPWR (Product Code: LS-1600V2-10P-HPWR-GL)
- S1600V2-18P-HPWR (Product Code: LS-1600V2-18P-HPWR-GL)
- S1600V2-26P-HPWR (Product Code: LS-1600V2-26P-HPWR-GL)
Installation Environment Requirements:
- Ventilation and Heat Dissipation: A minimum clearance of 10 cm (3.94 in) around the chassis is required. The installation environment must be adequately ventilated, free from heat sources, and have unobstructed air inlet and outlet vents.
- Anti-moisture: The switch must be installed in a clean, dry, and ventilated place with stable temperature. The environment should be free from water leakage or condensation. Dehumidification devices might be necessary. Avoid operating the device near water sources or in high humidity.
- Hot Surface: Some models may have hot surfaces and are intended for installation in restricted access areas, accessible only by skilled, instructed, or qualified personnel.
- Temperature/Humidity: Maintain acceptable temperature and humidity ranges to ensure correct operation and long service life. High humidity can cause poor insulation, electricity leakage, material changes, and metal corrosion. Low humidity can lead to contraction, ESD, and circuit failure. High temperatures accelerate insulation aging and reduce reliability.
- Lightning Protection: If a grounding strip is available, the grounding resistance of the device grounding connection to the equipment room's grounding strip must be less than 1 ohm. If no grounding strip is available, and a grounding body is buried into the earth, the grounding resistance must be less than 10 ohms. The switch must be properly grounded, and signal cables should be routed away from power cords and lightning rod down conductors. Signal lightning arresters are recommended for corresponding network interfaces.
- ESD Prevention: Always wear an ESD wrist strap when installing or removing components to prevent damage. The wrist strap must have good skin contact and be reliably grounded.
- Cleanliness: The installation site must be clean, dry, and free from corrosive gases. Dust particles (≥ 0.5 µm) concentration limit is ≤ 1.8 × 10^7 particles/m³.
- Corrosive Gas Limit: The equipment room must be free from corrosive gases such as acid and alkaline gases. Specific concentration limits are provided for SO2, H2S, Cl2, HCl, HF, NH3, O3, and NOx.
- EMI: Use a single-phase three-wire power receptacle with protection earth (PE) for AC power to filter interference. Keep the device away from radio transmitting stations, radar stations, and high-frequency devices. Electromagnetic shielding (e.g., shielded interface cables) should be used when necessary.
- Power Distribution: The power supply must be available and within the operating voltage range specified in the hardware information. If using an AC power outlet, a country-specific AC power cord should be used, and the PE wire must be reliably grounded.
Usage Features
The S1600V2 switches offer flexible installation options depending on the model:
- 19-inch Rack Installation: Models like S1600V2-18P, S1600V2-26P, S1600V2-18P-HPWR, and S1600V2-26P-HPWR can be installed in a standard 19-inch rack using provided mounting brackets. This requires two people for safe installation.
- Wall Mounting: Models such as S1600V2-6P, S1600V2-10P, S1600V2-6P-HPWR, and S1600V2-10P-HPWR can be mounted on a wall using a wall anchor kit (expansion anchor and screw). This involves affixing a positioning sticker, drilling holes, inserting screw anchors, fastening screws, and then hanging the switch.
- Workbench Mounting: All S1600V2 models can be placed on a clean workbench if a rack or wall mounting is not required. This involves attaching rubber feet to the chassis bottom and placing the switch with the upside up. A minimum clearance of 10 cm (3.94 in) around the chassis for heat dissipation is required, and heavy objects should not be placed on the switch.
Power Connectivity:
- AC Power Cord: The female connector of the AC power cord connects to the AC-input power receptacle on the switch. A cable tie is used to secure the power cord. The other end connects to an AC power source. A circuit breaker for each power cord is recommended.
- Power Adapter: Some models connect via a power adapter. Type-1 power adapters directly plug into the switch and an external AC source. Type-2 power adapters connect to an AC power cord, which then connects to the switch. The power adapter appearance may vary by country or region.
Maintenance Features
- Grounding: Proper grounding is crucial for lightning protection, ESD, and EMI protection. The grounding cable (provided with models that require it) connects the switch to a grounding strip in the equipment room. The grounding resistance should be verified using a multimeter and grounding resistance tester.
- Cleanliness: Regular cleaning of the equipment room and air filters is recommended. Using dustproof materials and maintaining clean ESD clothing and shoe covers are important.
- Environmental Monitoring: Continuous monitoring of temperature, humidity, and corrosive gas concentrations in the equipment room is advised to ensure optimal operating conditions and extend the device's lifespan.
- Post-Installation Check: After installation, verify that there is sufficient space for heat dissipation, the rack or workbench is stable, the grounding cable is correctly connected, the power source meets requirements, and power cords are correctly connected. If network or power cables are routed outdoors, ensure appropriate lightning protectors and surge-protected power strips are used.
- Power-on Verification: After powering on the switch, examine the LEDs to confirm correct operation.
The H3C S1600V2 Switch Series is designed for reliable performance in controlled indoor environments, with detailed guidelines provided to ensure safe and effective deployment and maintenance.