31
2.8 RS232 Connections
All RS232 connections are made using the serial
I/O port on the back of
the instrument (see Figure 11). This port uses an industry standard 9-pin
connector. See section 4.2 RS232 Connection for information on
installing the RS232 cable.
Note: For optimum performance and ESD protection, use a three-conductor
shielded cable. Use a metal shell for the printer or CRT terminal connector, and
connect the shield of the cable to the metal shell and to the sleeve (signal ground)
of the RS232 plug.
Press the SHIFT PRINT keys to send data to the printer. See section 3.7
Printing Data for instructions.
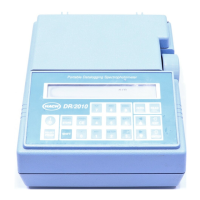
2.8.1 Setup and Use of the Citizen Printer
Follow all of the manufacturer's instructions shown on the printer and in
the printer manual when configuring for compatibility with the DR/2010
Spectrophotometer. A permanent record of test results is obtained by
using the RS232 serial output to drive a printer.
Figure 14 on page 54 illustrates the printout from the eighty-column
printer listed in the optional accessories in REPLACEMENT PARTS on
page 99. Pressing
SHIFT PRINT manually starts the printing (refer to section
3.7 Printing Data).
Connect the DR/2010 Spectrophotometer to the Citizen PN60 printer
using the serial printer interface cable, that is shipped with the Citizen
PN60 printer. The cable provides a direct link between the instrument and
the connector used for the serial port on the portable printer. See Table 2
and Table 3 if you need to wire a cable for special applications.
Table 2 Standard 9-pin to 9-pin Computer Cable
DR/2010 9-pin D Connector Socket Computer 9-pin D Connector, plug
Pin Signal Name Pin Signal Name
2 RXD 3 TXD
3 TXD 2 RXD
4 DTR no connection
5 GND 5 GND
6 DSR no connection
7 RTS 8 CTS
8 CTS 7 RTS