EasyManua.ls Logo

Hanna Instruments IRIS HI801 User Manual

Hanna Instruments IRIS HI801
48 pages
To Next Page IconTo Next Page
To Previous Page IconTo Previous Page
Page #31 background imageLoading...
Page #31 background image
31
FACTORS
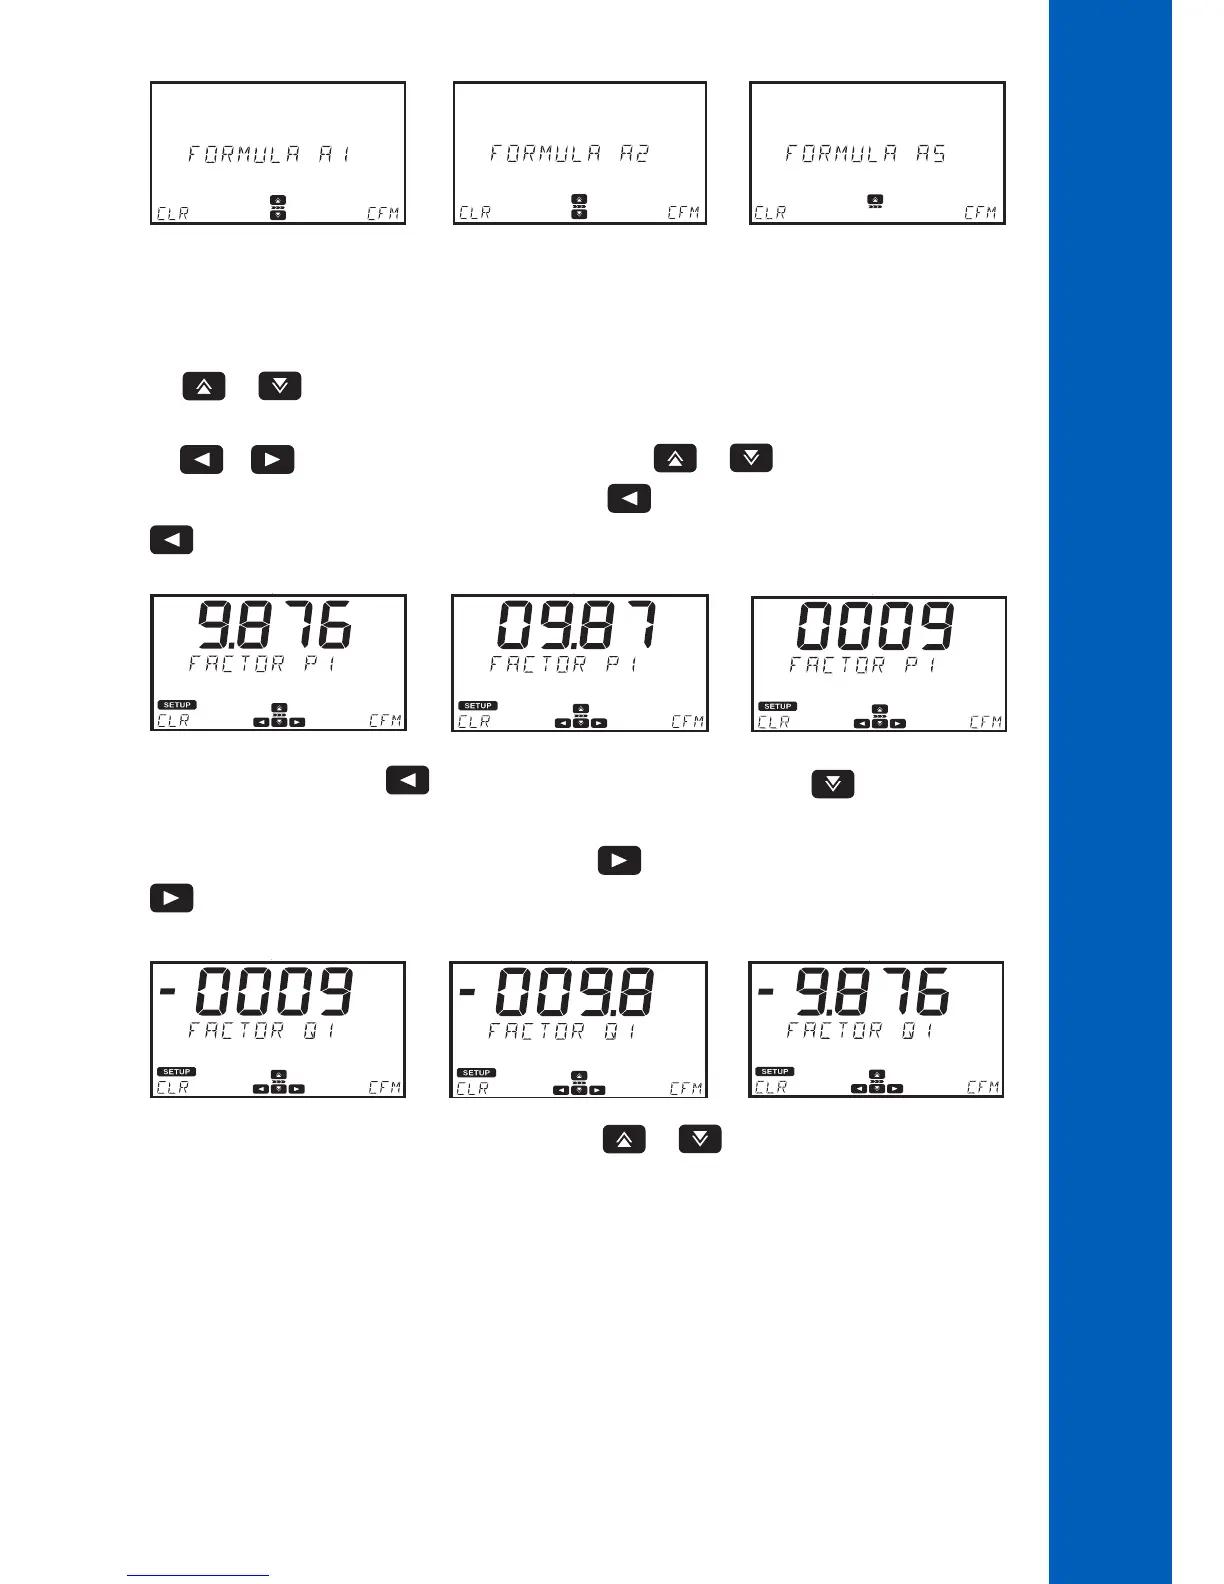
The meter will only display and use the factor needed for the selected equation.
Use the or to select the factor.
Press the EDIT key to modify the value.
Use the or key to highlight the digit to be modified. Press the or keys to set the desired value.
To shift the number (along with the decimal point) to the right use the key to highlight the digit furthest to the left and press
the key, 9.876 will become 09.87, then 009.8, and 0009.
...
To make the number negative use the key to highlight the digit furthest to the left and press key to decrement the
value.
To shift the number (along with the decimal point) to the left use the key to highlight the digit furthest to the right and press
the key, -0009 will become -009.8, then -09.87, and -9.876, this can be done as long as you have leading zeros available.
SETUP
...
...
The digit furthest to the left takes values from -9 to 9 by pressing the or keys, while the other digits are cyclic and
take values from 0 to 9.
Question and Answer IconNeed help?

Do you have a question about the Hanna Instruments IRIS HI801 and is the answer not in the manual?

Hanna Instruments IRIS HI801 Specifications

General IconGeneral
BrandHanna Instruments
ModelIRIS HI801
CategoryMeasuring Instruments
LanguageEnglish

Summary

1. Preliminary Examination

2. Safety Measures

3. Specifications

4. Description

4.1. General Description

Overview of the H1801 iris visible spectrophotometer's features and capabilities.

4.2. Functional Description

Detailed explanation of the instrument's components and their functions.

4.3. Principle of Operation

Explanation of light absorption and the Beer-Lambert Law as applied to spectrophotometry.

4.4. Optical System

Description of the light path and optical components within the spectrophotometer.

5. Operating Mode

5.1. Start Up

Procedure for powering on the instrument and its initial diagnostic tests.

5.2. Power and Battery Management

Information on powering the meter via adapter or battery and conserving power.

5.3. Cuvette Adapters

Details on compatible cuvette types and the use of cuvette adapters.

5.4. Methods

Explanation of factory and user-defined methods for analysis.

5.5. Timers

Instructions on using the instrument's built-in timers for measurements.

5.6. Data Management

Overview of saving, reviewing, and transferring measurement data.

6. Setup

6.1. Meter Setup

Configuration options for general meter settings like favorites, logging, and display.

6.2. System Check

Procedures for checking system information, firmware upgrades, and lamp diagnostics.

6.3. USB

Instructions for connecting to USB devices for method transfer and data export.

6.4. Method Settings (User Methods Only)

Customization options for user-defined methods including units, wavelengths, and calibration.

7. Methods

7.1. Factory Methods

Information on using pre-programmed methods provided by the manufacturer.

7.2. User Methods

Guidance on creating, managing, and exporting custom analysis methods.

7.3. Favorite Methods

How to tag and access frequently used methods for quick selection.

7.4. Create New

Step-by-step process for developing and saving new user-defined methods.

8. Warning and Error Messages

8.1. Warning Messages

List and explanation of potential warning indicators during instrument operation.

8.2. Errors

Description of error modes and guidance for system error reporting.

9. Abbreviations

10. Accessories

11. Spare Parts

11.1. Battery Replacement

Instructions for safely replacing the instrument's internal battery.

11.2. Lamp Replacement

Procedure for replacing the tungsten halogen lamp, with safety precautions.

Recommendations for Users

Certification

Warranty

Related product manuals