LIFT BAR TRIGGER REPLACEMENT
It is necessary to remove the side(s) from the crib to change the trigger assembly for
the lift bar. Please follow the instructions on pages 23-24 to do so.
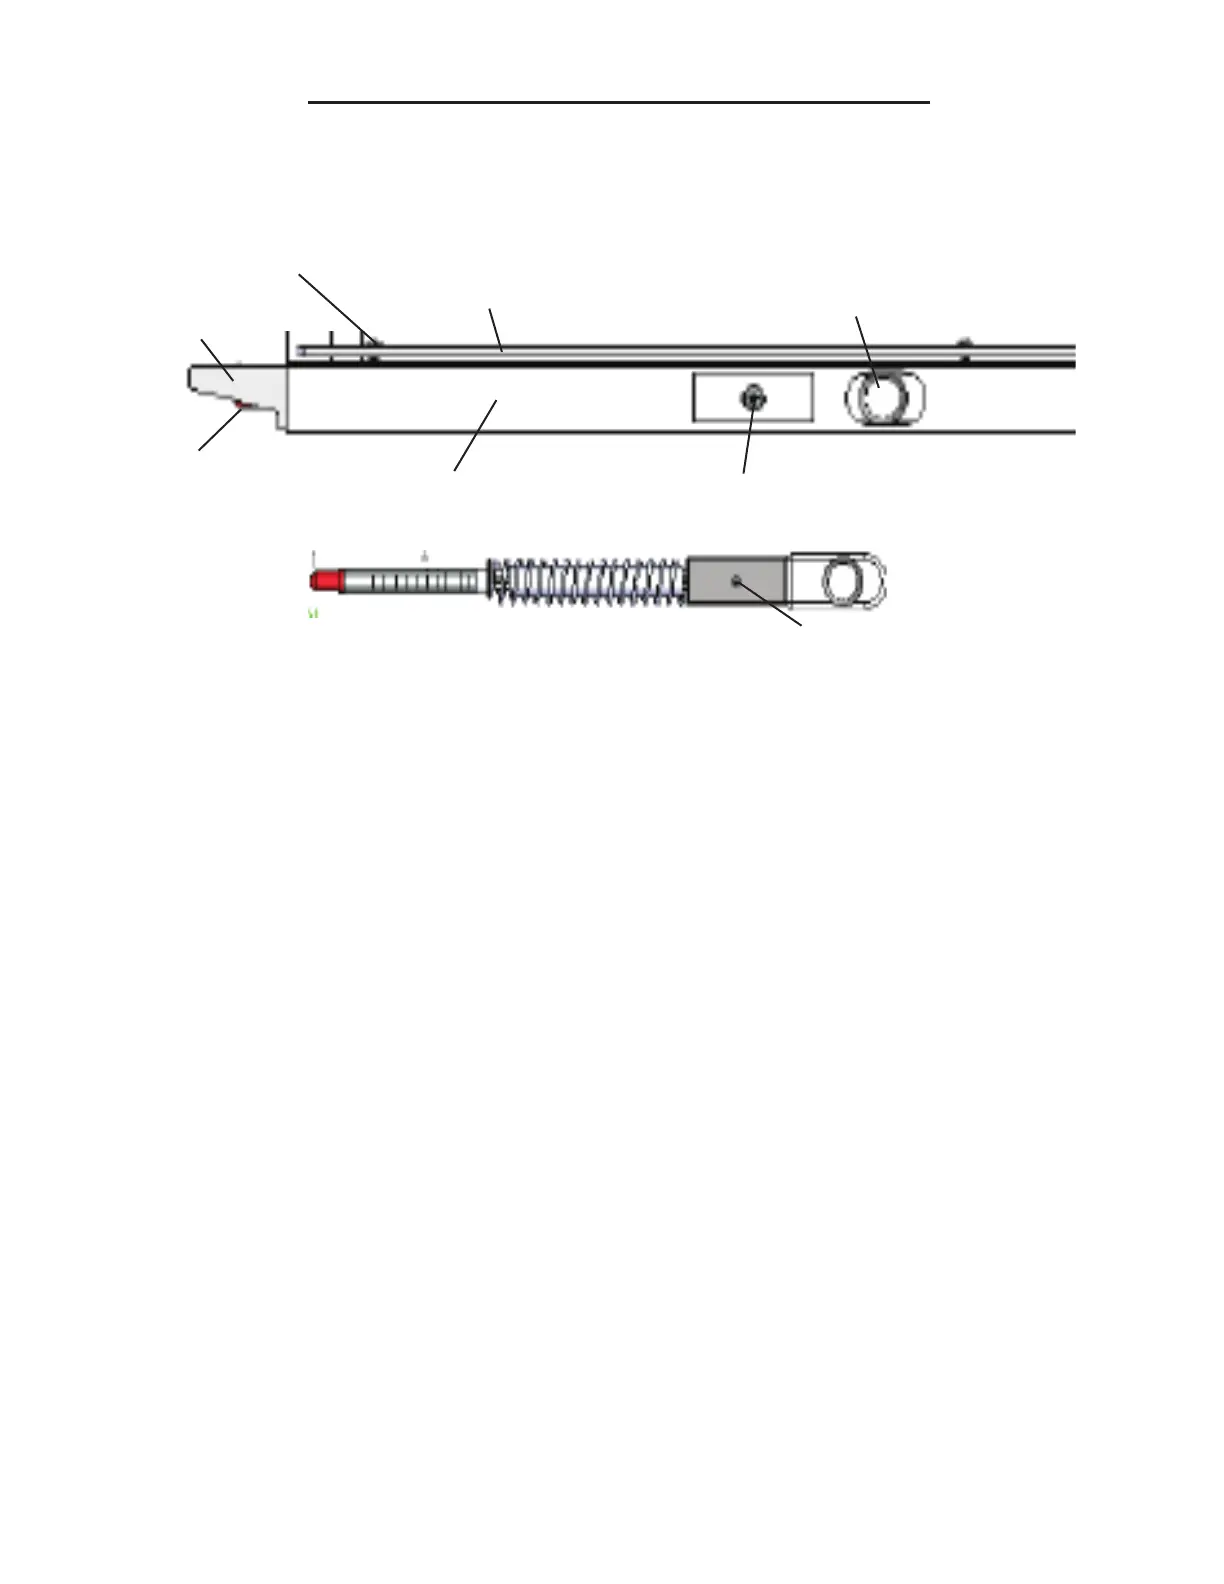
Curtain Lift Bar Screw for Trigger Mechanism
Fingertip Trigger Mechanism Lift Bar Retainer
Lift Bar Glide
Fingertip Trigger
Mechanism
Fingertip Trigger Mechanism
Once the curtain assembly has been removed from the crib and the slide rods have been
removed from the curtain assembly:
1. Remove the screw that holds in the trigger assembly, as well as the smaller screw for the
lift bar glide as illustrated above using a Philips screwdriver.
2. Pull the trigger assembly out of the lift bar along with the lift bar glide.
3. Insert the replacement trigger assembly into the opening at the end of the lift bar glide.
4. Insert both the lift bar glide and the new trigger assembly into the lift bar, making sure
that the hole for the screw on the black plastic portion of the trigger assembly is facing
outwards (or towards the hole in the lift bar).
5. Refasten the screw for the trigger mechanism as well as the screw for the lift bar glide.
Installation is complete
Screw for Lift Bar Glide
Hole for the screw to fasten
the trigger to the lift bar
*Never use a screw larger than the original equipment on the crib for either the lift bar glide
or the trigger mechanism. Both are sized to allow for movement of the trigger, and anything
larger will impede the ability of the trigger mechanism to move.
Lift bar trigger mechanisms are independent of each other, so it is not necessary to replace
both if only one has broken.