ASSEMBLY INSTRUCTIONS
1. Remove all parts from packaging. Note- To install this IV pole, it is necessary to remove
the side rail from the crib.
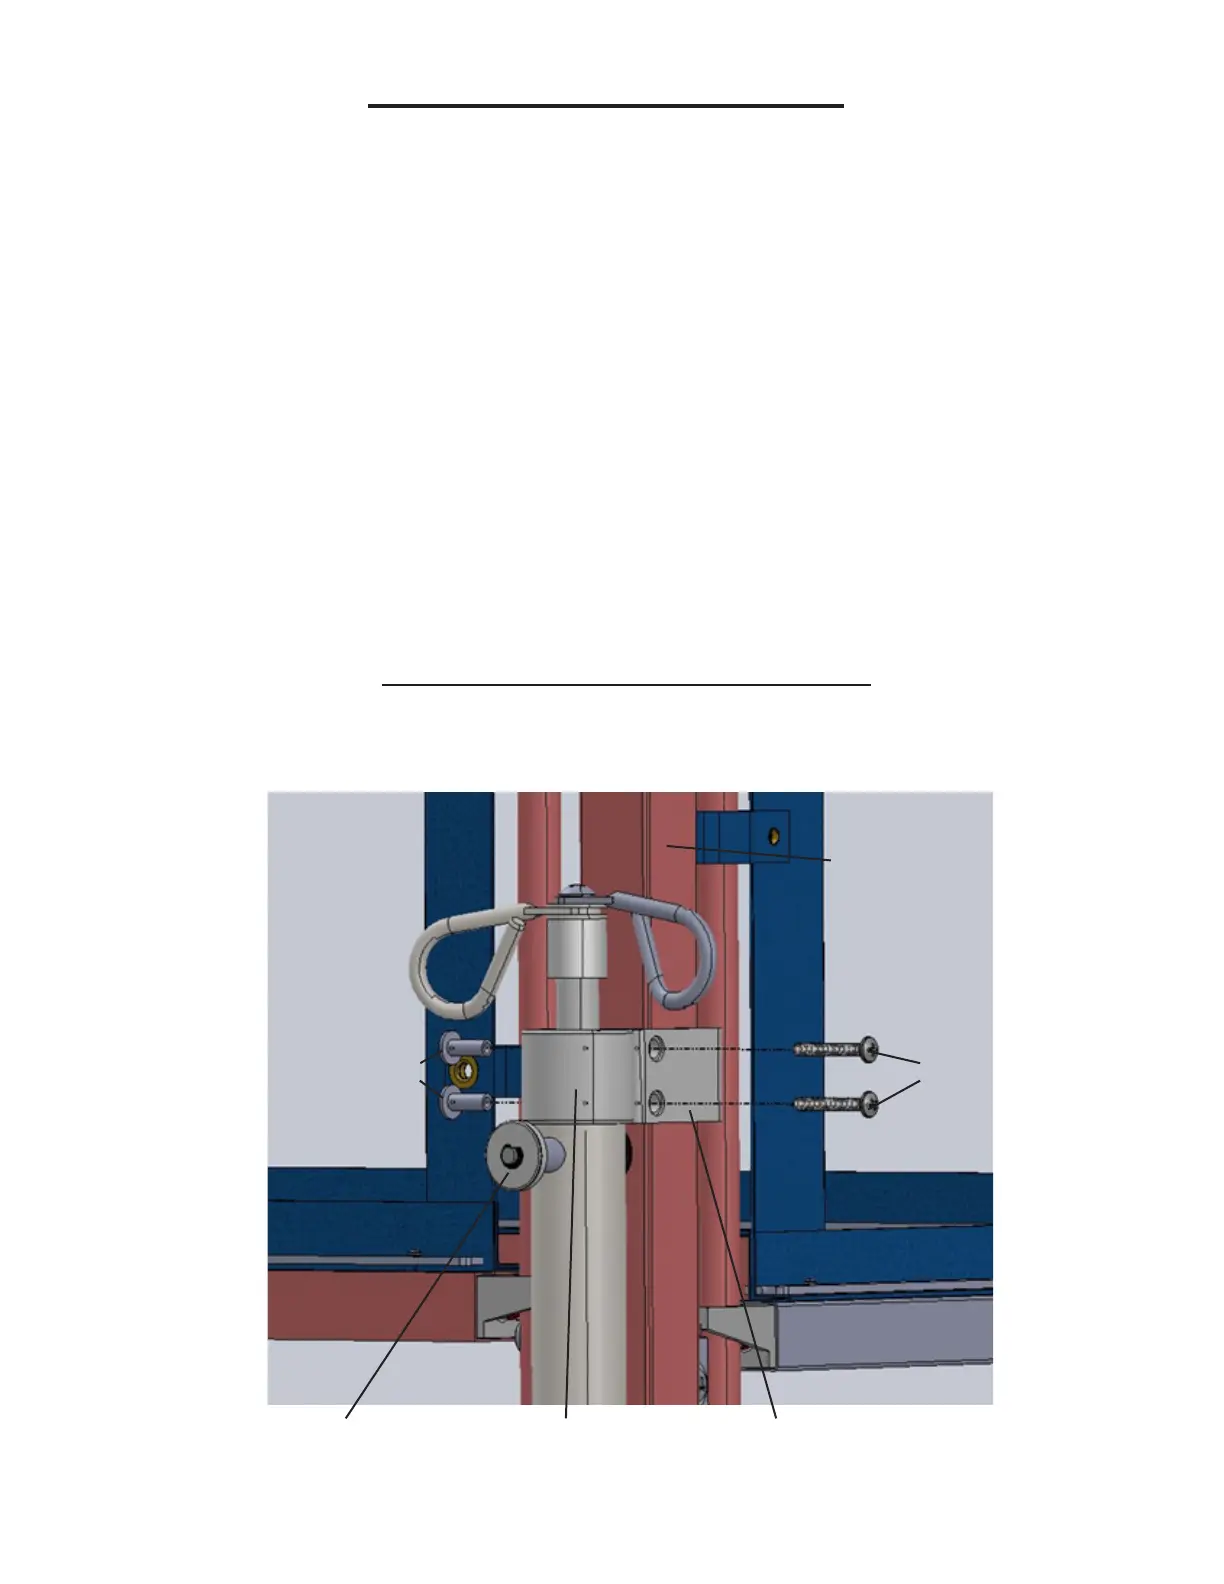
2. Place plastic brackets (11) on the inside of the desired crib corner post at the top and
press end of brackets outward around the post.
3. Place a plastic connector (12) around the IV pole tube at the top just above the release
pin (7).
4. Holding the IV pole assembly with the release pin (7) facing outwards away from the crib,
turn the plastic connectors (12) to face the open ends of the plastic brackets (11), then
press plastic connectors into the plastic brackets until they lock together.
5. Align the holes in the bracket and connector, then tap in the two connector nuts (14)
into the holes in both the top and bottom brackets/connectors.
6. Insert the two screws (13) into the two connector nuts in the top bracket/connector
and begin to fasten but do not completely tighten them at this time.
Plastic Bracket Release Pin Plastic Connector
Connector Nuts
Crib Post
Screws