30
If the child restraint is loose or not properly secured,
repeat procedure OR nd another locaon for the child
restraint (see “Vehicle seang posons”).
INSTALLING LOCKING CLIP
A locking clip is used to prevent certain vehicle
seat belts from loosening before a sudden stop
or crash. The locking clip can ONLY be used
on a vehicle lap-and-shoulder belt. A locking
clip will not x all types of vehicle seat belt
problems.
If your vehicle’s 3-point lap-and-shoulder seat belt is
equipped with an Emergency Locking Retractor (ELR)
that is NOT converble to funcon as an Automac
Locking Retractor (ALR), then the locking clip MUST be
used.
If you have any quesons about the specic type of seat
belt system in your vehicle and/or its operaon, consult
your vehicle owner’s manual.
• Follow the steps to properly secure vehicle lap-and-
shoulder seat belt (see “Installing with 3-Point Lap-
and-Shoulder Vehicle Seat Belt system”).
• Once seat belt is aached and properly adjusted, grasp
the two straps (lap and shoulder) together as close to
the vehicle belt buckle plate as possible. Unbuckle the
belt without allowing it to slip.
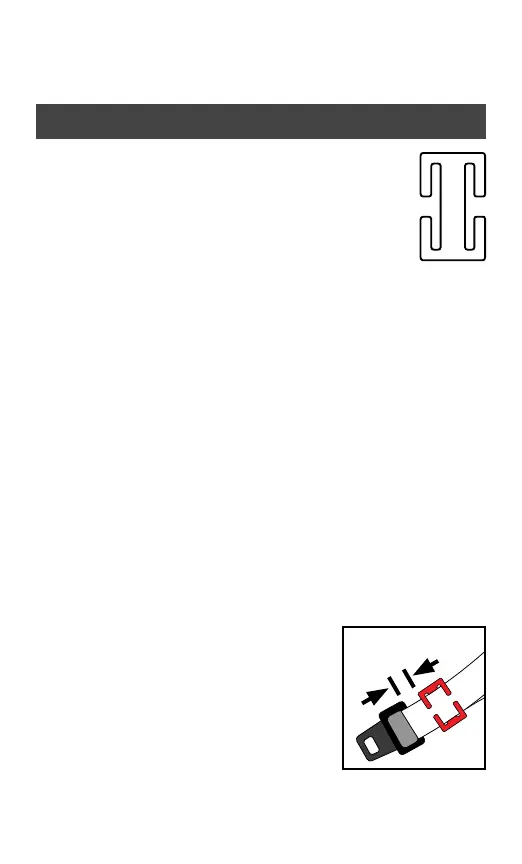
• Aach the locking clip around both lap and shoulder
belts ❶.
• Posion the locking clip about
2.5 cm (1 inch) from vehicle belt’s
buckle plate.
• Rebuckle belt. Check that the lap
belt does not move by pulling hard.
If belt loosens or lengthens, repeat
the procedure.
Test installaon to see if child restraint is secure. The
child restraint should NOT be able to move in any
2.5 cm (1")
❶