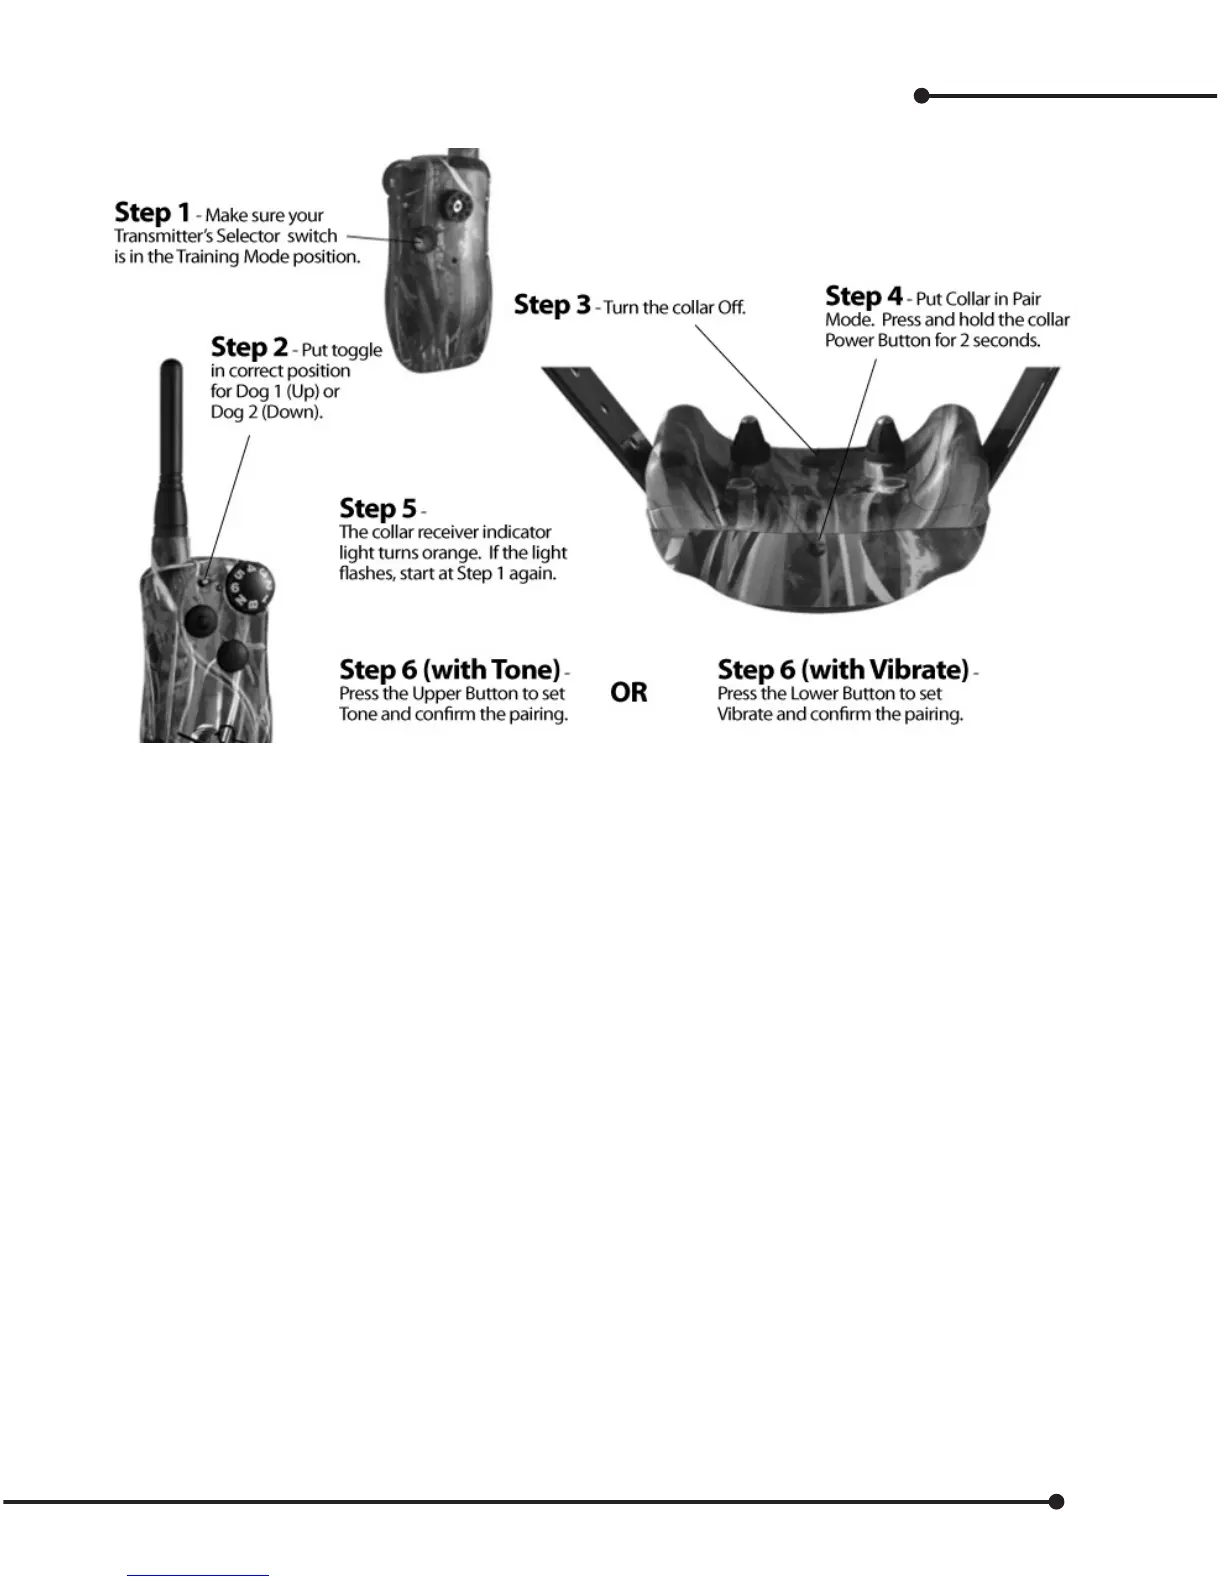
Add a new Collar (pairing) and Selection of Tone or Vibrate
To pair an existing collar to a new remote, or to pair a new collar receiver to work with your existing remote transmitter:
Note: Tone/Vibrate are available only in modes 9 through 12. Also, Tone is the default “B” on the intensity
dial, for button control.
Adding another collar for Two-Dog operation
A Hawx transmitter can be adjusted for two-dog operation by moving the toggle switch to the other posi-
tion, either up or down. Follow instructions above.
Pair collars for Three or Six-Dog System
This feature uses all three buttons for each dog on a three-dog system, and the toggle switch for a six-dog
system. This can be congured in modes 13 to 15 only.
1. To pair Collar 1
A. Turn the Collar o.
B. Press and hold the Power Button for 3 seconds.
C. The receiver indicator light turns orange. If the light begins ashing as normal, start over from A.
D. Take transmitter; make sure the Toggle Switch is in the up position.
E. Press the Upper Button on Master Transmitter.
F. Orange light will turn o.
G. Your collar is now paired. You can test it by pressing a transmitter button and observing the
indicator light on the collar receiver.
2. Add-On Collar 2 – repeat steps A to G, but press Lower Button (instead of Upper button) in step D.
3. Add-On Collar 3 – repeat steps A to G, but press Side Button (instead of Upper button) in step D.
23