Back
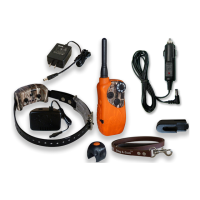
7. Dog & Gun Switch/Training Selector Switch
• This activates the control for the Dog & Gun
transmitter. DG = Dog & Gun mode.
T= Training mode.
8. Customizing Mode Button
• This allows you to customize the system from
factory settings. Customization for dierent
key positions, stimulation levels, types of
stimulation, vibrate/tone, multiple dogs, and
bird launchers.
(See pages 19 through 22 for customizing your unit.)
9. Charging Jack
• Plug in charger to start charging.
NOTE: Charge transmitter & collar BEFORE FIRST USE.
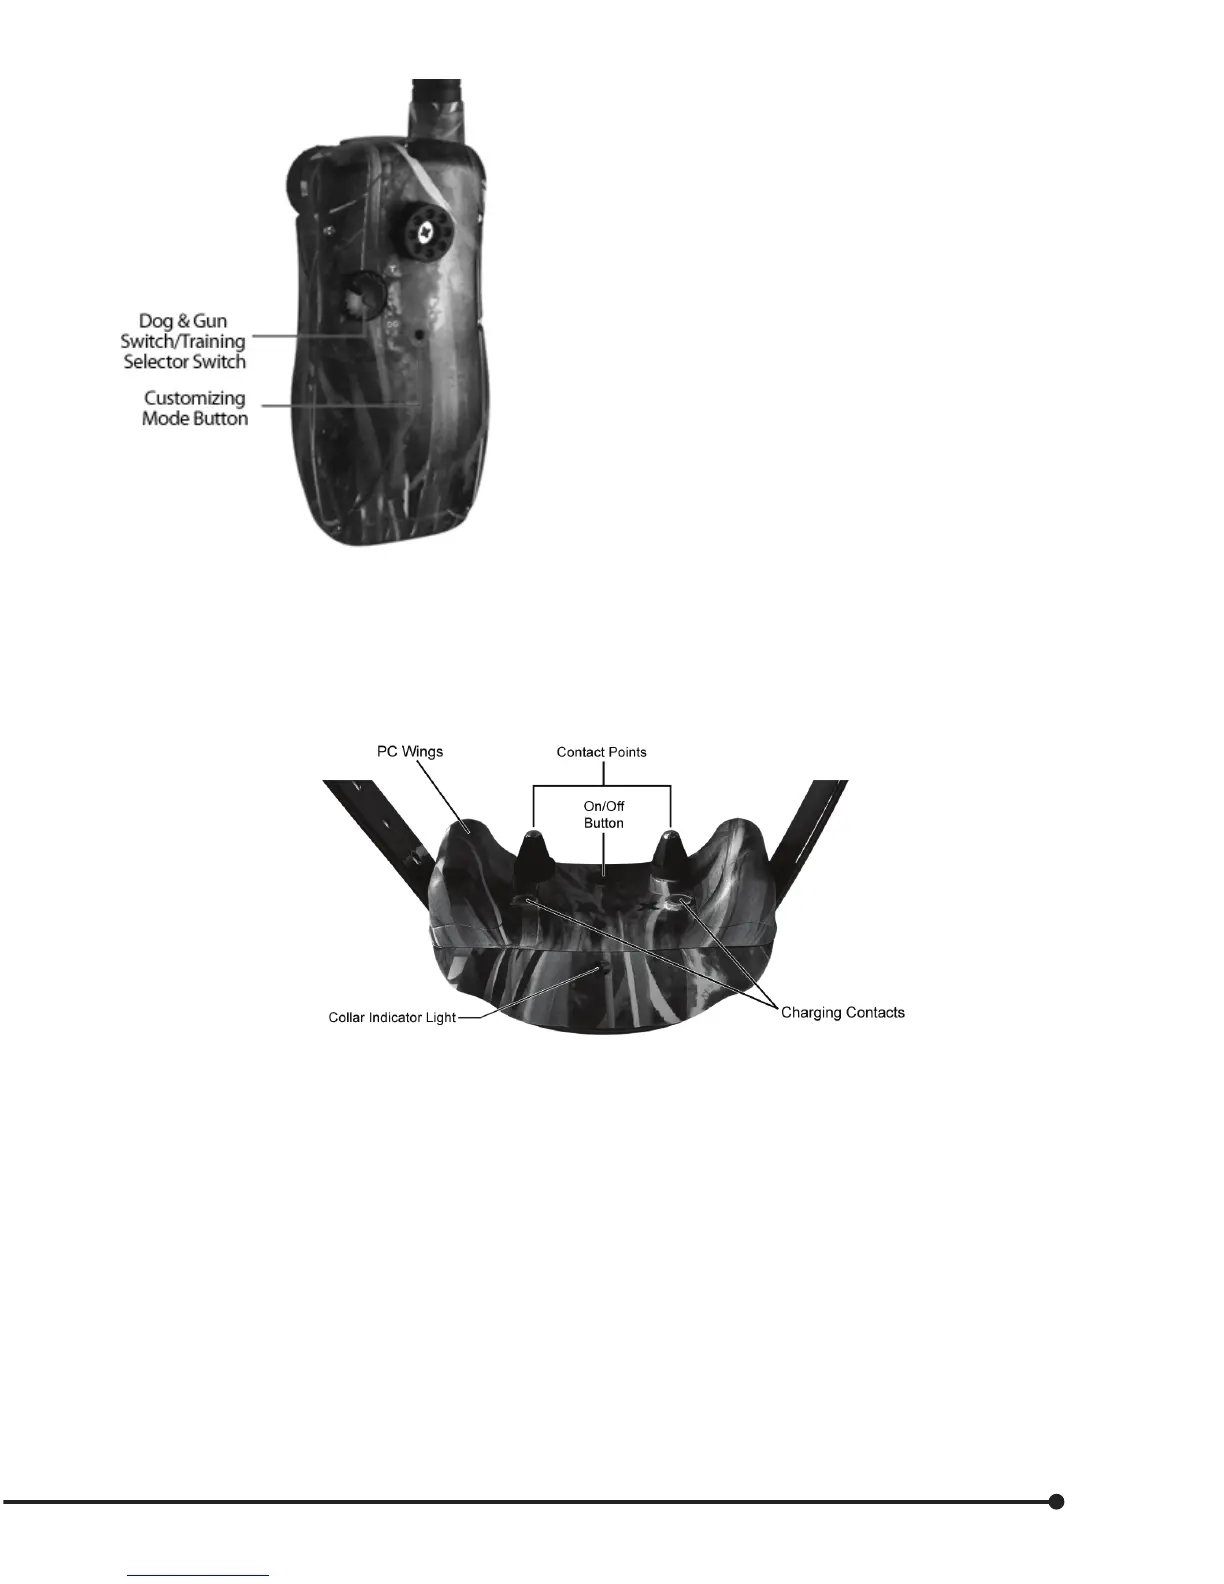
Collar Receiver
The collar receives a signal from the Master Transmitter and delivers stimulation, tone or vibration for
correcting or rewarding your dog. The collar is 100% waterproof.
On/O Button
To turn on, press rmly and release. Press to turn on, two conrming tones will sound. Collar light will ash
periodically. Press to turn o, and one long conrming tone will sound. Collar light will stop ashing.
Dual-Purpose Collar Indicator Light
Indicates when the collar is on or o, indicates a received command from the transmitter, and serves as low
battery indicator.
Contact Points
The contacts through which the collar receiver delivers stimulation.
7
 Loading...