31
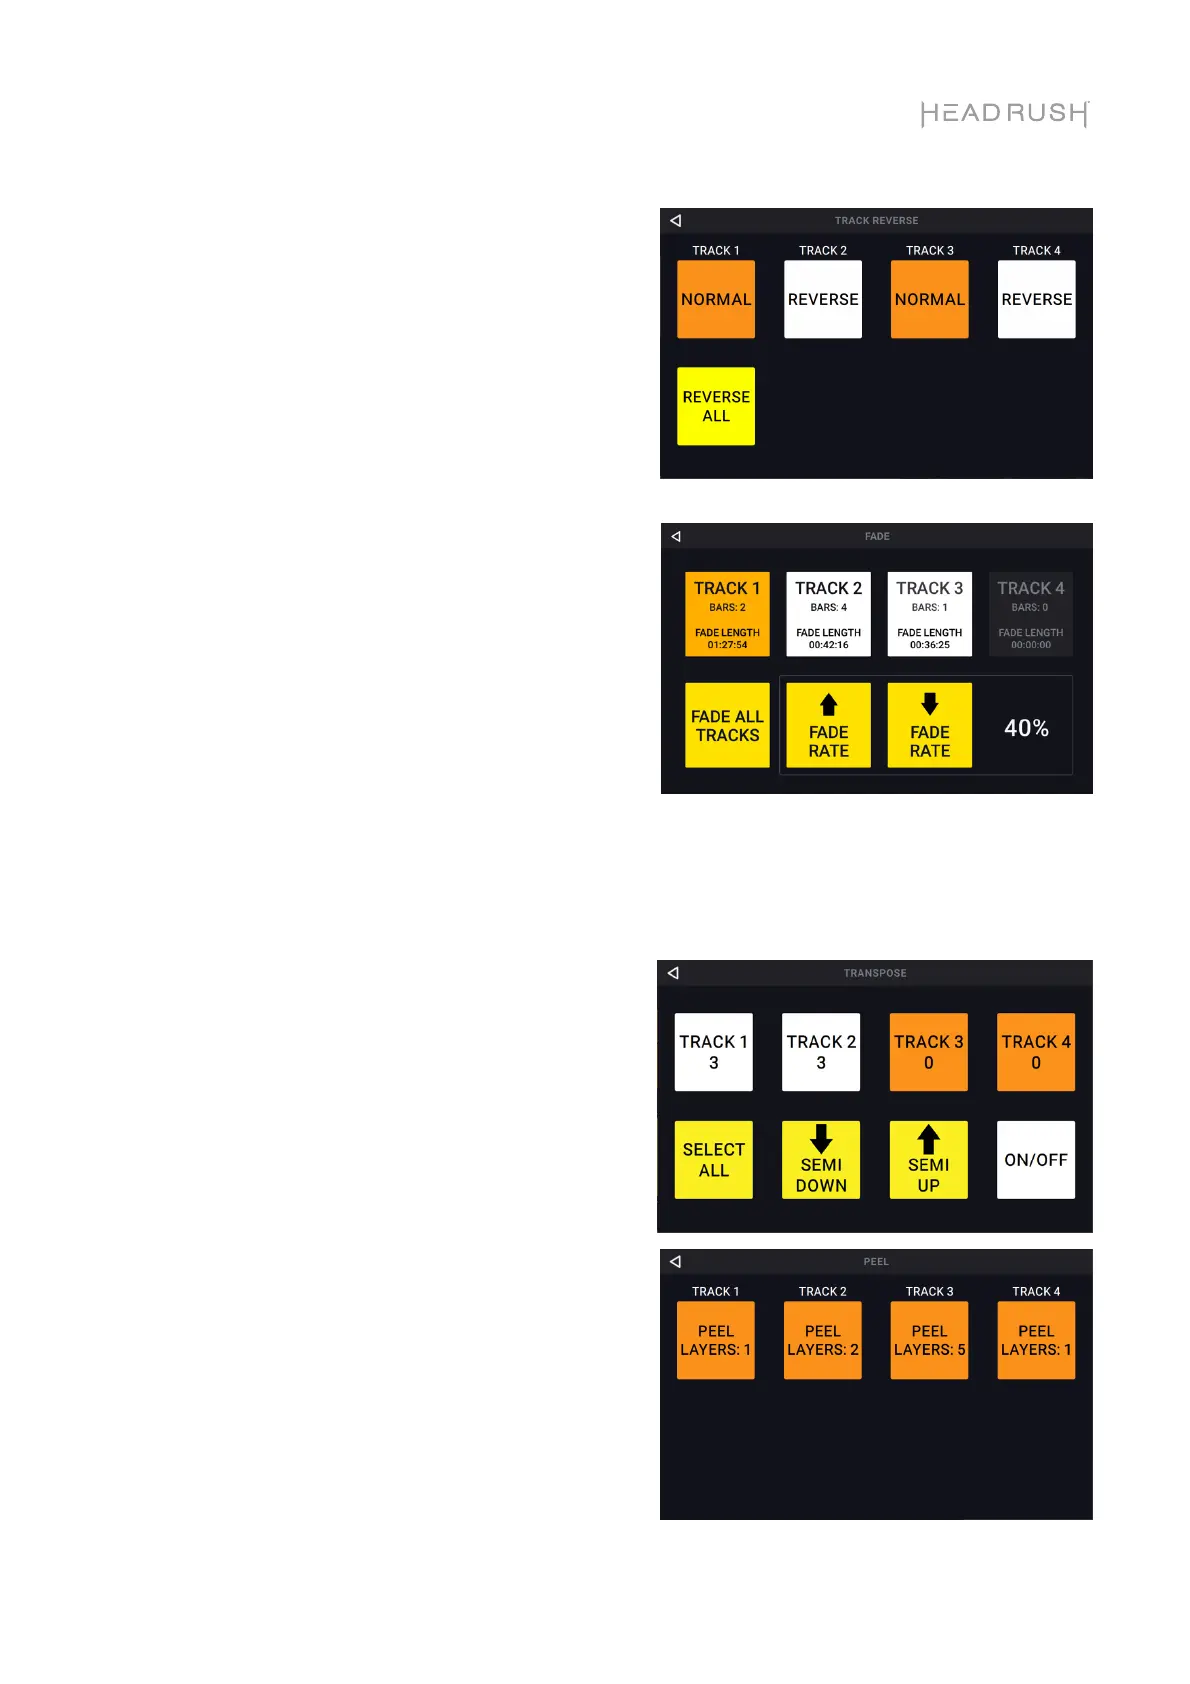
Reverse:
Use footswitches 3–6 to adjust the playback
direction of each looper track. If no looper track is
recorded, the track option will be grayed out.
You can also use footswitch 9 to adjust the
playback direction of all looper tracks at the same
time.
Fade:
Use footswitches 3–6 to apply a fade out or fade
in to each looper track. If the track is playing and
available to fade out, the track option will be
orange. If the track is stopped and available to
fade in, the track option will be white.
Use footswitches 10–11 to adjust the rate of the
fade, or tap the corresponding buttons on the
touchscreen.
You can also use footswitch 9 to apply the fade
function to all tracks at the same time. If some
tracks are playing and some tracks are stopped,
this function will cross-fade the tracks.
Transpose:
Use footswitches 3–6 to select a looper track to
adjust the transposition.
Use footswitch 9 to select all looper tracks at the
same time.
Use footswitches 10–11 to adjust the amount of
transposition (in semitones) for the selected track.
Use footswitch 12 to enable or disable
transposition for all tracks, whether they are
currently selected or not. If the transposition for a
track is set to 0, no change is made.
Peel:
Use footswitches 3–6 to permanently "peel off"
the last recorded layer of a looper track.
If no layers are available to be peeled, the looper
track will be grayed out.