Page 82
In the
following steps you will adjust a pair
of coils
for each
band. If you
do
not have the optional
bands
installed,
omit the steps that
have
an
asterisk.
Leave
the
dial set at 100 for all
of
these steps. Set
the BAND switch as
indicated, and then key the
transmitter and adjust
the listed coils alternately for
a
peak voltage reading. Repeat
each
step at
least once
until there is no further
increase. Unkey the trans-
mitter
between steps while you change to the
next
band.
BAND ADJUST
)
80
L401,L402
)
40
L403.L404
)
30*
L405,L406
)
20
L407,L408
}
17*
L409,L411
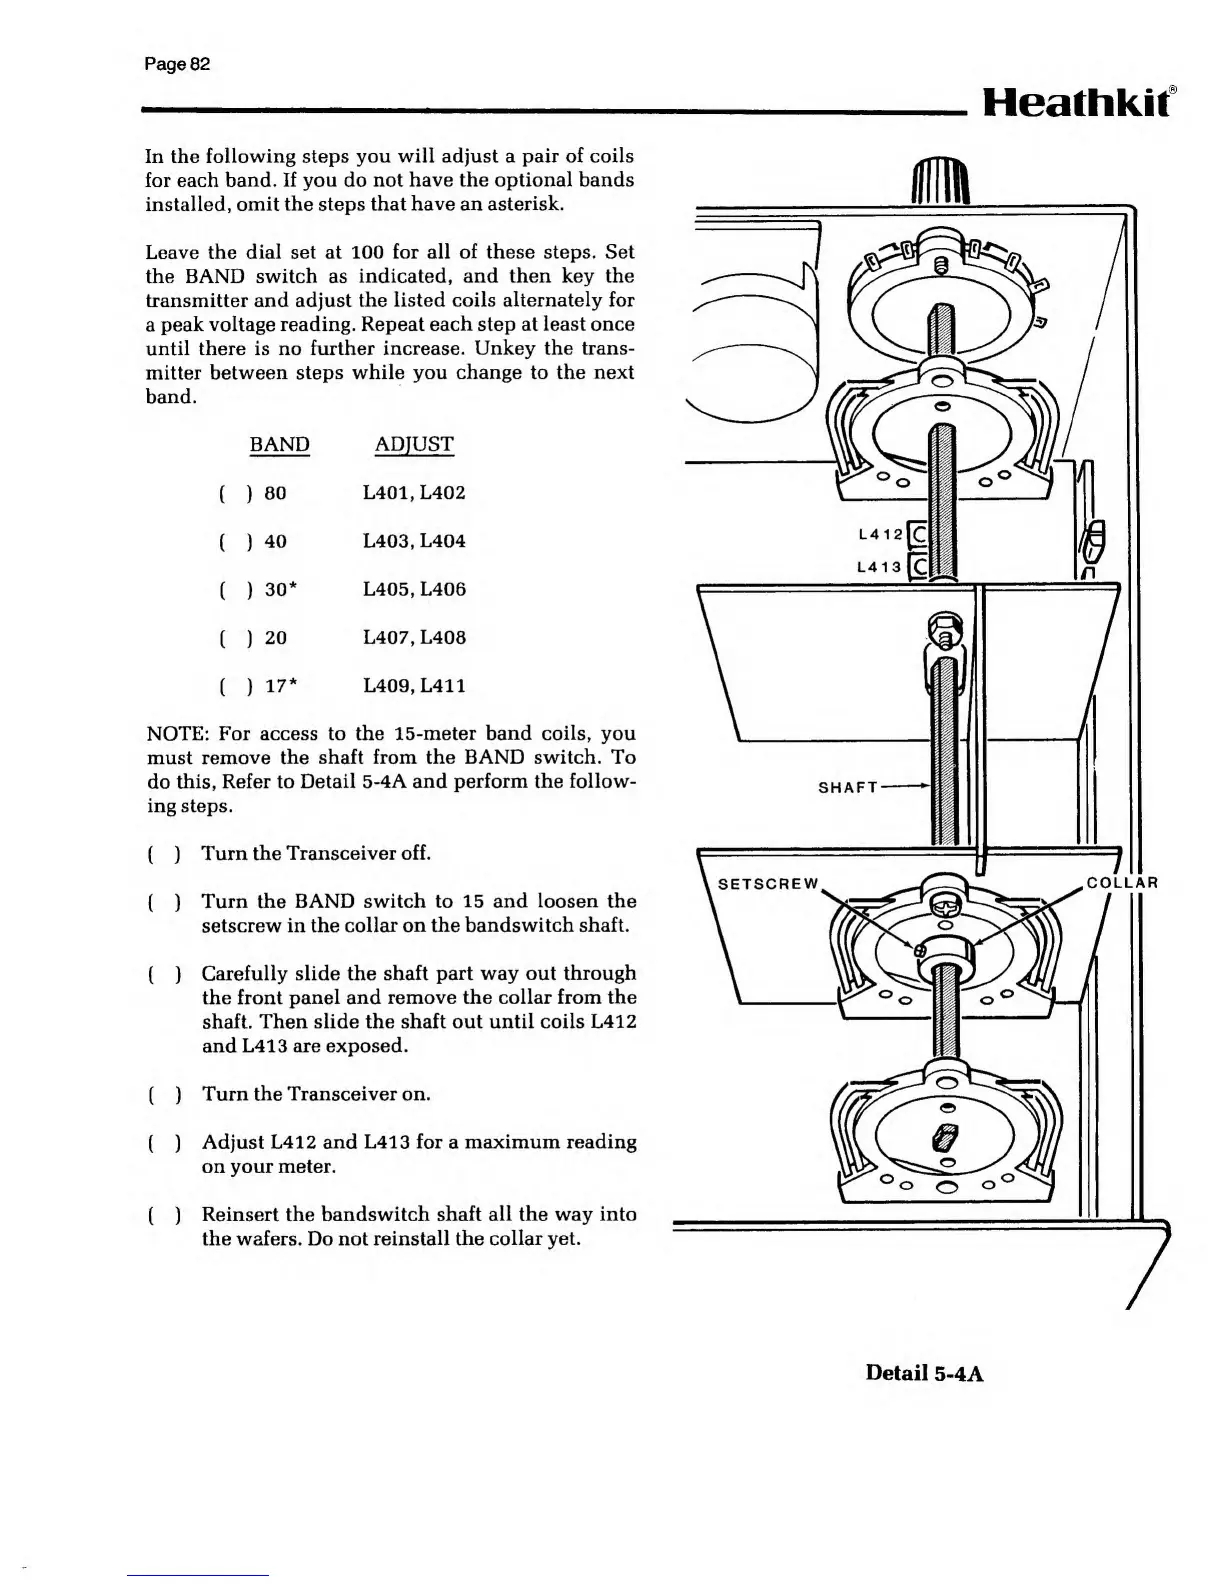
NOTE:
For access to the 15-meter
band coils,
you
must
remove the shaft from the BAND switch. To
do
this, Refer to Detail 5-4A and
perform the follow-
ing steps.
(
)
Turn
the Transceiver off.
{
)
Turn the BAND switch to
15
and
loosen
the
setscrew in the
collar on the bandswitch shaft.
( )
Carefully slide the shaft
part way out through
the front panel
and remove the collar from the
shaft. Then slide the shaft out until coils L412
and L413 are exposed.
(
)
Turn
the Transceiver on.
( )
Adjust L412
and L413 for
a
maximum reading
on your meter.
(
)
Reinsert the bandswitch
shaft all the way into
the wafers. Do not
reinstall
the
collar yet.
Heathkit
Detail
5-4A