Page
87
Heathkif
—
Comprehensive
reference
material
about
antennas
and
transmission
lines is
presented
in the
ARRL
An-
tenna
Handbook
and
similar
publications,
available
at
most
electronic
hobby
stores
or
public
libraries.
Once
you
have
selected and
installed your
antenna,
connect its
lead-in to
the
coaxial
jack
on the
rear
panel.
DC
POWER
Your
Transceiver
is
designed to
operate
from a
12.6-
volt DC
source
such as
the
Heathkit
Model PSA-9
Accessory
Power
Supply,
an
automobile
battery, or
other
stable
source that
will
supply 12.6
volts
at 1
ampere. If you
have
the
Model PSA-9
Power Supply,
its
output
connector
will
plug
directly
into
the DC
POWER
connector
on the
rear
panel of
your
Trans-
ceiver.
For
connection to
a
car
battery or
other
12.6-volt
source,
refer to
Detail
7-lA and
perform
the
follow-
ing
steps.
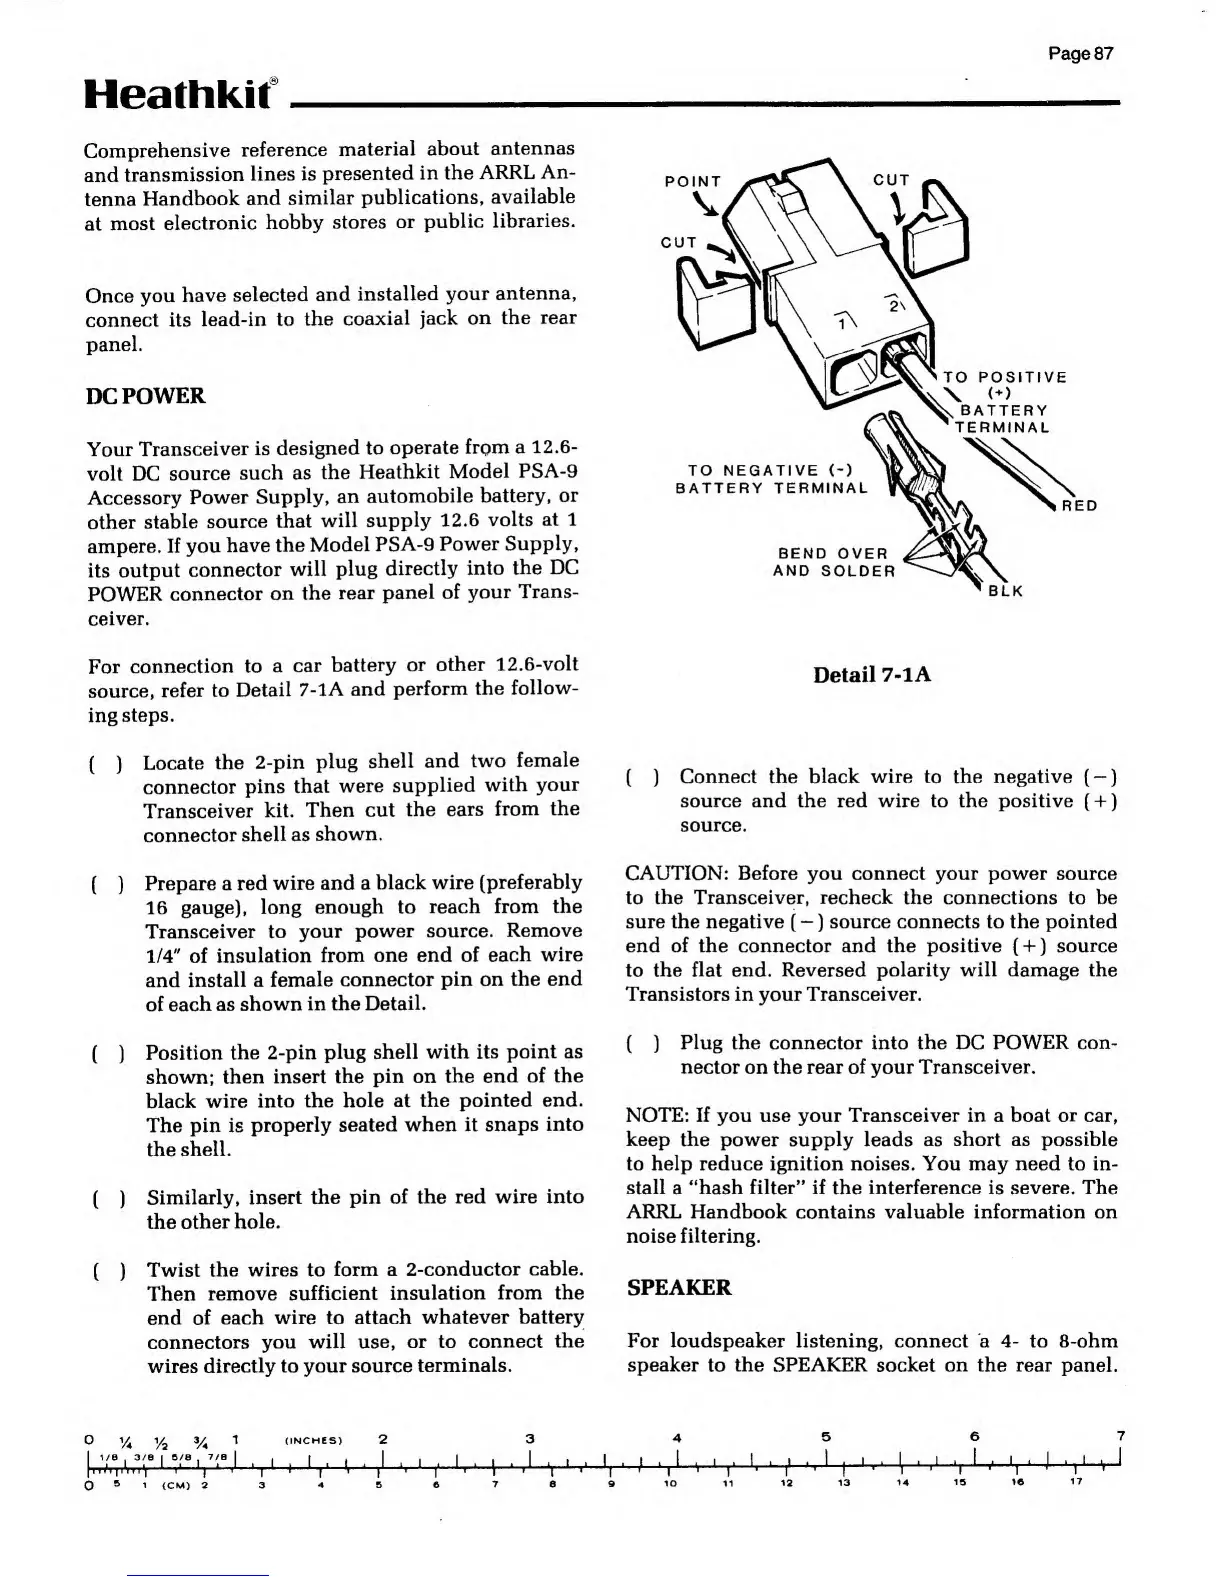
(
)
Locate
the
2-pin
plug
shell and
two
female
connector
pins
that
were
supplied
with
your
Transceiver
kit.
Then cut
the
ears
from the
connector
shell as
shown.
( )
Prepare a red
wire and a
black wire
(preferably
16
gauge), long
enough to
reach from the
Transceiver
to your
power source.
Remove
1/4"
of
insulation from
one end of
each wire
and
install a
female connector
pin on the end
of
each as
shown in the
Detail.
(
)
Position
the 2-pin
plug shell with
its point as
shown;
then insert
the pin on the
end of the
black wire
into the hole
at the pointed end.
The pin is
properly
seated when it snaps
into
the
shell.
(
)
Similarly,
insert the pin
of the red wire into
the other
hole.
(
)
Twist the
wires to
form a
2-conductor cable.
Then
remove
sufficient
insulation from the
end
of each
wire to attach
whatever battery
connectors
you will
use, or to
connect the
wires directly
to your source
terminals.
Detail
7-lA
(
)
Connect the
black wire to the negative
(
—
)
source and the red wire to the positive
(
+
)
source.
CAUTION: Before you connect your power source
to the
Transceiver, recheck
the connections to be
sure the negative
(
—
) source connects to the pointed
end of the connector and the
positive
(
+
)
source
to the
flat end. Reversed polarity will damage the
Transistors in your Transceiver.
( )
Plug the connector into the DC
POWER
con-
nector on the rear of your
Transceiver.
NOTE: If you use your Transceiver in a boat
or
car,
keep the
power supply leads as
short as possible
to help reduce ignition noises. You may need to in-
stall
a
"hash filter" if
the
interference is severe. The
ARRL Handbook contains valuable information on
noise filtering.
SPEAKER
For loudspeaker listening, connect a
4-
to 8-ohm
speaker
to
the SPEAKER socket
on
the
rear panel.