December 2001 Machine Axes 6 – 5
6 Machine Integration
6.1 Machine Axes
6.1.1 Selecting the Axes
With MP10 you define which machine axes are to be operable.
The bits may be changed during the run-time without a control reset.
However, the bits to be changed must have been set before the control was
switched on.
Changing bits that had not been set leads to a control reset.
MP10 Active axes
Format: %xxxxxxxxx
Input: Bits 0 to 8 correspond to axes 1 to 9
0: Axis not active
1: Axis active
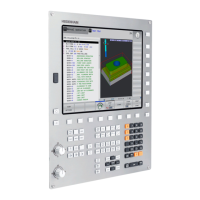
Screen display You can define how the axes are shown on the screen:
7
77
7 In MP100.x, assign a designation to each logical axis.
7
77
7 Define in MP7291.x the screen line in which the axis is to be displayed.
Rules for the display:
n NC axes are designated with uppercase letters.
n PLC axes are designated with lowercase letters.
n Axes that are not present are given a hyphen "-".
MP100 Designation of axes
Format: XYZABCUVWxyzabcuvw-
Input: Characters 1 to 9 correspond to axes 1 to 9
MP100.0 Designation of axes for traverse range 1
MP100.1 Designation of axes for traverse range 2
MP100.2 Designation of axes for traverse range 3
MP7291 Display of axes on the screen
Format: SXYZABCUVWxyzabcuvw-
Input: Characters 1 to 9 from the right represent lines 1 to 9
Character 10 is the spindle "S", which is always output in line 9.
MP7291.0 Display in traverse range 1
MP7291.1 Display in traverse range 2
MP7291.2 Display in traverse range 3
Assignment of the
axis keys
IV and V
On the keyboard unit and the HR 410 handwheel, you can assign the axis keys
IV and V as desired.
MP410 Assignment of axis keys IV and V
Input: Axis designation XYZABCUVWxyzabcuvw-
MP410.3 Axis key IV
MP410.4 Axis key V
Note
Axis 9 may only be used as a PLC axis.
 Loading...