5
INSTALLATIONS AND CONNECTIONS
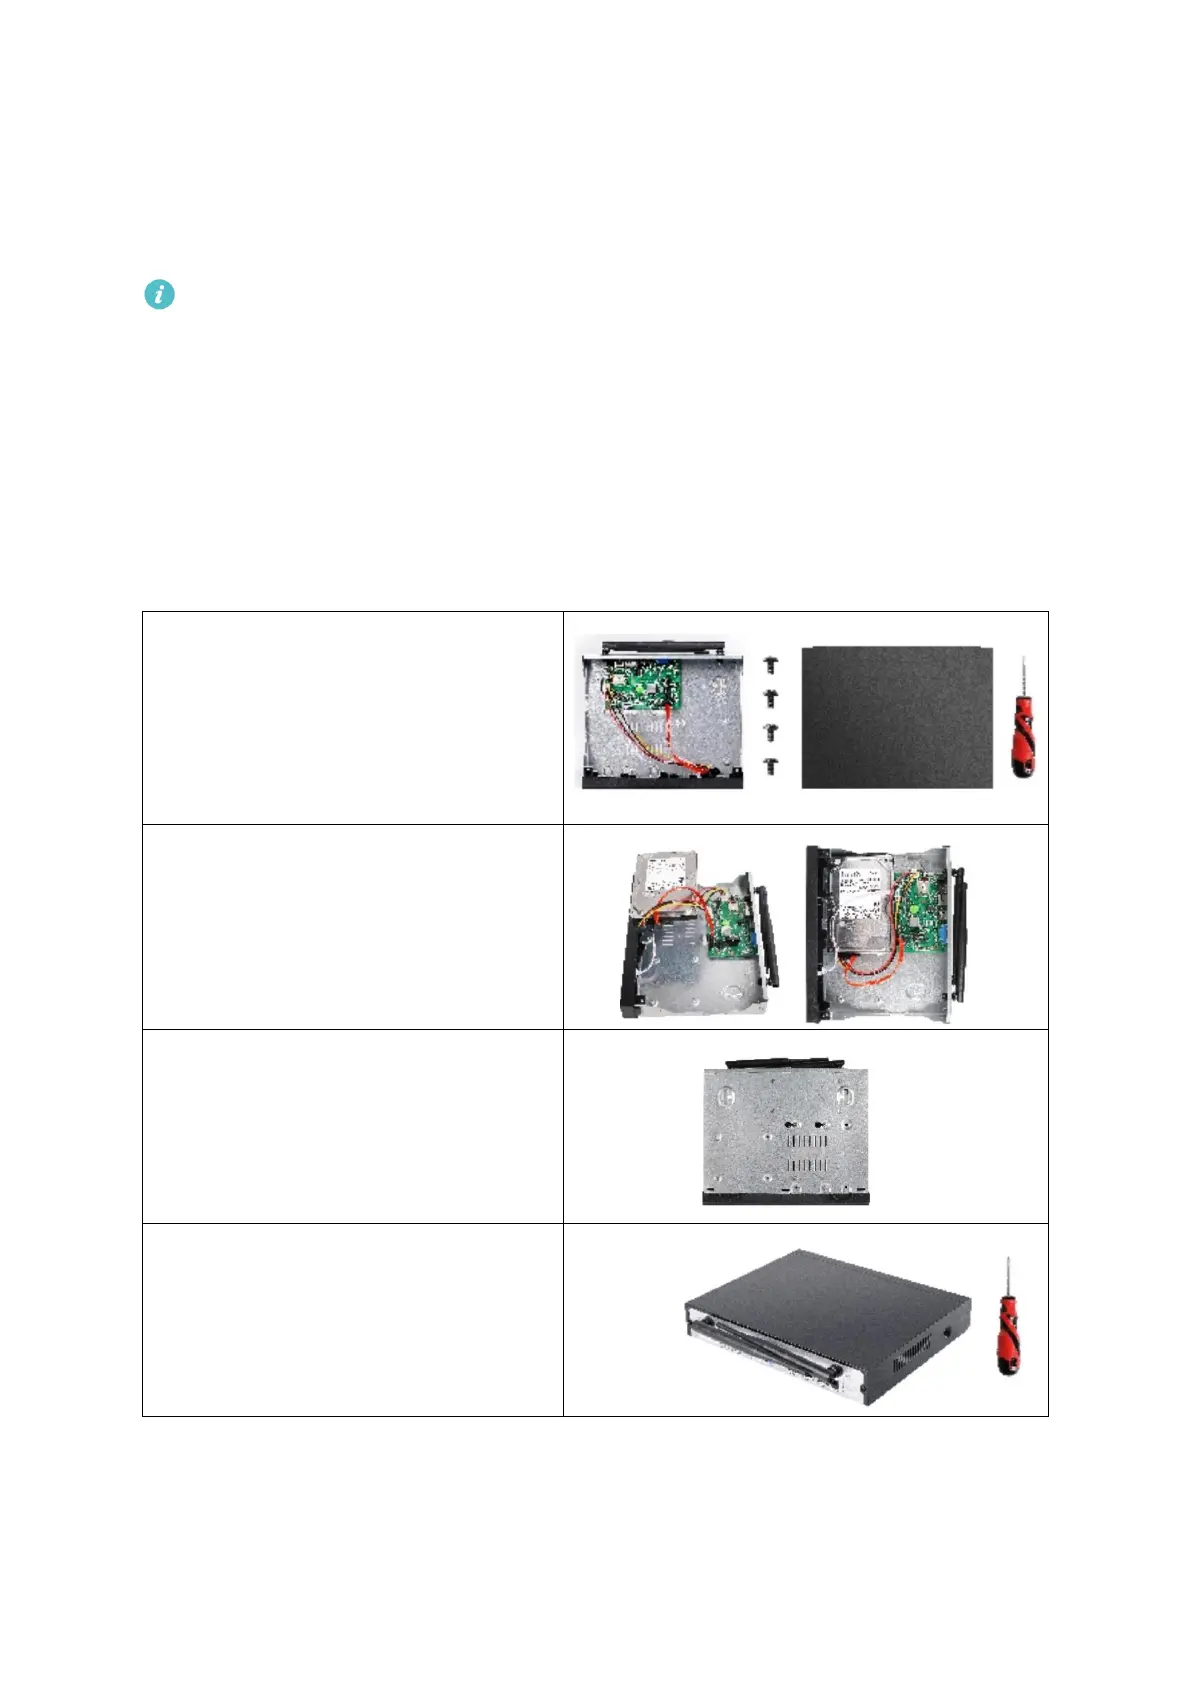
Hard Disk Drive Installation
IMPORTANT:
1. To record video and play the historical video, the installation of the Hard Disk
Drive is a must. Otherwise, you can only watch the live picture.
2. Please check whether you purchased the NVR kit with a Hard Disk Drive or
without a Hard Disk Drive. If with a Hard Disk Drive, you may refer to the steps
below to replace your Hard Disk Drive; while if without a Hard Disk Drive, you can
purchase one, then install it following the instructions below.
3. This NVR system works with a 3.5” SATA Hard Disk Drive. The Hard Disk Drive
should be formatted if it’s installed.
Step 3:
Hold the Hard Disk Drive and the NVR
together, carefully turn them over,
then align the screw holes on the Hard
Disk Drive with the screw holes on the
NVR housing.
Step 4:
Using a Phillips screwdriver to tight the
Hard Disk Drive and NVR housing with
the provided screws, then assemble
the top cover of the NVR.