NETLink
®
PRO family Application Examples
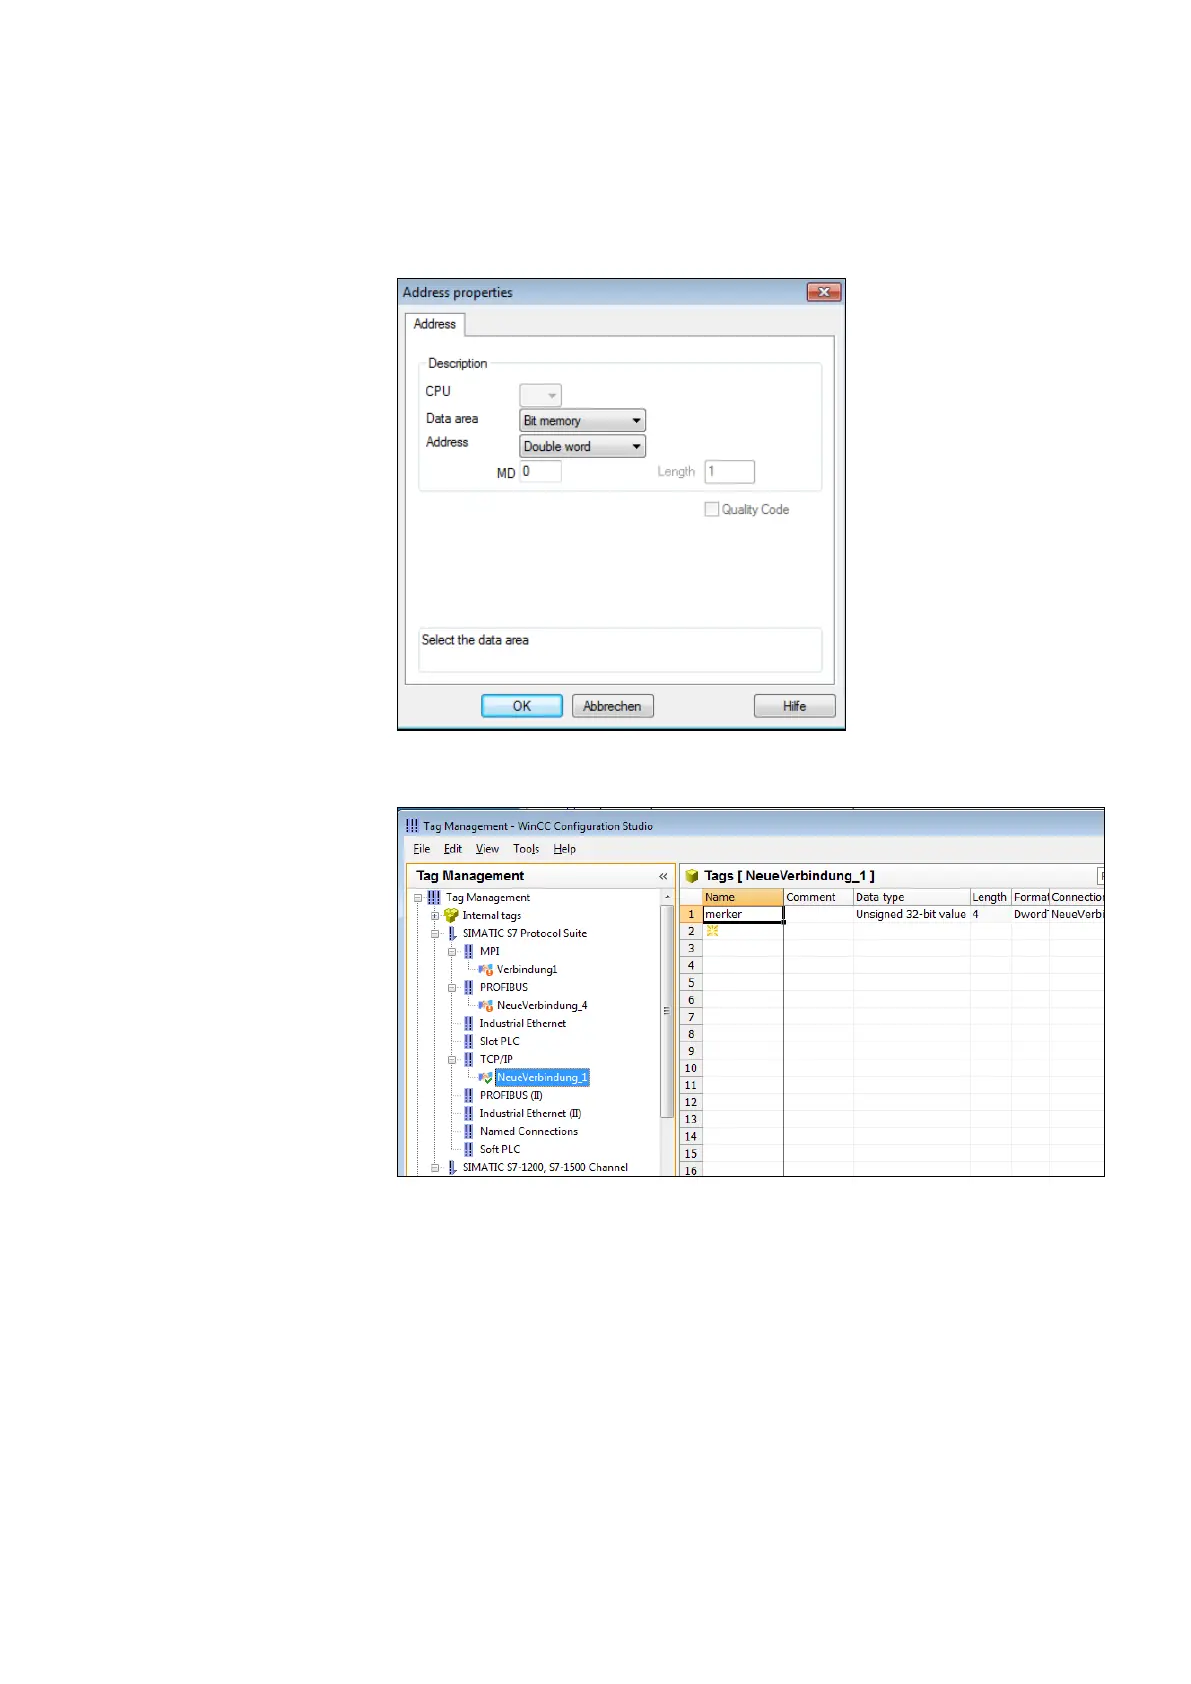
• In the properties window of the variable, which was
named ‘merker’ in this case, we can now select the type
of variable by clicking the ‘Select’ button.
Marker byte 0 is configured here.
The following screenshot shows that a variable named ‘merker’
now exists under the ‘newconnection_1’ connection.
If this variable is now included in the initial screen of the
WinCC project, for example, a connection will be established
to the CPU with address 2 via the NETLink
®
Gateway to read or
write marker byte 0 from this address.
Further variables of different types can, of course, be created
and used according to the same scheme.
It is also possible to create additional TCP/IP connections in
order to communicate not only with the CPU with bus address
2 but also with other CPUs.