Users Manual Henkovac 04-serie V2019
11.4.0 Seal Beams and Counter Beams
To achieve a quality seal, it is necessary that the seal beam and counter beam are in good condition.
1. Clean the seal and counter beams daily with a dry cloth
2. Replace the Teflon tape on the seal beam if damaged and replace the sealing wire if kinked
3. Replace the silicone rubber seal if it is burned in
Depending on the type of machine, there are three seal beam versions:
1. Single-seal beam (T2)
2. Stainless steel seal beam
3. Aluminum seal beam
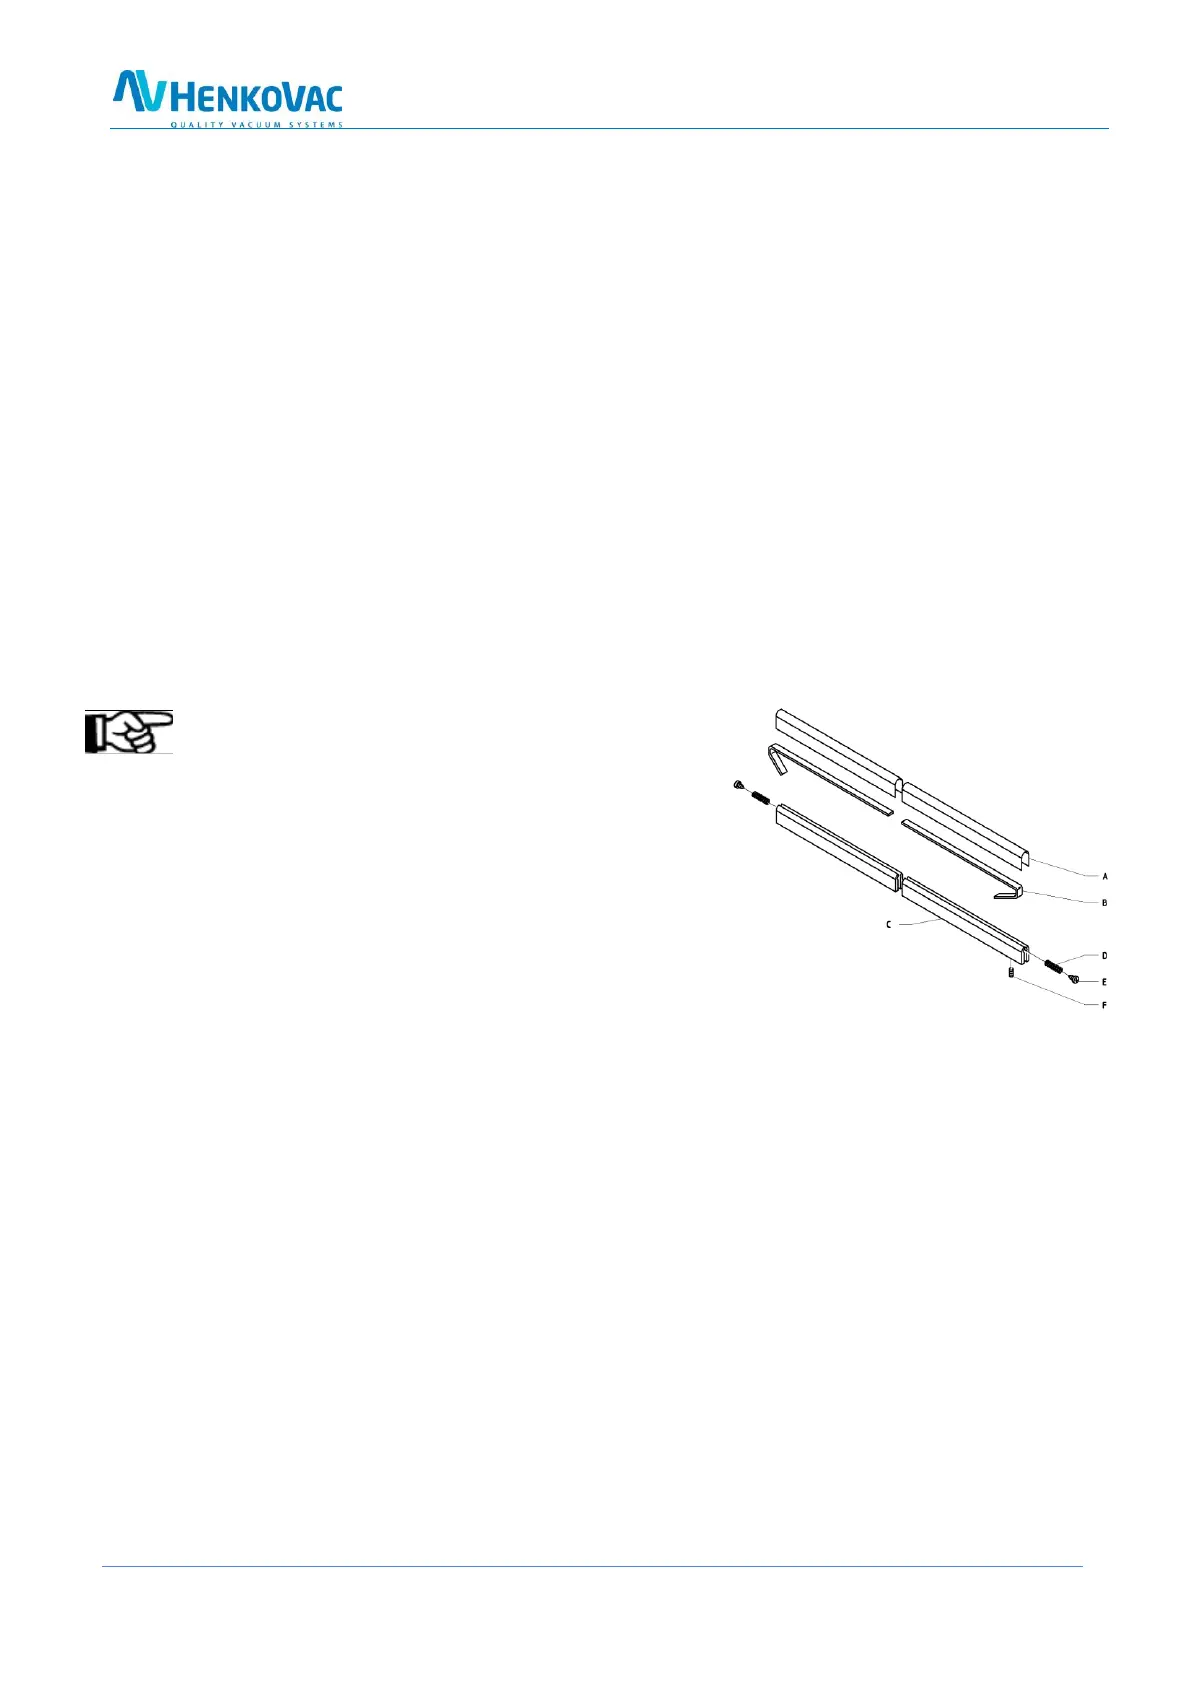
11.4.1 Single-Seal Beam
Remove the sealing wire and Teflon tape as follows:
1. Grab the seal beam in the middle and pull it straight up and out of the machine
2. The beam is held in place by 2 pins; some force may be necessary to loosen the beam
3. Remove the brown Teflon tape (A) that is applied to the seal beam
4. Remove the two screws (F) on the underside of the seal beam; this releases the sealing wire (B)
5. Clean the seal beam thoroughly and remove any glue residue of the Teflon tape
Notes
Check the condition of the tensioning springs (D)
at both ends of the seal beam; replace if necessary
These springs maintain tension on the sealing wire
Using the seal beam without the springs may cause
sealing wires to break
Install the sealing wire and Teflon tape as follows:
1. Position the sealing wire across the beam and fasten it on one side with a small bolt
2. Apply tension on the wire by pulling it with a pair of pliers
3. Fasten the wire on the opposite end of the beam with the second bolt and cut the wire to
length; the ends of the sealing wire must be long enough to make electrical contact with the pins
in the vacuum chamber
4. Apply the Teflon tape smooth and tight over the seal beam; make sure that the beam is clean and
free of grease
5. Re-install the beam in the vacuum chamber; check to make sure that the ends of the sealing wire
make contact with the steel pins