VertX EVO V1000 User Guide, 71000-901, Rev. A.4
Page 18 of 25 July 2016
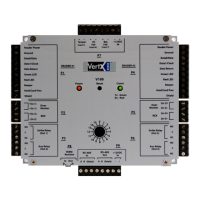
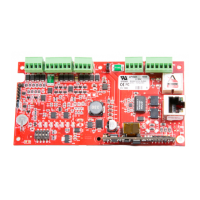
A.7 Network Defaults Jumper
The Network Defaults Jumper requires that someone with physical access to the V1000,
place a jumper over the Debug port while the controller is rebooting, as detailed below. The
controller reconfigures its network settings to the factory defaults when the jumper is on the
Debug port during a reboot. From this point, configuration (or re-configuration) proceeds
normally.
Use the Network Defaults Jumper to correct potential errors in a VertX controller’s network
configuration.
A jumper is supplied with the V1000, and is located across pins 6 & 8 of the Debug port for
safe storage. Replace the jumper across pins 6 and 8 for safe storage, after restoring
network defaults.
1. Remove the V1000 cover.
2. Reboot the controller and place the supplied jumper over pins 3 & 5 of the Debug
port while the Power LED is green.
Note: The network reset opportunity occurs for 30 seconds while rebooting the
controller.
3. After 30 seconds, the Power LED flashes green five times, indicating success. When
an error occurs, the LED flashes red five times. In both instances, the LED turns off
indicating a power cycle is required.
4. Remove the jumper, return it to pins 6 & 8 of the Debug port and cycle power. The
controller resets in approximately 60-seconds. Once the reset is complete, the LED
returns to green. After the 30-second window, the LED returns to normal Red state.
The controller is fully functional during this time.
CAUTION: During the controller rebooting process, all network configuration
information is overwritten and returned to the original defaults.
5. Configure the controller for your installation parameters. See Section 5.1: VertX
Communications.
6. Replace the V1000 cover.

 Loading...