39
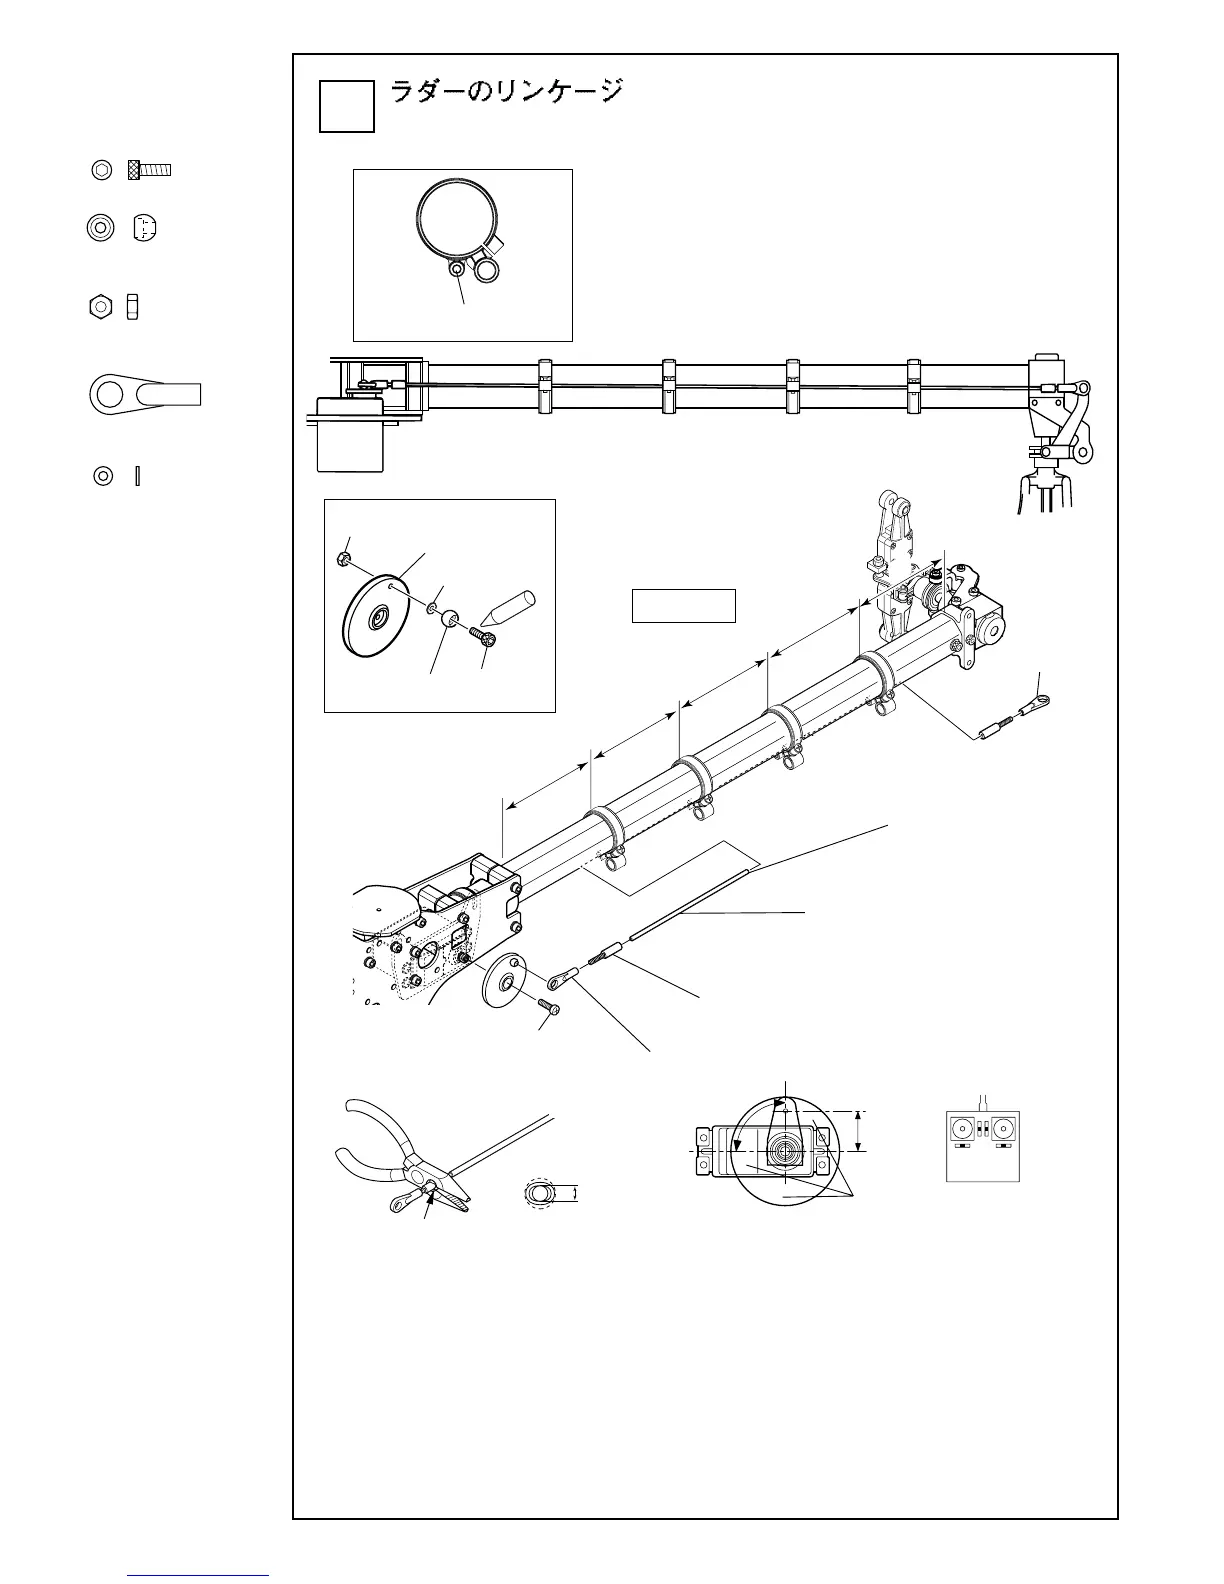
Rudder linkage
30
M2ナット…………………1
M2 nut
EXφ5ボール ……………1
EXø5 ball
FWø1.7 ……………………1
M2ロッドエンド …………2
M2 rod end
M2X6CS …………………1
A=B=C=D=E
サーボホーン:
ニュートラル
Servo horn:
NEUTRAL
90˚
17mm
カット
Cut
この穴を使用する
Use this hole.
プロポ
スティック、トリム:
ニュートラル
Radio transmitter
Stick, trim:
NEUTRAL
M2ナット
M2 nut
サーボホーン
Servo horn
M2X6CS
EXøボール
EX ø5 ball
Lock
FWø1.7
つぶします
Crush here.
2mm
A
B
C
D
E
下図のようにラダーコントロールガイドの位置をラダー
コントロールロッドにそってずらしながら合わせます。
Position the rudder control guide by sliding it along the
rudder control rod as shown below.
サーボに付属のネジ
Servo horn screw included
with servo
ロッドエンド
Rod end
アジャストジョイントM2Xø2
Adjust joint M2Xø2
ø2カーボンロッド
ø2 carbon rod
※カーボンロッドはヤスリで
カットして使用します。
※Cut the carbon rod by a file.
ロッドエン