Chapter 5 Wiring
5 - 2
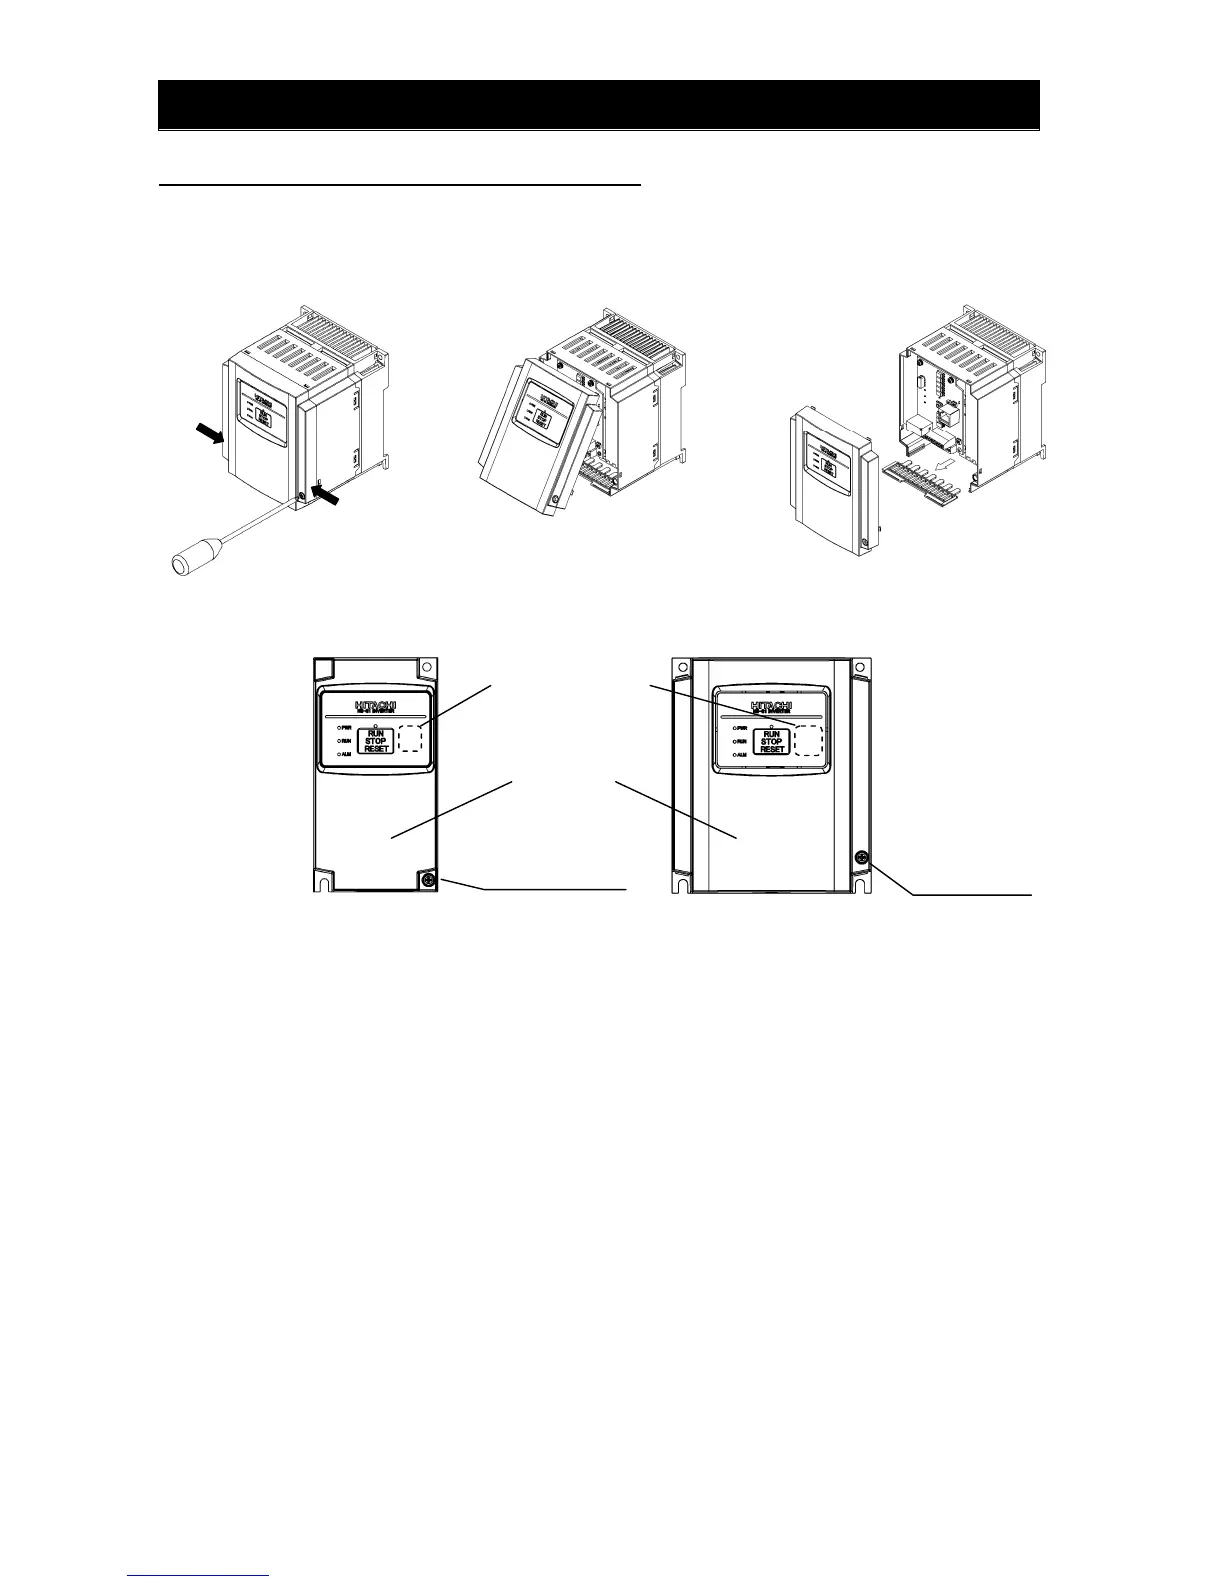
5.2 How to attach and remove the front cover
(1) How to remove
(2) It is necessary to make window on the front cover when using remote operator
(OPE-S/SR/SBK/SRmini, WOP), Modbus-RTU, or PC software (ProDriveNext). See above for the
position of the window.
- Be sure to make window after removing the front cover.
- There are cutouts at the window, so it can be removed easily by pressing up side and bottom side of
the window alternatively.
- The window cannot be restored if it is once opened. Please use commercially supplied RJ45
connector cap or the like if necessary.
(3) How to attach
- Press the front cover to the main body until there is a click sound.
- Do not tighten the screw too much.
1) Loosen up the screw
2) remove the cover by pressing the bottom side o
the cover to the direction shown below.
3) Move the wiring plate like shown below
in case of wiring.
Screw for fixing the front cover is located at right-bottom side
Screw for fixing
front cove
 Loading...