12
Charger Connections
Charger Connections
1.) Connecting to a power source
The Hitec RDX1 Pro features a built-in switching power supply. You can
connect the AC power cord directly to an AC socket (100-240V AC) or use
an 11-18V DC power source (such as an automotive battery or 12 Volt
power supply).
2.) Connecting the battery
NOTE: Before connecting any battery, it is absolutely essential to check one
last time that the parameters were set correctly. If the settings are incorrect,
the battery may be damaged and, in worse case scenarios, could even burst
into ames or explode. To avoid short circuits between the banana plugs,
always connect the charge leads to the charger rst, and then to the battery
second. Reverse the sequence when disconnecting the pack.
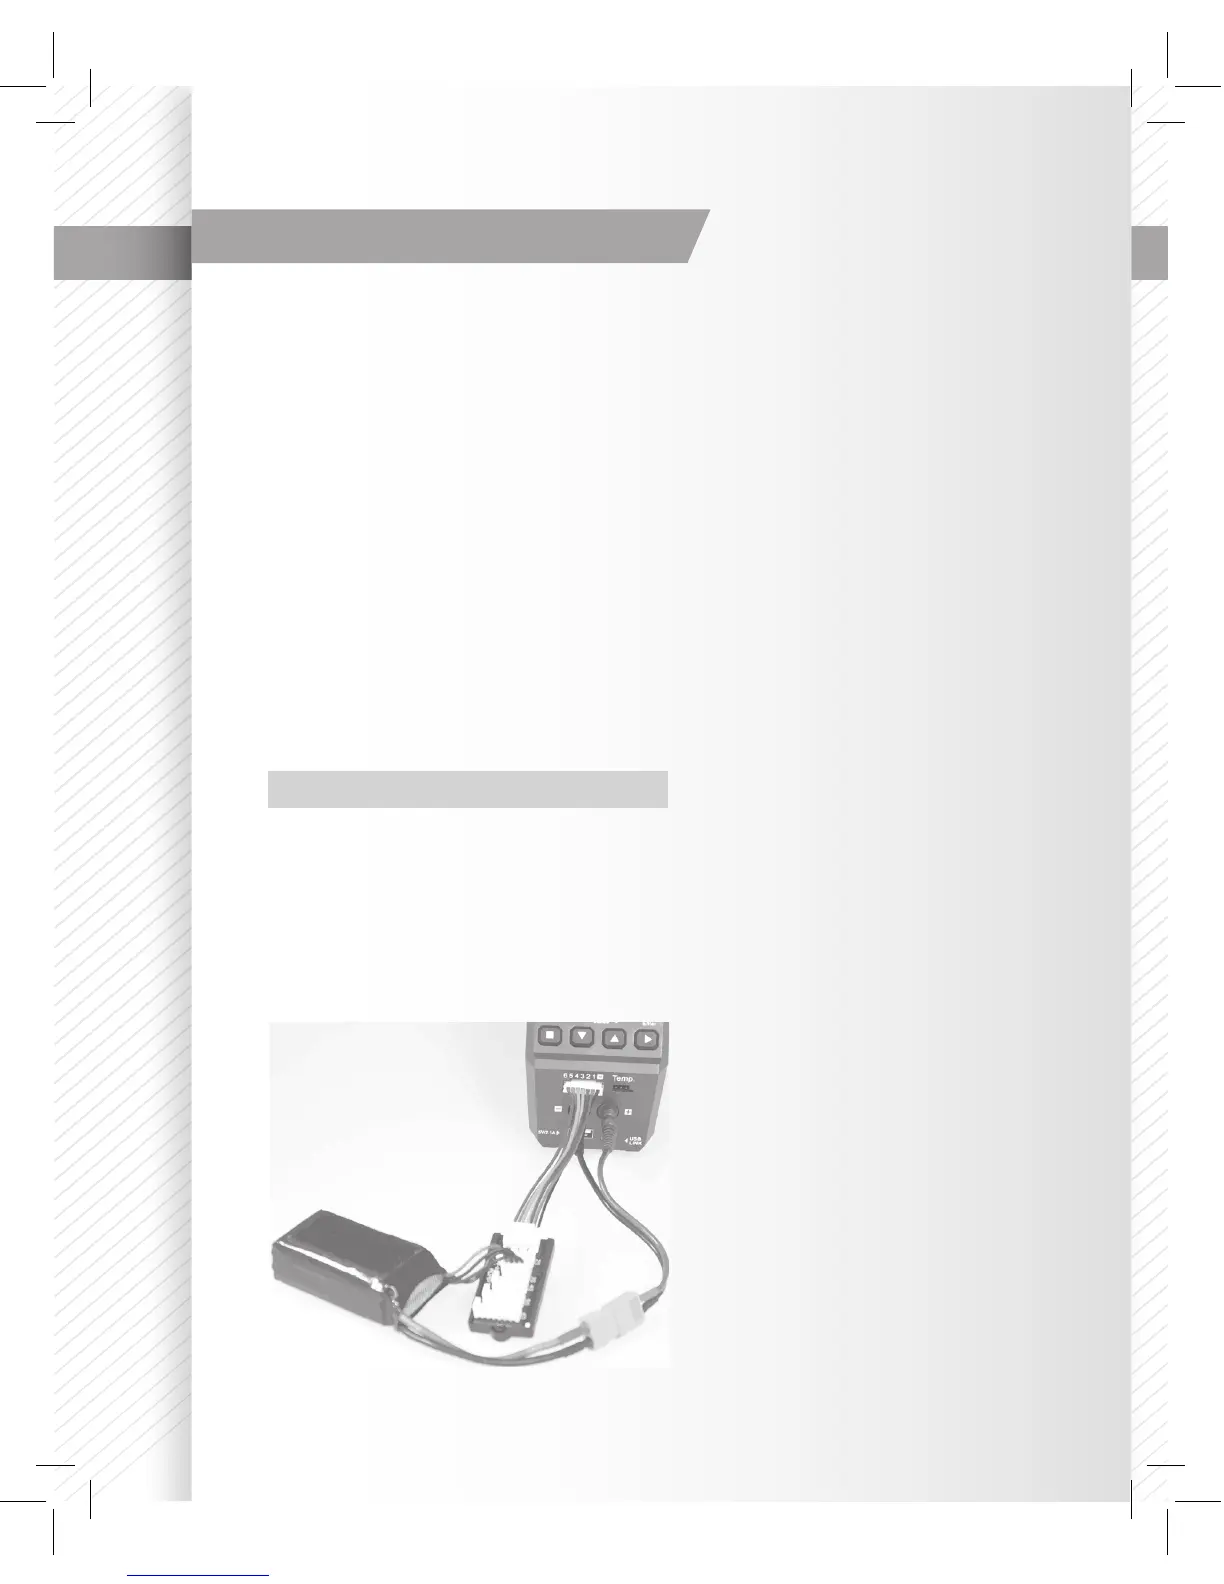
3.) Balance Socket
The balance wire attached to the battery must be connected to the
charger, with the black wire aligned with the negative marking. Take care to
maintain correct polarity. (See wiring diagram below)
This diagram shows the correct way to connect your battery to the Hitec
RDX1 Pro when charging in the balance charge program mode.
WARNING:
Failure to connect as shown in this
diagram will damage your charger.
To avoid a short circuit between the
charge lead, always connect the
charge cable to the charger rst,
then connect the battery. Reverse
the sequence when disconnecting.
For Lithium Batteries in all modes