Accenta/Optima Engineer’s Manual
3
Fixing the Control Panel
CAUTION: When positioning the control panel make sure that it is located in a dry place away
from damp areas.
NOTE: The Accenta Mini enclosure is illustrated here, however the procedures for the other panels is
similar.
Control Panel
Q
S
R
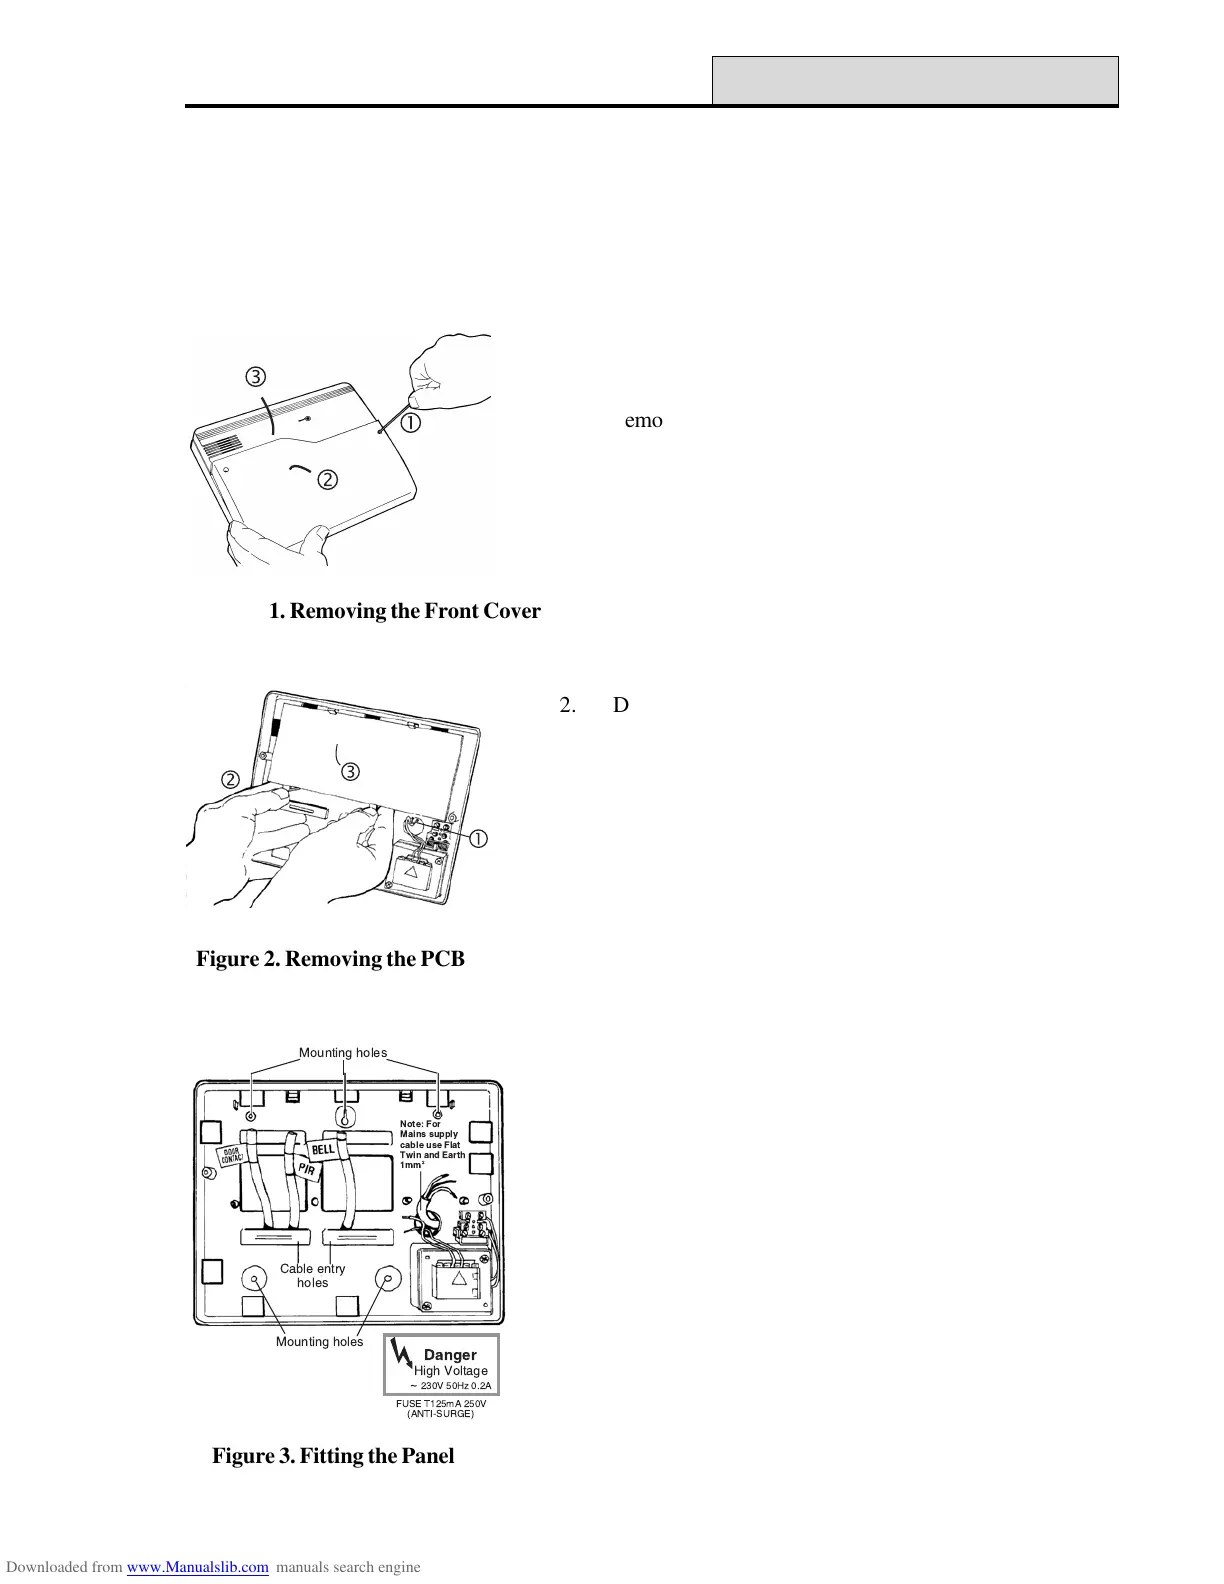
2. Disconnect the transformer wires from the board, these are
marked AC. Carefully remove the board by gently pushing
down the holding clips on the bottom edge of the board
and withdraw it from the base.
NOTE: When replacing the board align it on the round
support pillars to the bottom and allow it to
click down past the clips at the top of the case.
Refit the transformer wires into the terminal.
Q
R
S
1. Remove the front cover(s) from the base assembly.
3. Fit the panel to the wall with suitable fixings. Ensure the
wall surface is flat to prevent base distortion. There are
cable entry holes provided in the rear of the base and
around the outside edges through the thinned out plastic
sections which may be cut away as required.
NOTE: The hole provided adjacent to the mains
transformer is a dedicated mains cable entry
hole.
!"
#$ %&'()
Figure 1. Removing the Front Cover
Figure 2. Removing the PCB
Figure 3. Fitting the Panel
 Loading...