Accenta/Optima Engineer’s Manual
5
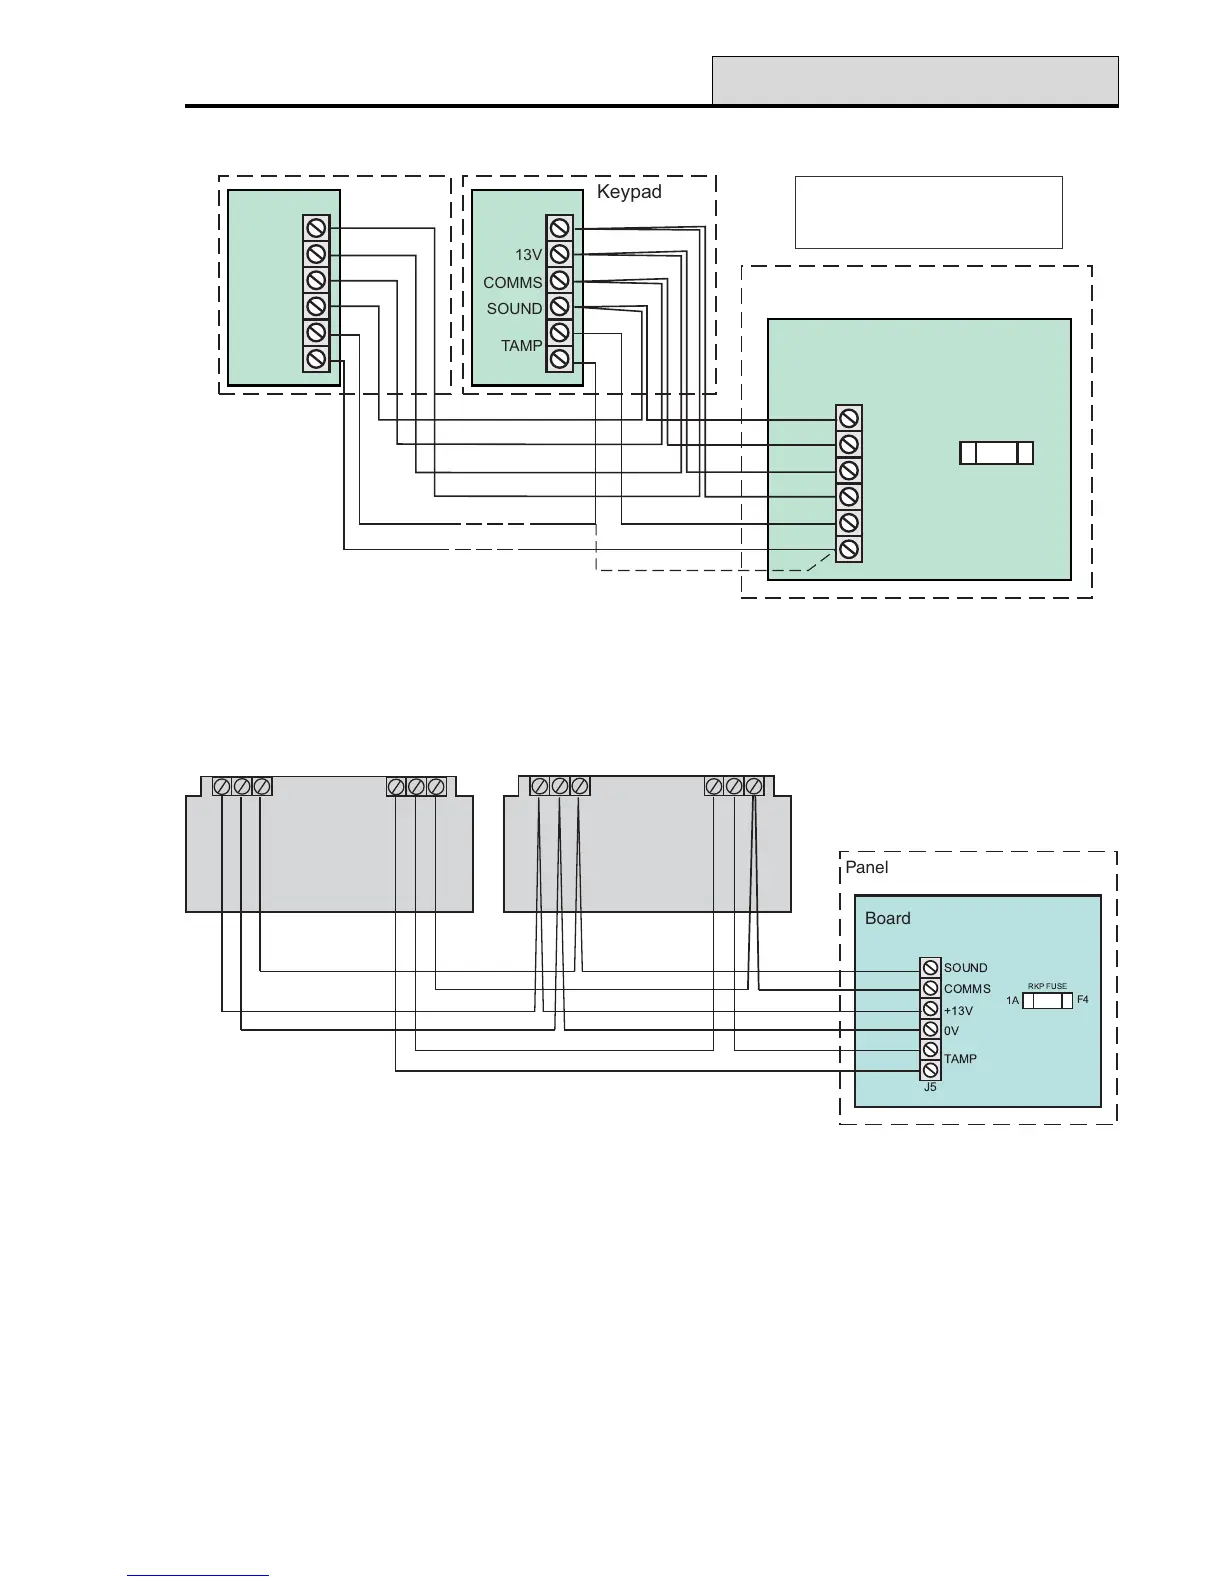
Figure 5. Connecting LED keypads to panel
Connecting Keypads
Connecting Remote Keypads
NOTE: Where an Accenta Mini panel is being installed, make sure there is at least one remote keypad
wired to the panel before the first power up.
Up to four remote LCD or LED keypads can be connected to the panel. Wire the keypad(s) as per Figure 5
(LED keypad) or Figure 6 (LCD keypad).
NOTE: When the panel back-up battery is charging, the LCD keypad backlight may not operate.
Figure 6. Connecting LCD keypads to panel
+13V
0V sound
TB1
comms
tamp
tamp
TB2
Keypad PCB
+13V
0V sound
TB1
comms
tamp
tamp
TB2
Keypad PCB
Board
Panel
Keypad
SOUND
TAMP
COMMS
13V
0V
Board
J5
0V
TAMP
+13V
COMMS
SOUND
1A
RKP FUSE
F2
Panel
Board
A maximum of up to Four
Remote Keypads allowed
Keypad
SOUND
TAMP
COMMS
13V
0V
Board
 Loading...