22
Section 5: Post-Installation Activities
The system maintenance provider is responsible for the maintenance and upkeep of GLSS Gateway. The
maintenance involves avoiding potential issues, taking regular backups, restoring data when required,
collecting data for troubleshooting, and so on.
5.1 Maintenance Testing
You can create and offer test plans for a building’s maintenance tests. A test plan shows the devices to be
tested and the type of tests for each device.
1. On the All Customers screen, find the customer > site, and then tap on the specific building.
2. At the bottom, tap the CheckPoint icon, and then tap on the building.
3. Connect to the gateway.
4. Tap START NEW TEST.
5. From the Select Test Type menu, select Maintenance.
6. In the Test Name field, provide a name for the test.
7. From the Select Devices for Testing section, select the required test type:
• All Devices: Select it to test all devices or to create a test plan.
• Test Plans: Reuse already created test plans.
• Past Test Session: Choose a test session, which was performed earlier.
8. To create a new test plan, tap All Devices.
9. From the inventory list, include or exclude devices to be tested..
10. Tap SAVE & NEXT.
From the ACTIVE TESTS list, your test plan opens.
11. On the test plan, tap Enable Control.
12. From the devices list, find the device to be tested, and tap on the More icon.
13. Select the type of tests to be done for the device.
14. Repeat steps 11 and 12 until all the required devices and test types are configured.
15. Start the test.
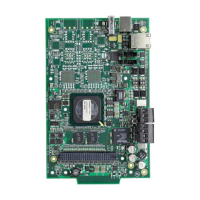
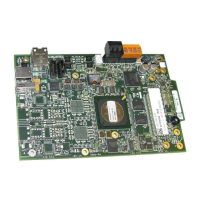
5.2 Upgrading the Gateway Firmware
Honeywell periodically releases updates and upgrades to the gateway’s firmware. Using the Gateway
Configuration tool you can securely make the firmware upgrade to the gateway.
5.2.1 To Upgrade to a Later Release
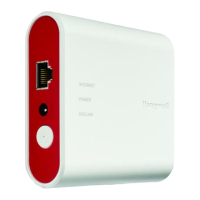
1. On the gateway side: Connect an Ethernet cable to the Ethernet port.
The port is labeled as 2 in the
Figure 3.3: “Gateway Connections” on page 14
.
2. On the configuration computer side: Connect the Ethernet cable to the configuration
computer’s Ethernet port.
3. On the gateway board, find the S6 button.
4. To switch to the configuration mode, press the S6 button for a minimum of 6 seconds,
and then release it.
The LED indicator DL3 turns ON and SOLID, indicating that the configuration is enabled.
5. Open the Chrome browser and enter the following IP address for the configuration
tool: https://192.168.10.190:9443/config/index.html
6. In the Sign In page, enter the password.
7. In the list of settings options, click Diagnostic.
8. In the GATEWAY FIRMWARE UPGRADE section, click Choose File.
9. Select the firmware image file and click Choose.
10.Once the chosen file is uploaded, click Upgrade.
NOTE: In the app, the option to enable the control functionality is available for a duration. The duration is:
60 minutes to 10 hours.
 Loading...