Do you have a question about the Honeywell HON-CGW-MBB and is the answer not in the manual?
Details installation, deployment, and upgrade procedures for the CLSS Gateway.
Provides information on training modules and related documents for the CLSS Gateway.
Links to training videos for CLSS Gateway installation and operation.
Lists documents related to the CLSS Gateway and compatible panels.
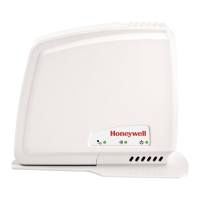
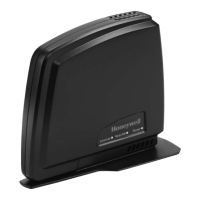
Describes the gateway's role as a portal for fire alarm systems and remote management.
Explains the CLSS software suite for remote fire system management.
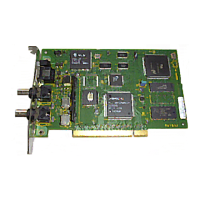
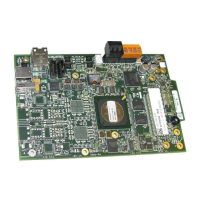
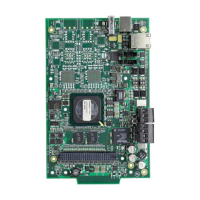
Illustrates the physical layout of the CLSS Gateway circuit board and its components.
Details the various physical connection interfaces on the CLSS Gateway board.
Explains the meaning and status indicated by the LEDs on the CLSS Gateway board.
Security guidelines for users and technicians interacting with CLSS Gateway.
Identifies security threats and risks associated with networked systems.
Discusses risks and best practices related to unauthorized access and password management.
Recommendations for secure use of removable media with the CLSS Gateway.
Guidance on keeping CLSS Gateway software and firmware up-to-date.
Information on malicious software and how it can affect the CLSS Gateway.
Details required network ports and firewall configurations for the CLSS Gateway.
Security measures for network connections, firewalls, and VPNs.
Guidelines for secure connection of VESDA detectors and other devices.
Security practices for monitoring stations and associated PCs.
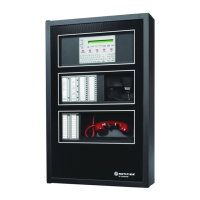
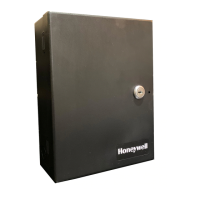
Step-by-step instructions for mounting the fixed CLSS Gateway enclosure on a wall.
Illustrates the various connection points on the CLSS Gateway board.
Information on connecting the CLSS Gateway to supported fire alarm panels.
Procedures for installing a cellular module for enhanced communication services.
Steps for replacing the SIM card in the cellular module of the CLSS Gateway.
Instructions for installing an external antenna to improve LTE signal reception.
Outlines the steps for commissioning the CLSS Gateway for new or existing customers.
Explains how to verify successful connections using the CLSS Gateway's LED indicators.
Describes how to change panel brand and communication settings via the CLSS mobile App.
Details the communication path supervision and AC failure handling for CLSS Gateway.
Explains how the CLSS Gateway transmits events to Honeywell's NOC.
Steps for activating central station communication via CLSS Site Manager.
Procedure for installing a fixed CLSS Gateway to enable central station comms.
How technicians configure central station communication for the CLSS Gateway.
Options for single or dual path communication for alarm transmissions.
Instructions for upgrading the CLSS Gateway firmware via CLSS Service Manager.
Steps to upgrade firmware after the CLSS Gateway has been commissioned.
Procedure for upgrading CLSS Gateway firmware using a PC and Ethernet connection.
Steps to verify the successful upgrade of CLSS Gateway firmware.
Explains LED behavior during the CLSS Gateway firmware upgrade process.
Troubleshooting guide for common issues encountered with the CLSS Gateway.
Guide to diagnosing and resolving issues indicated by CLSS Gateway LEDs.
Guide to resolving issues not indicated by CLSS Gateway LEDs.
Describes the CLSS Gateway's role and functionalities as a Modbus slave.
Cybersecurity recommendations for using Modbus with the CLSS Gateway.
Details the required IP ports for the CLSS Gateway's Modbus function.
Information and formula for calculating network bandwidth requirements for CLSS Gateway.
Describes the IP network architectures used with the CLSS Gateway.
Explains the setup for a redundant CLSS Gateway configuration.
Details changes when CLSS Gateway replaces a Modbus Gateway in the network.
Guidelines for using CLSS Gateway and Modbus Gateway together.
Lists agency approvals and listings for the CLSS Gateway.
Lists compliance and installation standards for the CLSS Gateway.
Lists fire panels, network cards, and other products compatible with the CLSS Gateway.
Steps to purchase Modbus support via CLSS Site Manager.
Steps to purchase Modbus support via CLSS Site Manager.
General information on installing and configuring the CLSS Gateway for Modbus.
IP settings applicable to Modbus clients connecting to the CLSS Gateway.
Instructions for connecting the CLSS Gateway to a Modbus client via Ethernet.
Detailed steps to configure Modbus settings for the CLSS Gateway.
How to configure a Modbus master application to connect to the CLSS Gateway.
Lists the Modbus commands supported by the CLSS Gateway.
Overview of control features available for the CLSS Gateway.
Lists the specific commands supported for controlling the CLSS Gateway.
Information on how the CLSS Gateway handles analog values and trending.
Explains the register mapping for Modbus communication with the CLSS Gateway.
Overview of the 16-bit registers used by the CLSS Gateway for Modbus.
Details the structure and meaning of point status holding registers.
Describes status registers for zones and panel circuits.
Status holding registers specifically for bell circuits.
Input registers detailing device types for bell circuits.
Holding register for panel status, including Silence and Reset bits.
Input registers for analog values, applicable to 4-20 mA modules.
Holding registers for panel and system troubles, including overall trouble summary.
Input registers for gateway status and configuration information.
Details on how node status is represented by bits in registers.
Function code to read identification and information about the CLSS Gateway.
Troubleshooting guide for common issues encountered with the CLSS Gateway.
How to interface with a Modbus RTU master using Moxa MGate MB3180.
Hardware configuration details for the Moxa MGate MB3180 interface.
Reference to holding registers for system trouble information.
Explains Modbus exception responses and their causes.
Maps CLSS Gateway events to Modbus event categories.
Categorizes and lists device types supported by the CLSS Gateway.
Lists agency listings and compliance standards for the BACnet feature.
Installation requirements and node compatibility for the BACnet feature.
System requirements and connection options for BACnet architecture.
Illustrates the NFN network architecture for BACnet connectivity.
Steps to purchase and activate BACnet support on CLSS Site Manager and App.
Steps to purchase BACnet support on CLSS Site Manager.
Instructions to activate the BACnet feature in the CLSS App.
Lists BACnet object types supported for Life Safety Points and Zones.
Details BACnet object types for Multi-State Inputs supported by CLSS Gateway.
Lists BACnet object types supported for Binary Outputs.
Details BACnet object types for Notification Classes supported by CLSS Gateway.
Lists the types of nodes compatible with the CLSS Gateway.
Details power requirements and wiring for the CLSS Gateway.
Illustrates connection options on the CLSS Gateway board.
Instructions for connecting the CLSS Gateway to a fire alarm panel.
Connection options and requirements for AM Series Panels.
Lists connection options for AM Series Panels with the CLSS Gateway.
Steps to establish an RS-232 connection with AM8200 Panels.
Connection options and requirements for ESSER Panels.
Lists connection options for ESSER Panels with the CLSS Gateway.
Steps to establish an RS-485 connection with ESSER FlexES and IQ8 Panels.
Steps to establish an RS-232 connection with ESSER panels using a TTY-RS-232 converter.
Configuration settings within Tools 8000 for ESSER panels.
Connection options and requirements for Farenhyt Panels.
Lists connection options for Farenhyt Panels with the CLSS Gateway.
Steps to establish an RS-485 connection with Farenhyt Panels.
Enables the panel to recognize the CLSS gateway and annunciator.
Step-by-step guide to programming the Farenhyt panel for annunciator.
Connection options and requirements for FireWarden Panels.
Lists connection options for FireWarden Panels with the CLSS Gateway.
Steps to establish an RS-485 connection with FireWarden Panels.
Enables the panel to recognize the CLSS gateway and annunciator.
Step-by-step guide to programming the FireWarden panel for annunciator.
Connection options and requirements for Gamewell-FCI Panels.
Lists connection options for Gamewell-FCI Panels with the CLSS Gateway.
Steps to use the printer port connection with Gamewell-FCI Panels.
Connection options and requirements for Gent Panels.
Lists connection options for Gent Panels with the CLSS Gateway.
Recommends RS-232 for fixed, USB for portable Gent Compact Series Panels.
Steps to establish an RS-232 connection with Gent Compact Series Panels.
Connection options and requirements for Vigilon Series Panels.
Steps to establish a UART/TTL connection with Vigilon Series Panels.
Connecting Vigilon panels via RS-232 using an I/O card.
Steps to establish a USB connection with Gent Compact Series Panels.
Connection options and requirements for Morley-IAS Panels.
Lists connection options for Morley-IAS Panels with the CLSS Gateway.
Steps to establish an RS-232 connection with Morley DXc Panels.
Connection options and requirements for NOTIFIER® UL panels.
Lists connection options for NOTIFIER® UL panels with the CLSS Gateway.
Steps to establish a NUP connection with NOTIFIER® UL panels.
Connection options and requirements for NOTIFIER® European Panels.
Lists connection options for NOTIFIER® European Panels.
Steps to prepare for connections with NOTIFIER® European Panels.
Steps to establish a NUP connection with NOTIFIER® European Panels.
Connection options and requirements for Silent Knight Panels.
Lists connection options for Silent Knight Panels.
Steps to establish an RS-485 connection with Silent Knight Panels.
Connection options and requirements for Triga Panels.
Lists connection options for Triga Panels.
Steps to establish an RS-485 connection with Triga Panels.
Connection options and requirements for VESDA® Detectors.
Lists connection options for VESDA® Detectors.
Steps to establish an Ethernet connection with VESDA® Detectors.
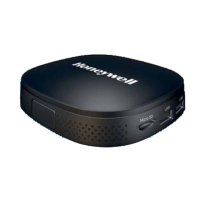
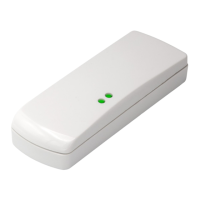
Explains the operation of cellular modules connected to the CLSS Gateway.
Lists the specific cellular modules and their supported frequency bands.
| Model | HON-CGW-MBB |
|---|---|
| Category | Gateway |
| Manufacturer | Honeywell |
| Connectivity | Wired |
| Communication Protocol | Modbus |
| Power Supply | 24V DC |