Installation Guide SMX-AUS
NS-MN-0030 / 11.2020 31
7 Appendix 1 - Replacing the Panel Chassis
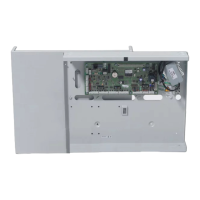
SMX-AUS panels allow you to change the chassis. The replacement process begins with removing the electrical and device connections and ends with connecting
them again in the new chassis.
7.1 To change the enclosure
1. Switch off the SMX-AUS panel.
2. Unlock and open the front door of the panel.
3. In the enclosure, find the fuse holder.
4. From the fuse holder, remove the following main AC power supply
cable connections:
- Remove the power line.
- Remove the earthing and grounding wires.
5. Find the main printed circuit board (PCB) of the panel.
6. From the main PCB, remove all the connectors. For example,
remove the connectors from loop, auxiliaries, printer, relay,
monitor, and so on.
7. From the chassis, using a screwdriver, remove all the M3 screws.
8. From the metal bracket sub-assembly, remove all the M3 screws.
9. Gently remove the enclosure.
10. Place the main PCB inside the new metal bracket sub-assembly.
11. Switch off the SMX-AUS panel.
12. Unlock and open the front door of the panel.
13. In the enclosure, find the fuse holder.
14. From the fuse holder, remove the following main AC power supply
cable connections: - Remove the power line.
15. Remove the earthing and grounding wires.
16. Find the main printed circuit board (PCB) of the panel.
17. From the main PCB, remove all the connectors. For example,
remove the connectors from loop, auxiliaries, printer, relay,
monitor, and so on.
18. From the chassis, using a screwdriver, remove all the M3 screws.
19. From the metal bracket sub-assembly, remove all the M3 screws.
20. Gently remove the enclosure.
21. Place the main PCB inside the new metal bracket sub-assembly.
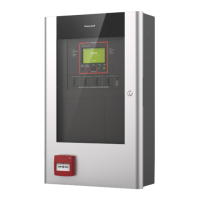
Fig. 15: Re-assembling the Chassis
 Loading...


