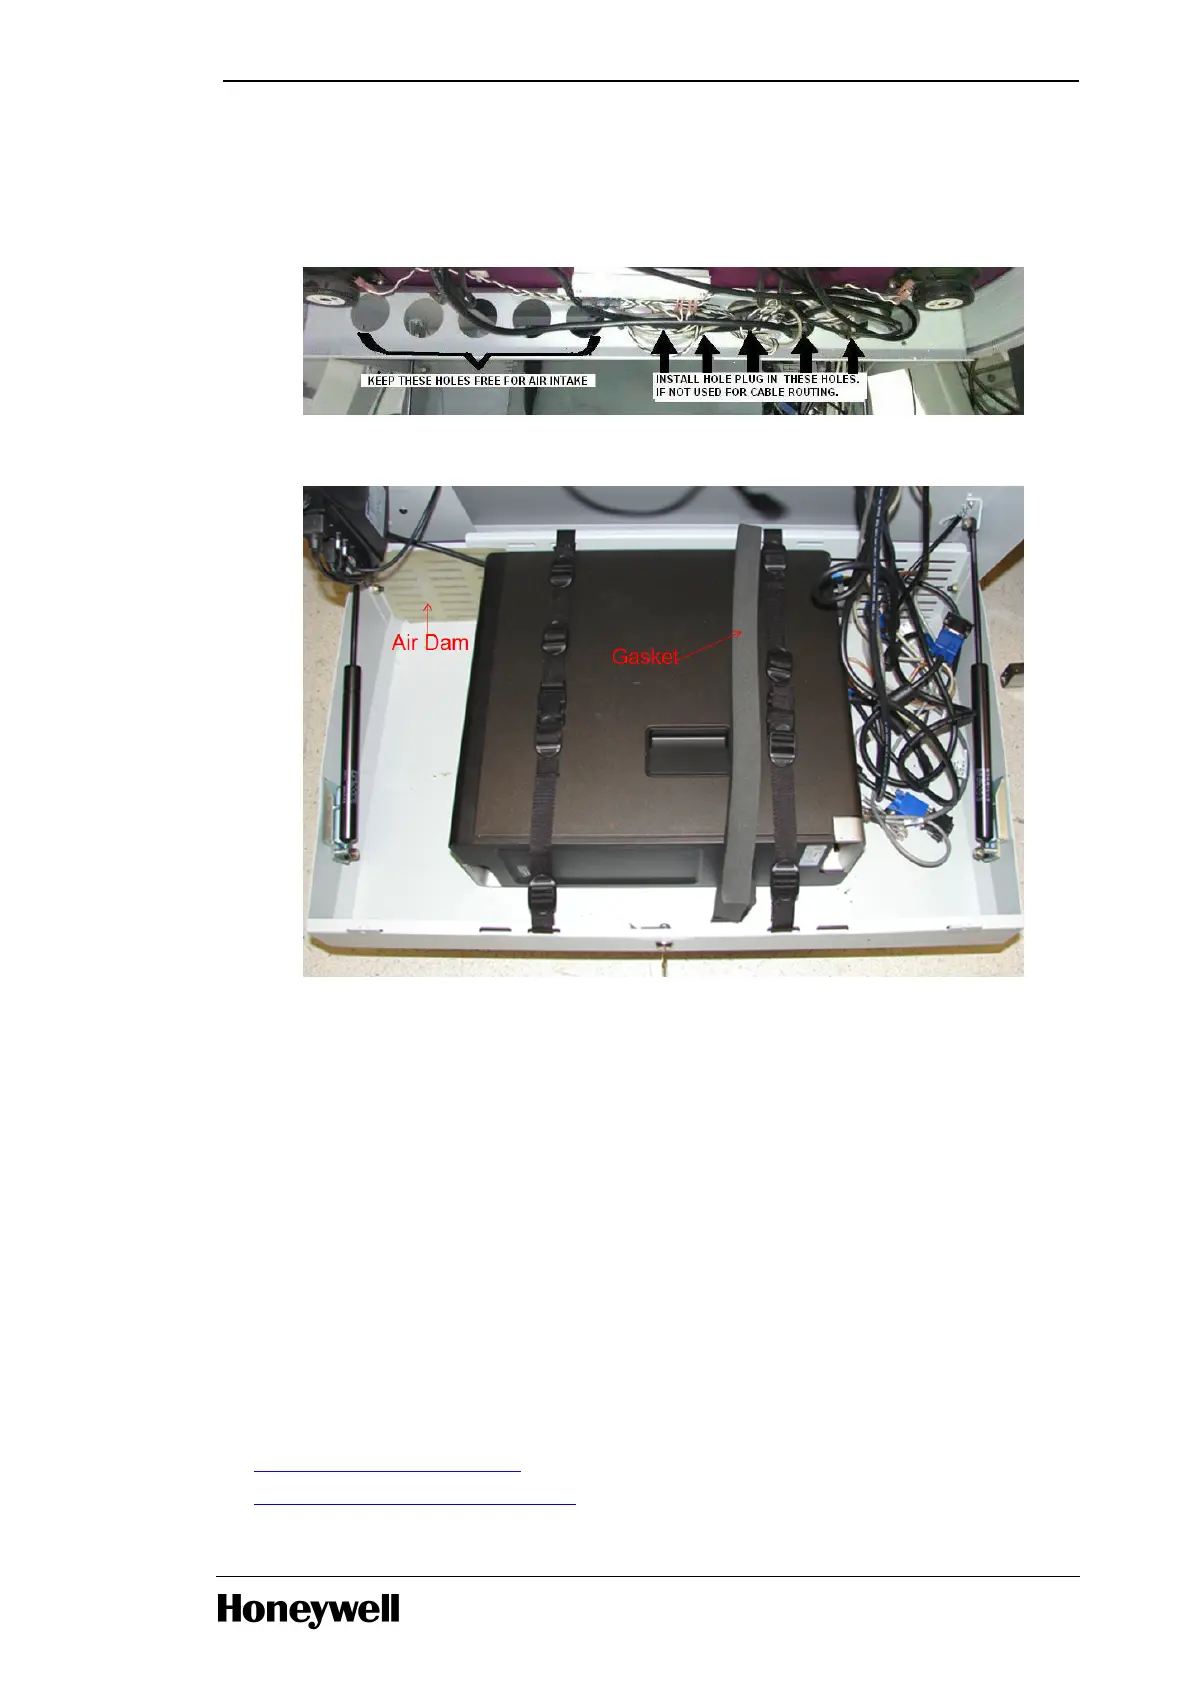
11. The lower valance of the back panel has ten 2 inch holes. These are for both cable passage and
air flow. Four hole plugs are present. Install or move the hole plugs to seal any of the 2 inch holes
on the right side of the lower valance that are not used for cable routing. The five 2 inch holes on
the left side of the lower valance should be completely open (do not route cable through these
holes) to allow airflow to the front bezel of the workstation.
12. Close the enclosure, securing it with the lock and, if necessary, shipping screws.
3.5 Installing workstation in the Experion Orion Console
3.5.1 Installing a workstation
For installing a workstation on the Experion Orion Console, refer to the section Installing a Workstation
in the Experion Orion Console Installation Guide.
3.6 Installing workstation in Z and EZ Console
This section provides instructions for installing a newly purchased Honeywell-configured workstation in
a newly purchased Honeywell Z or EZ-console. The workstation is shipped from the Honeywell factory,
packaged in the OEM shipping carton of the manufacturer. This procedure assumes that a new Z or EZ
console is shipped from the Honeywell factory with workstation hardware pre-installed.
l Z and EZ mounting requirements
l Installing workstation in Z or EZ console
- 31 -
Chapter 3 - Installing
 Loading...