Calibration Handbook
99Midas
Midas Calibration Procedure
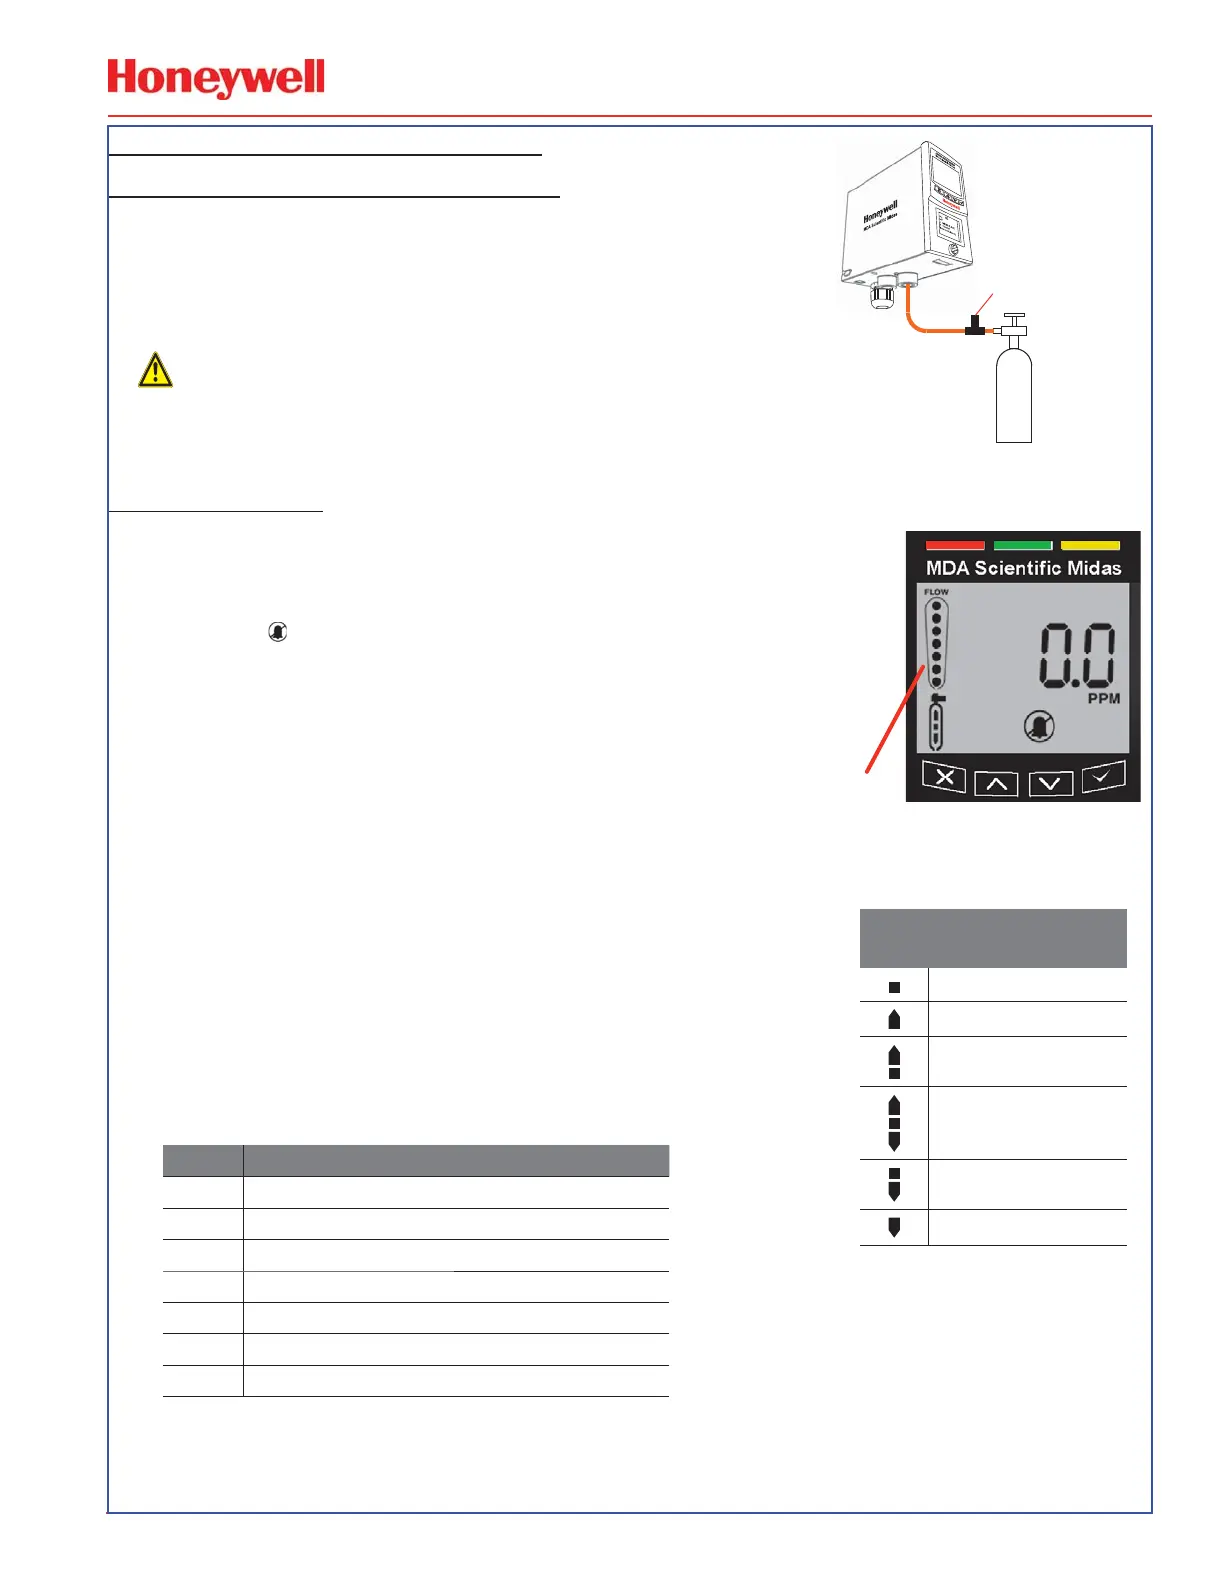
Zero Calibration - Hardware Setup
s Connect 1LPM regulator to Zero Air grade gas cylinder
s Connect ‘Tee’ to regulator
s Connect open end of ‘Tee’ to Midas
®
inlet port
s Be sure Midas
®
in “Zero Calibration” mode
WARNING
NEVER force a sample into Midas, unit damage may result.
s
Zero Calibration
1. Use ‘▲’ or ‘▼’ to select zero calibration ‘ 0CAL’ submenu and press ‘✓’ to
accept.
2. Zero calibration icon starts flashing for user to prepare to apply zero gas.
3. Inhibit ‘
’ icon is also displayed indicating that no alarm outputs will be
generated during this process.
4. Press ‘✓’ to confirm when ready and the icon goes steady.
5. Apply zero gas (or ambient air).
6. Dots on the left of the display indicate progress to a successful zero.
7. Display will show the zero gas reading and if measured to be stable for
an appropriate period of time will display ‘PASS’.
8. If zero calibration is unsuccessful, display will show an error code (see table below).
9. Press ‘✓’ to exit.
10. Press ‘▲’ or ‘▼’ to select another submenu.
11. Press ‘X’ to return to set-up, calibration and test menu selection.
12. Press ‘X’ again to return to normal operation.
NOTE
The change in the gas bottle icon’s contents gives an indication as to the relative
Code Code Meaning
PASS Successful Calibration
FL:0H Zero Calibration Timeout – Over Range
FL:0L Zero Calibration Timeout – Under Range
FL:0U Zero Calibration Timeout – Unstable
FL:SH Span Calibration Timeout – Over Range
FL:SL Span Calibration Timeout – Under Range
FL:SU Span Calibration Timeout – Unstable
1 LPM
Regulator
Zero Air
Tee
Calibration Stability
Icons
Stable
Over - Range
Unstable - Rising
Unstable - Flat
Unstable - Falling
Under - Range
 Loading...