;.=.9.
.
f Look at the controls. Besure you
:’.
..
~=~nd~rstand how to set them prop-
%@&frlv.Read over the directions for
..-4a.
‘th~ Automatic Oven Timer so you
understand its use with the -
controls.
T Check oven interior. Look at the
,..
shelves,Take a practice run at re-
movingand replacing them prop-
erly, to givesure sturdy support.
3. Read over information and tips
that follow.
4, Keep this book handy so you can
refer to it, especiallyduring the first
weeksof getting acquainted with
your oven.
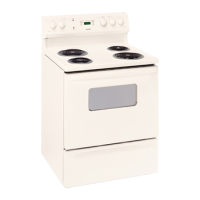
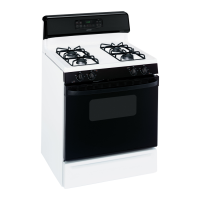
oven ConiroIs
The controls for the oven(s)are
marked OVEN SET and OVEN
TEMP. OVEN SET has settingsfor
BAKE, TIME BAKE, BROIL,
CLEAN and OFF. When you turn
the knob to the desired setting, the
proper heating units are then acti-
‘=~-~~ated for that operation.
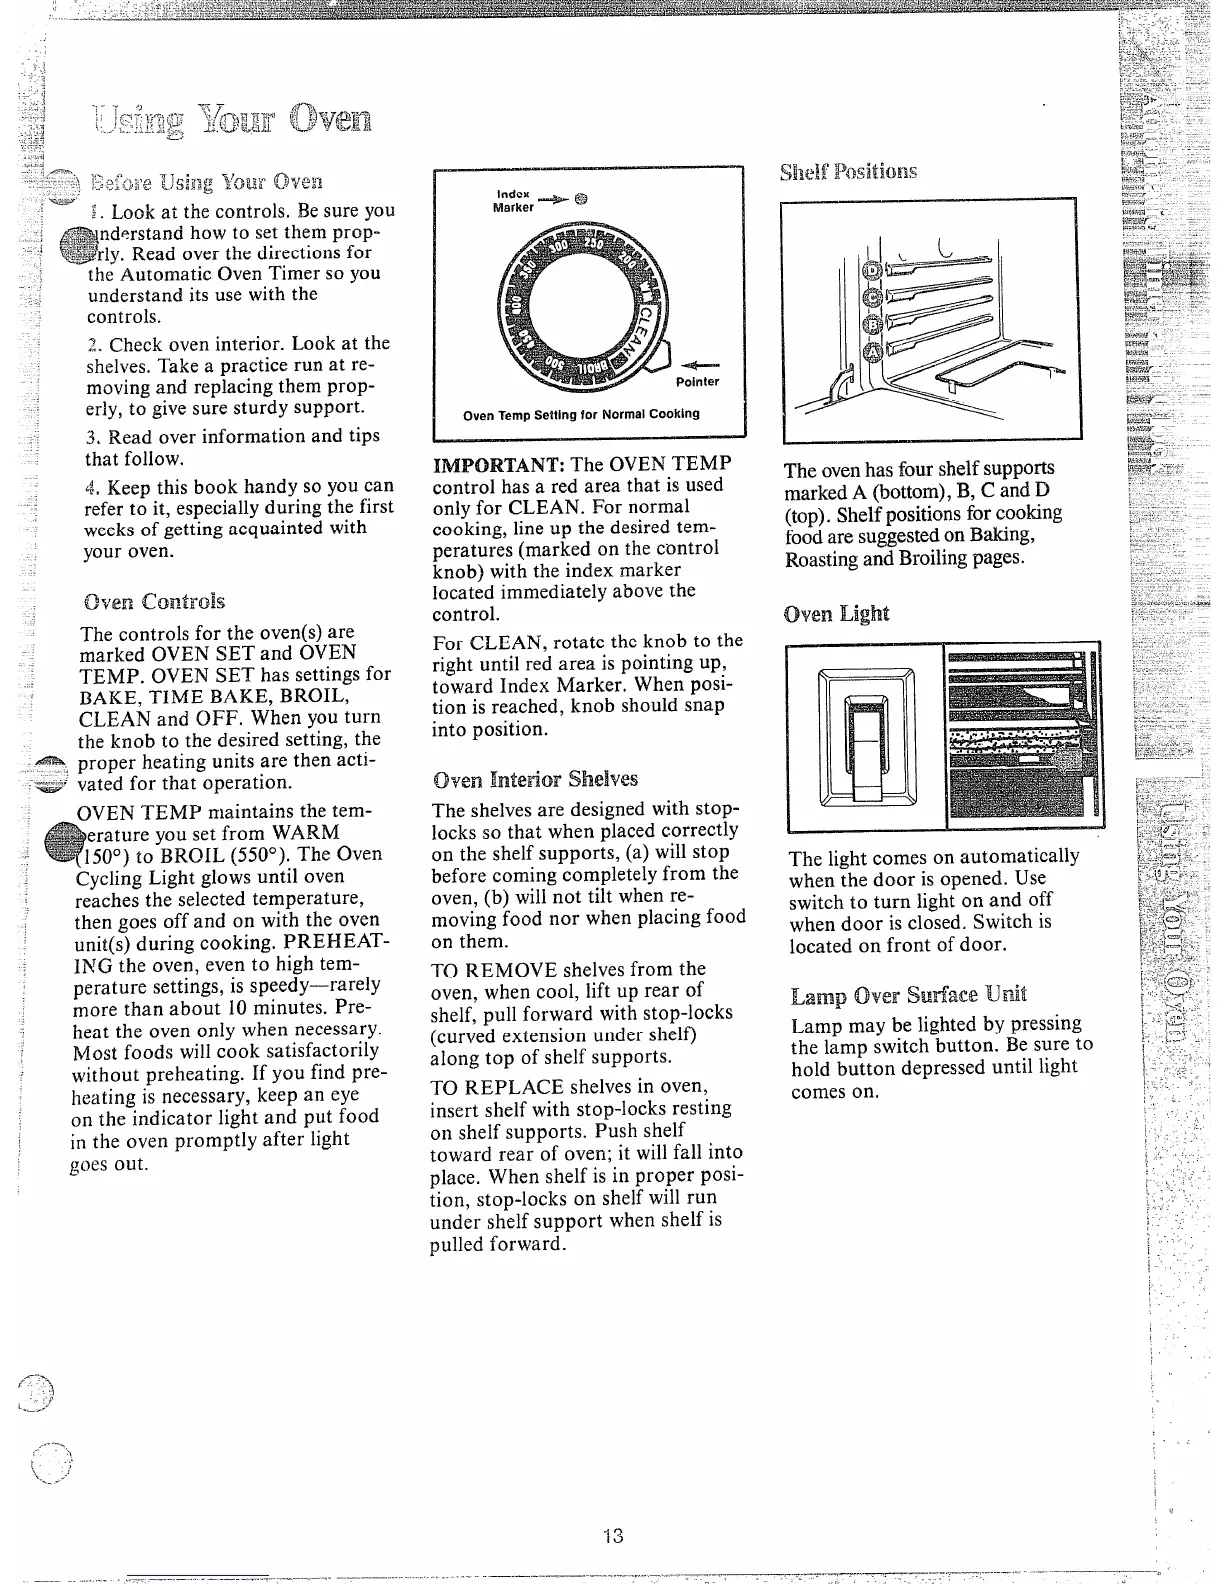
Index + ~
Marker
Pointer
Oven ‘rempSetting for NormalCooking
The OVEN TEMP
control has a red area that is used
only for CLEAN. For normal
cooking, line up the desired tem-
peratures (marked on the control
knob) with the index marker
located immediately above the
control.
For CLEAN, rotate the knob to the
right until red area is pointing up,
toward Index Marker. When posi-
tion is reached, knob should snap
into position.
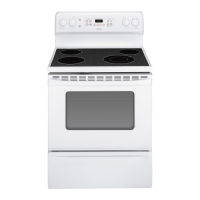
oven Interior shelves
OVEN TEMP maintains the tem-
The shelvesare designed with stop-
erature you set from WARM
50°) to BRQH. (5500).The Oven
Cycling Light glows until oven
reaches the selected temperature,
then goes off and on with the oven
unit(s) during cooking. PREHEAT-
I~TGthe oven, even to high tem-
perature settings, is speedy—rarely
more than about 10minutes. Pre-
heat the oven only when necessary.
Most foods will cook satisfactorily
without preheating. If you find pre-
heating is necessary, keep an eye
on the indicator light and put food
in the oven promptly after light
goes out.
locks so that when placed correctly
on the shelfsupports, (a) willstop
before coming completelyfrom the
oven, (b) willnot tilt when re-
moving food nor when placing food
on them.
TO REMOVE shelvesfrom the
oven, when cool, lift up rear of
shelf, pull forward with stop-locks
(curved extension under shelf)
along top of shelf supports.
TO REPLACE shelvesin oven,
insert shelf with stop-locks resting
on shelf supports. Push shelf
toward rear of oven; it willfall into
t)lace. When shelf is in proper posi-
.
tion, stop-locks on she~ will run
under shelf support when shelf is
pulled forward.
The light comes on automatically
when the door isopened. Use
switch to turn light on and off
when door is closed. Switch is
located on front of door.
Lamp
fmwSwfafx TLJ.mit
Lamp may be lighted by pressing
the lamp switch button. Besure to
hold button depressed until light
comes on.