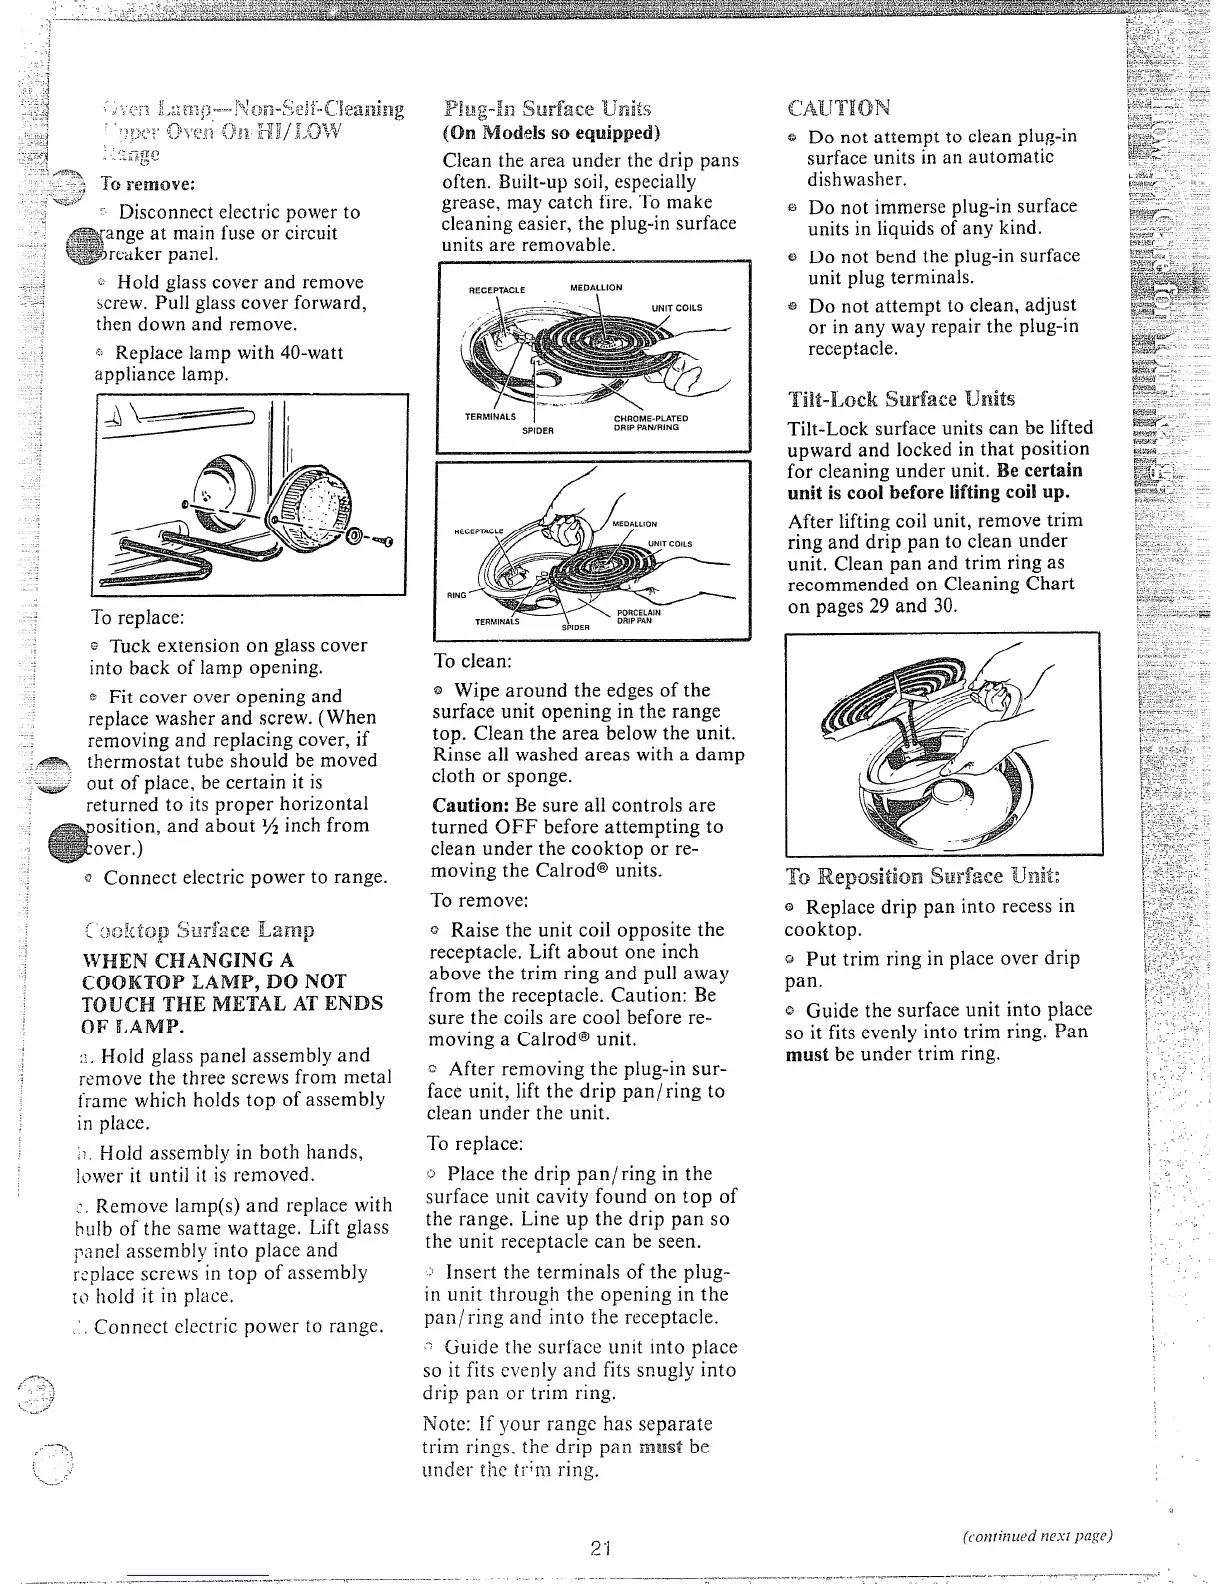
~ Hold glasscover and remove
screw.Pull glasscover forward,
then down and remove.
~’Replacelamp with 40-watt
appliance lamp.
--=43
To replace:
GTuck extension on glasscover
into back of lamp opening.
~ Fit cover over opening and
replace washer and screw. (When
removing and replacing cover, if
,,*=. thermostat tube should be moved
-&<——-
out of place, be certain it is
-=5ZY
returned to its Proper horizontal
~osition, and abou”t% inch from
over.)
~ Connect electricpower to range.
..-
:.:Xlktop 5LJ14=”
~+”~e Lamp
WHEN
iX-IANGHW A
COOKT’OP L4Jw, Do N(YI’
TOUCH THE
METAL AT’ENDS
OF LAMP.
::. Hold glass panel assembly and
remove the three screws from metal
frame which holds top of assembly
in place.
;’. Hold assembly in both hands,
]Owel-it until it is removed.
I Remove lamp(s) and replace with
~~l]bof the same wattage, Lift glass
panel assembl~:into place and
r:place screws In top of assembly
10hold it in place,
.’.Connect ciectric power to range.
-------
<“
- .%
“>
1
?
..
-.--’
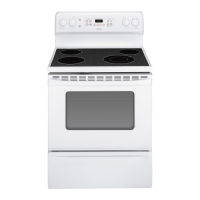
Hug-h SWfi3ccU1’-ii%
(on Models so equipped)
Clean the area under the drip pans
often. Built-upsoil, especially
grease, may catch fire, To make
cleaningeasier,the plug-insurface
units are removable.
RECEPTACLE
MEDALLION
I
.
TERhllNALS
CHROME-PLATEO
SPIOER
ORIP PAN/RING
I /“
R
RIN
To clean:
@Wipe around the edgesof the
surface unit opening in the range
top. Clean the area below the unit.
Rinse all washed areas with a damp
cloth or sponge.
Caution: Be sure all controls are
turned OFF before attempting to
clean under the cooktop or re-
movirigthe Calrod@units.
To remove:
~ Raise the unit coil opposite the
receptacle, Lift about one inch
above the trim ring and pull away
from the receptacle. Caution: Be
sure the coils are cool before re-
moving a Calrod@unit,
~ After removing the plug-in sur-
face unit, lift the drip pan/ring to
clean under the unit.
To replace:
~~Place the drip pan/ring in the
surface unit cavity found on top of
the range. Line up the drip pan so
the unit receptacle can be seen.
: insert the terminals of the plug-
in unit through the opening in the
pan/ring and into the receptacle.
~~Guide the surface unit into place
so it fits evenly and fits snugly into
drip pan or trim ring.
N’ote:~fyour range has separate
trim rings, the drip pan must be
under the
ti”;m ring.
2-/
Do not attempt to clean plug-in
surfaceunits in an automatic
dishwasher.
Do not immerseplug-insurface
units in ~iquidsof any kind.
Do not bend the plug-insurface
unit plug terminals.
Do not attempt to clean, adjust
or in any way repair the plug-in
receptacle.
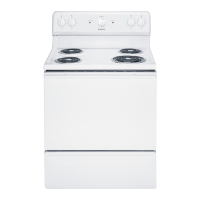
~~hf% Ud$j
Tilt-Lock surface unitscan be lifted
upward and locked in that position
for cleaning under unit. Be certain
unit is COO]before liftingcoilup.
After liftingcoil unit, remove trim
ring and drip pan to clean under
unit. Clean pan and trim ring as
recommended on Cleaning Chart
on pages 29 and 30.
~f-jReposition FjhH’faceIunk
o Replace drip pan into recessin
cooktop.
Q Put trim ring in place over drip
pan.
o Guide the surface unit into place
so it fits evenly into trim ring. Pan
must be under trim ring.