1. Prepare the computer for disassembly (see Preparation for disassembly on page 32).
2. Remove the bottom cover (see Bottom cover and rubber feet on page 32).
3. Remove the battery (see Battery on page 34).
4. Remove the WLAN module (see WLAN module on page 38).
5. Remove the solid-state drive (see Solid-state drive on page 37).
6. Remove the fan (see Fan on page 44).
7. Remove the system board (see System board on page 48).
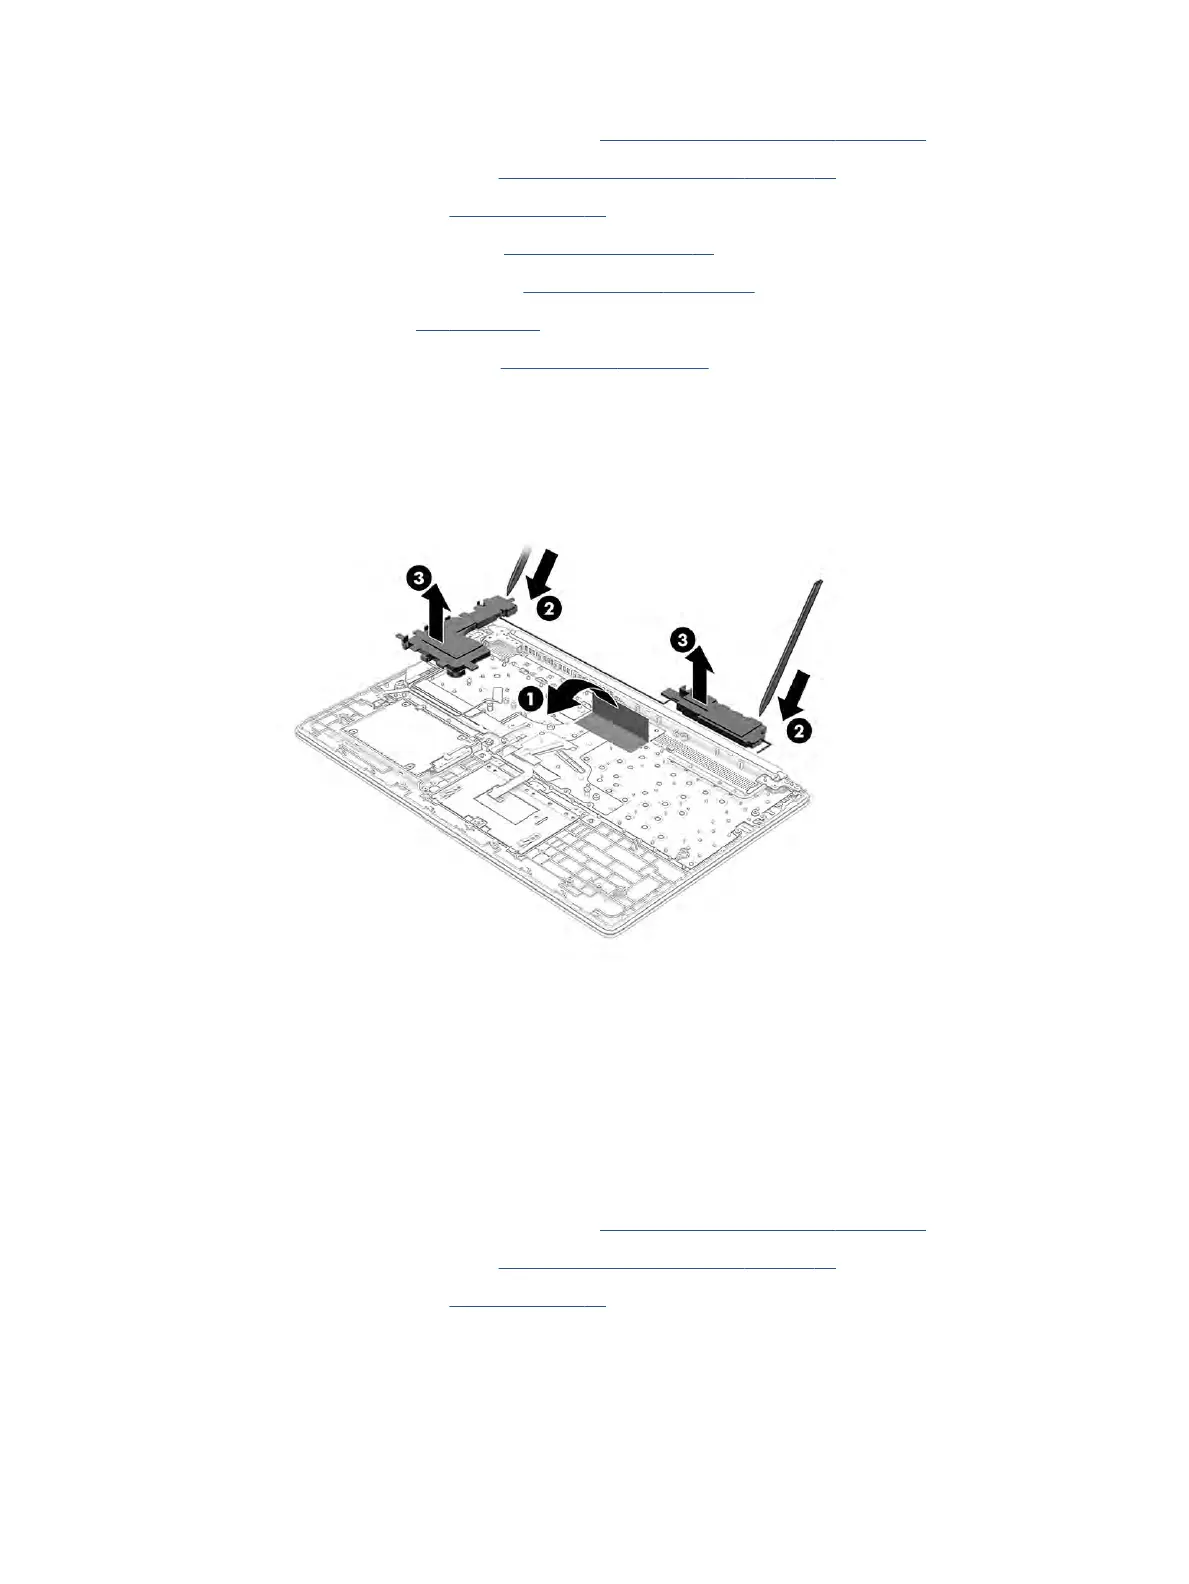
Remove the speakers:
1. Lift the protective tape that covers the cable between the speakers (1).
2. Use a tool to release both speakers (2). The speakers are secured with adhesive.
3. Remove the speakers from the computer (3) .
Reverse this procedure to install the speakers.
Display assembly
To remove and disassemble the display assembly, use these procedures and illustrations.
Full hinge-up displays are not available as spare parts. Spare parts for displays are available only at the
subcomponent level.
Before removing the display panel, follow these steps:
1. Prepare the computer for disassembly (see Preparation for disassembly on page 32).
2. Remove the bottom cover (see Bottom cover and rubber feet on page 32).
3. Remove the battery (see Battery on page 34).
Remove the display assembly:
1. Disconnect the display cable from the system board ZIF connector (1), and then remove the tape that
secures the display cable to the system board (2).
Component replacement procedures 51
 Loading...