EasyManuals Logo

HP 6000 User Manual

HP 6000
114 pages
To Next Page IconTo Next Page
To Previous Page IconTo Previous Page
Page #30 background imageLoading...
Page #30 background image
2-8 Removal and Replacement HP Omnibook 6000/6100
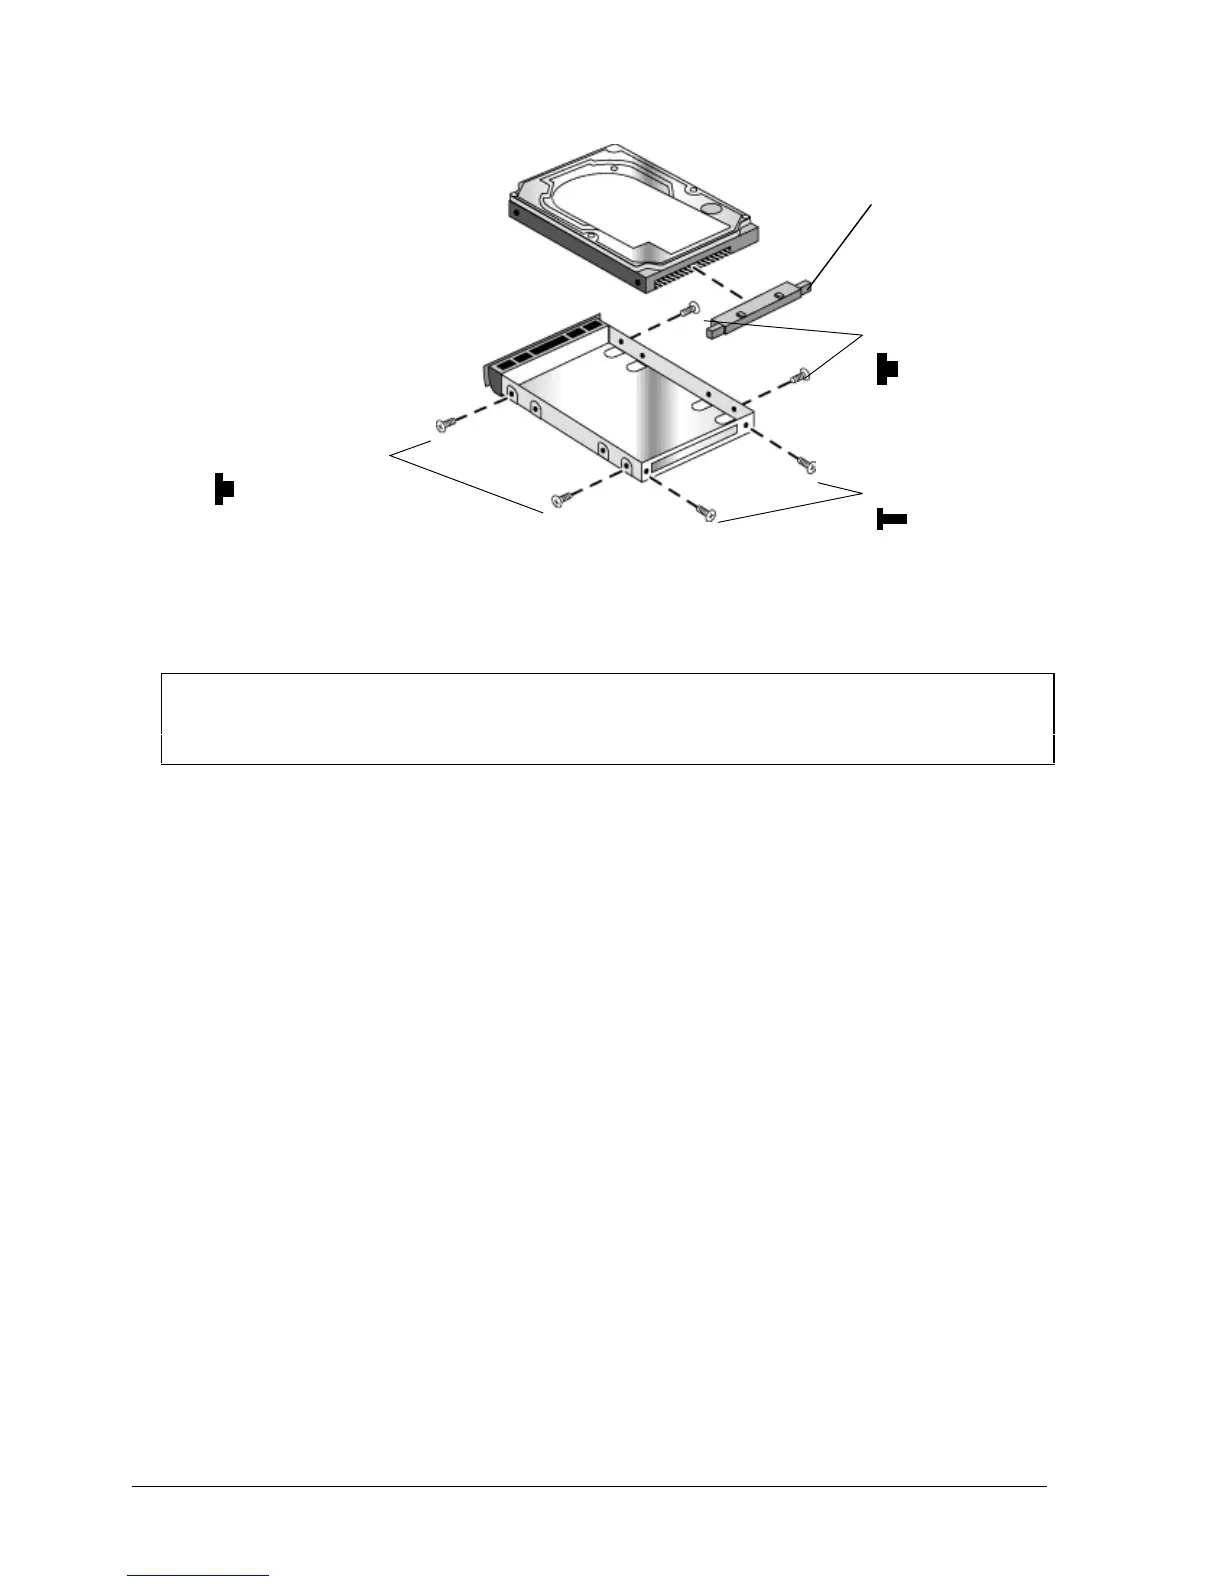
Figure 2-7. Removing the Hard Disk Case
Slide the cover down into place so the retainer tab engages the casing.
Carefully put the pin connector back onto the pins on the end of the new hard drive. Work at each
end alternately so that the connector slides on evenly without bending the connector pins.
Important
If you are installing a new hard drive, create a Utility partition on the drive before loading any
software—see “Creating a Utility Partition,” below.
Pin connector
Screws, M3×3mm (2)
Screws, M3×3mm (2)
Screws, M2×4mm (2)
(OB 6000 only)

Table of Contents

Other manuals for HP 6000

Questions and Answers:

Question and Answer IconNeed help?

Do you have a question about the HP 6000 and is the answer not in the manual?

HP 6000 Specifications

General IconGeneral
AudioIntegrated High Definition Audio
ProcessorIntel Core 2 Duo
RAMUp to 8GB DDR3
StorageUp to 1TB HDD
GraphicsIntegrated Intel Graphics Media Accelerator 4500, Optional discrete graphics cards
Operating SystemWindows 7
Optical DriveDVD-ROM
NetworkIntegrated 10/100/1000 Ethernet
PortsUSB 2.0, VGA, Serial, Parallel, PS/2, Audio In/Out
Expansion SlotsPCI, PCIe x1, PCIe x16
Power Supply300W

Related product manuals