EasyManuals Logo

HP 6000 User Manual

HP 6000
114 pages
To Next Page IconTo Next Page
To Previous Page IconTo Previous Page
Page #51 background imageLoading...
Page #51 background image
HP Omnibook 6000/6100 Removal and Replacement 2-29
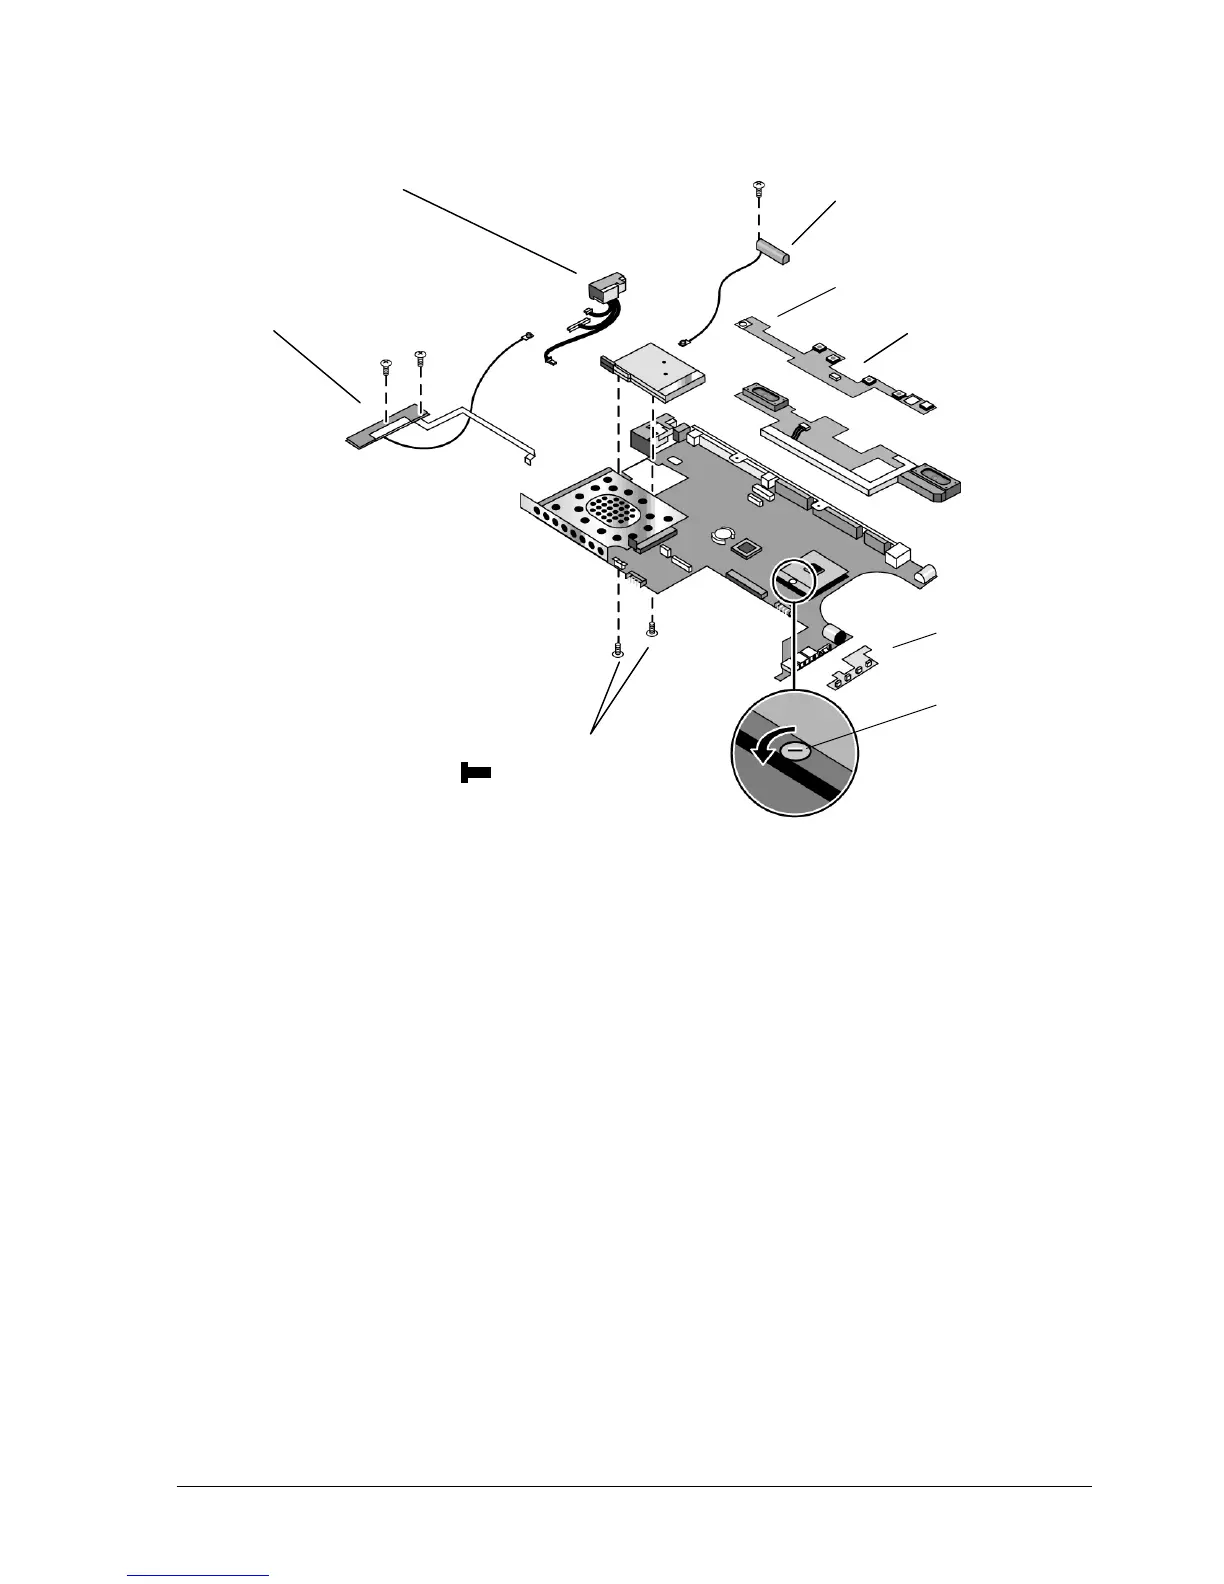
Figure 2-21. Replacing Motherboard Components: Omnibook 6100 Models
Omnibook 6000 Models Only
1. If present, remove the mini-PCI card and mini-PCI panel.
2. Remove the screw from the display interface PCA, and carefully lift the PCA off of the connector
underneath.
3. Carefully lift the power supply PCA off of the connector underneath.
4. Remove the screw from the volume PCA, and carefully lift the PCA off of the connector
underneath.
5. Turn the lock screw one-half turn counterclockwise to release the CPU module, and remove the
CPU module from the motherboard.
Volume PCA
CPU module
lock screw
Display interface PCA
Screws, M2x4mm (2)
Speaker assembly
Mini-PCA panel
(LAN/modem)
Front antenna PCA
Rear antenna PCA

Table of Contents

Other manuals for HP 6000

Questions and Answers:

Question and Answer IconNeed help?

Do you have a question about the HP 6000 and is the answer not in the manual?

HP 6000 Specifications

General IconGeneral
AudioIntegrated High Definition Audio
ProcessorIntel Core 2 Duo
RAMUp to 8GB DDR3
StorageUp to 1TB HDD
GraphicsIntegrated Intel Graphics Media Accelerator 4500, Optional discrete graphics cards
Operating SystemWindows 7
Optical DriveDVD-ROM
NetworkIntegrated 10/100/1000 Ethernet
PortsUSB 2.0, VGA, Serial, Parallel, PS/2, Audio In/Out
Expansion SlotsPCI, PCIe x1, PCIe x16
Power Supply300W

Related product manuals