HP Omnibook 6000/6100 Removal and Replacement 2-23
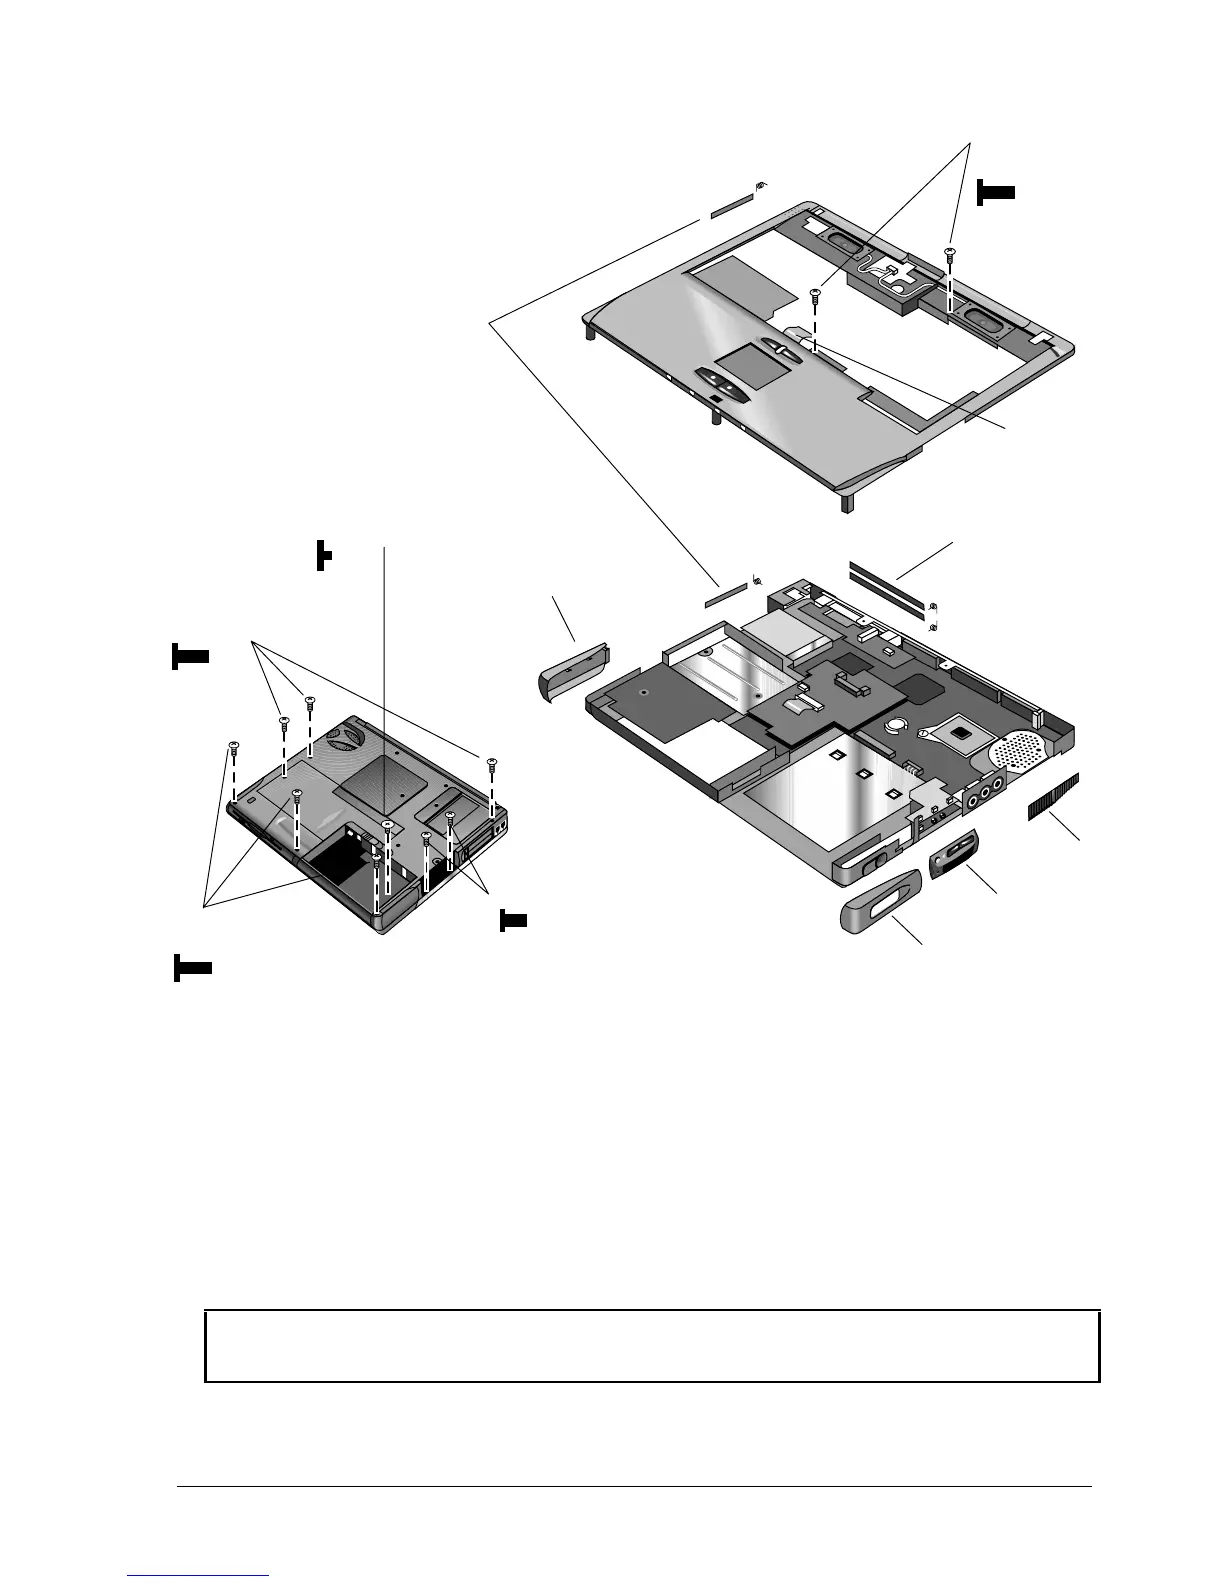
Figure 2-16. Removing the Top Case: Omnibook 6000 Models
Reassembly Notes:
All Models
• Omnibook 6000 only: If you need to reinstall the sound/IR panel, make sure the volume control is
oriented properly (pins facing inward). Insert the tabs on the end of the panel into the slots in the
bottom case.
• When reinstalling the right corner cover, first insert the tab at the back end of the cover into the
case, then move the plug-in module latch forward and snap the cover over the latch and into place.
• Wireless models only: If you are replacing the rear antenna PCA, place the PCA in its position
near the left hinge, replace the screw, then thread the cable through to the bottom of the computer
and reconnect the cable to the mini-PCI card.
Caution: Omnibook 6000 Models
Be careful not to pinch the speaker wires when reinstalling the nearby retaining screws.
Screws,
M2.5x6mm
2
PCMCIA doors
Screws, M2.5x6mm (3)
Screws, M2.5x4mm (2)
Cover,
Panel,
sound/IR
Panel,
vent
Cover, left
corner
Screw, M2.5x2mm
Docking doors
Touch pad
flex cable
Screws,
M2.5x6mm
3