Technical Reference Guide 3–25
Installing or Replacing Parts
Power Supply
Before replacing the power supply, you can use the Built-In Self-Test (BIST) feature to find out if
the power supply still works. Refer to Chapter 4, “Troubleshooting”, for more information.
Removing the Power Supply
1. Turn off the system, disconnect all cables, and remove the system access panel and airflow
guide.
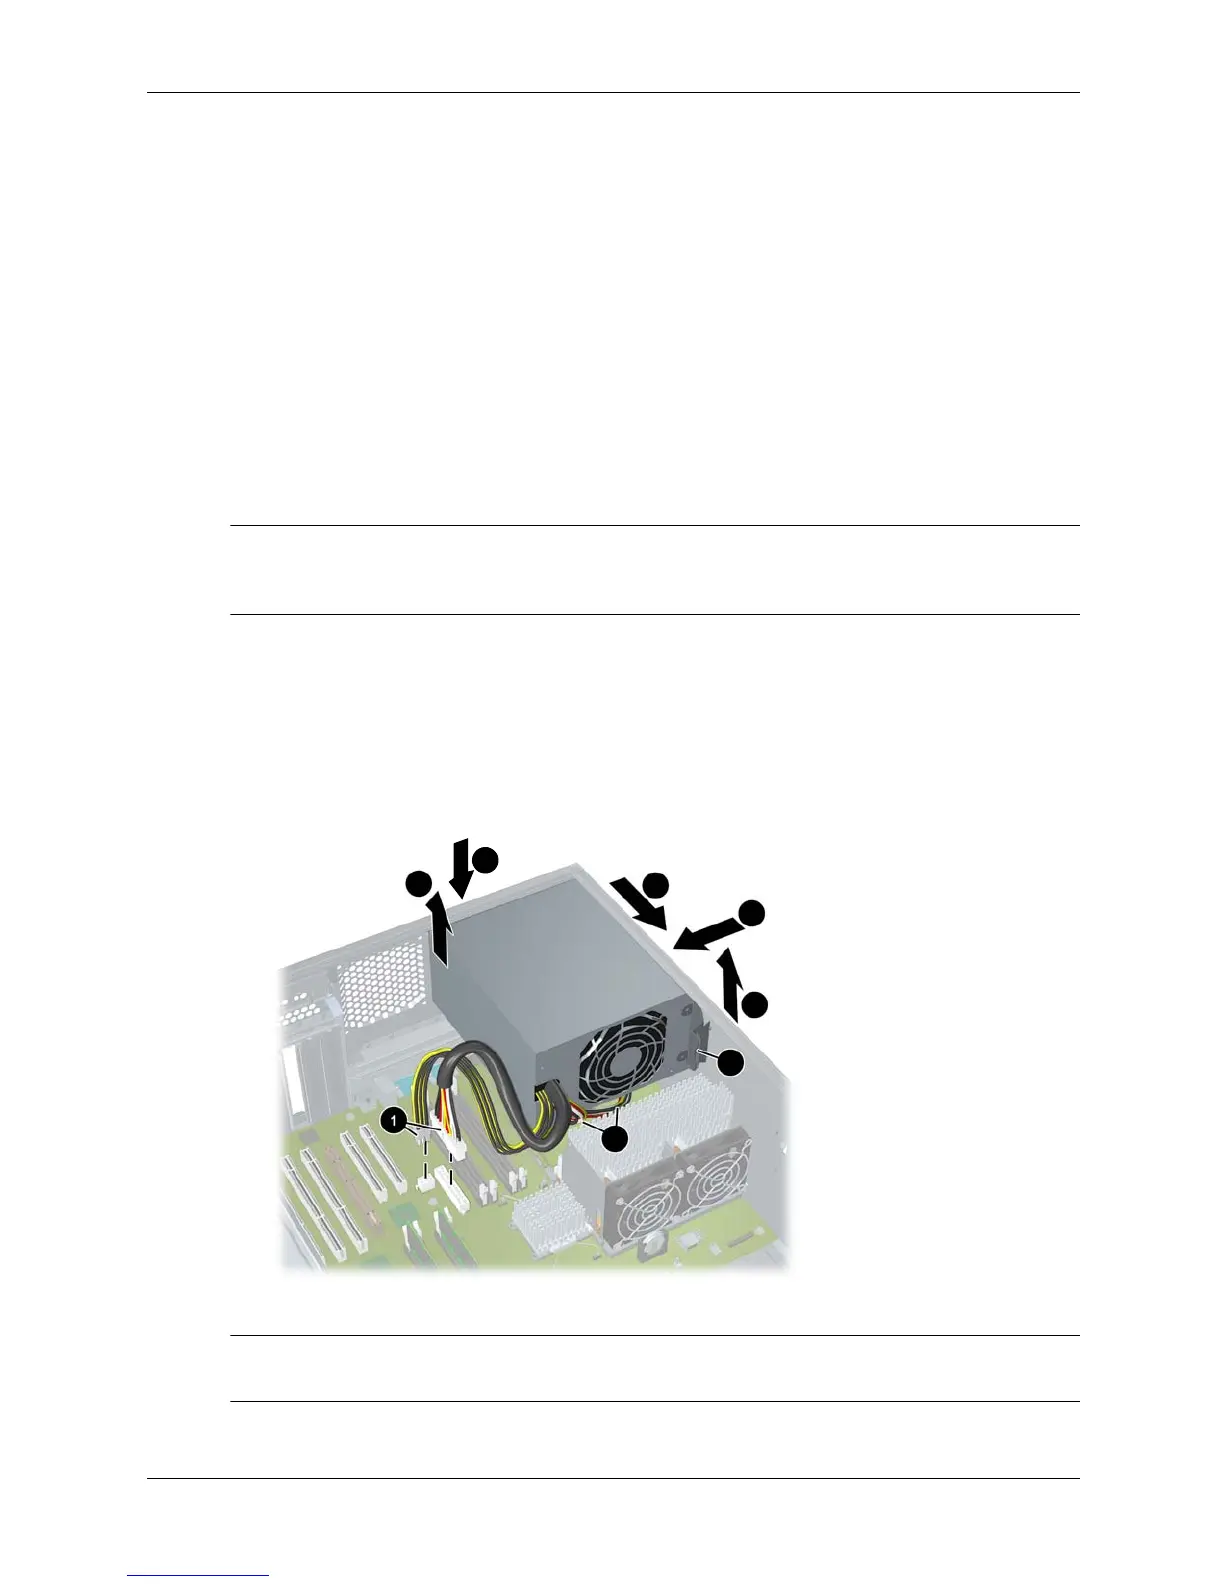
2. Unplug the power supply power connectors from all components 1, including the:
❏ hard drives
❏ optical drives
❏ graphics card
❏ system board
NOTE: Use caution when lifting the power supply because there are cables below the power
supply (illustrated on the next page) that must be removed before completely removing the
power supply from the chassis.
3. Loosen the thumbscrew that secures the power supply to the rear panel 2.
4. While supporting the power supply weight with your hand 3, reach inside the system chassis
and pull the lever that locks the power supply in place 4.
5. Slide the power supply toward the front of the chassis 5 and toward the PCI slots 6, then lift
it out 7.
6. Unplug the power supply cables that connect to the power module(s) 8.
Removing the power supply
✎
NOTE: For information on testing the power supply, refer to “Troubleshooting the Power
Supply” on page 4-14.
2
8
3
4
5
6
7