Replacing the hard drive
To locate the hard drive on the system board, see Locating internal components on page 21.
1. Remove all removable media, such as USB ash drives, from the computer.
2. Turn o the computer properly through the operating system, and turn o any external devices.
3. Disconnect the power cord from the AC outlet and disconnect any external devices.
IMPORTANT: Regardless of the power-on state, voltage is always present on the system board as long
as the system is plugged into an active AC outlet. You must disconnect the power cord and wait
approximately 30 seconds for the power to drain to avoid damage to the internal components of the
computer.
4. Remove the base unit rear and front access panels. See Removing and replacing the base unit access
covers on page 15.
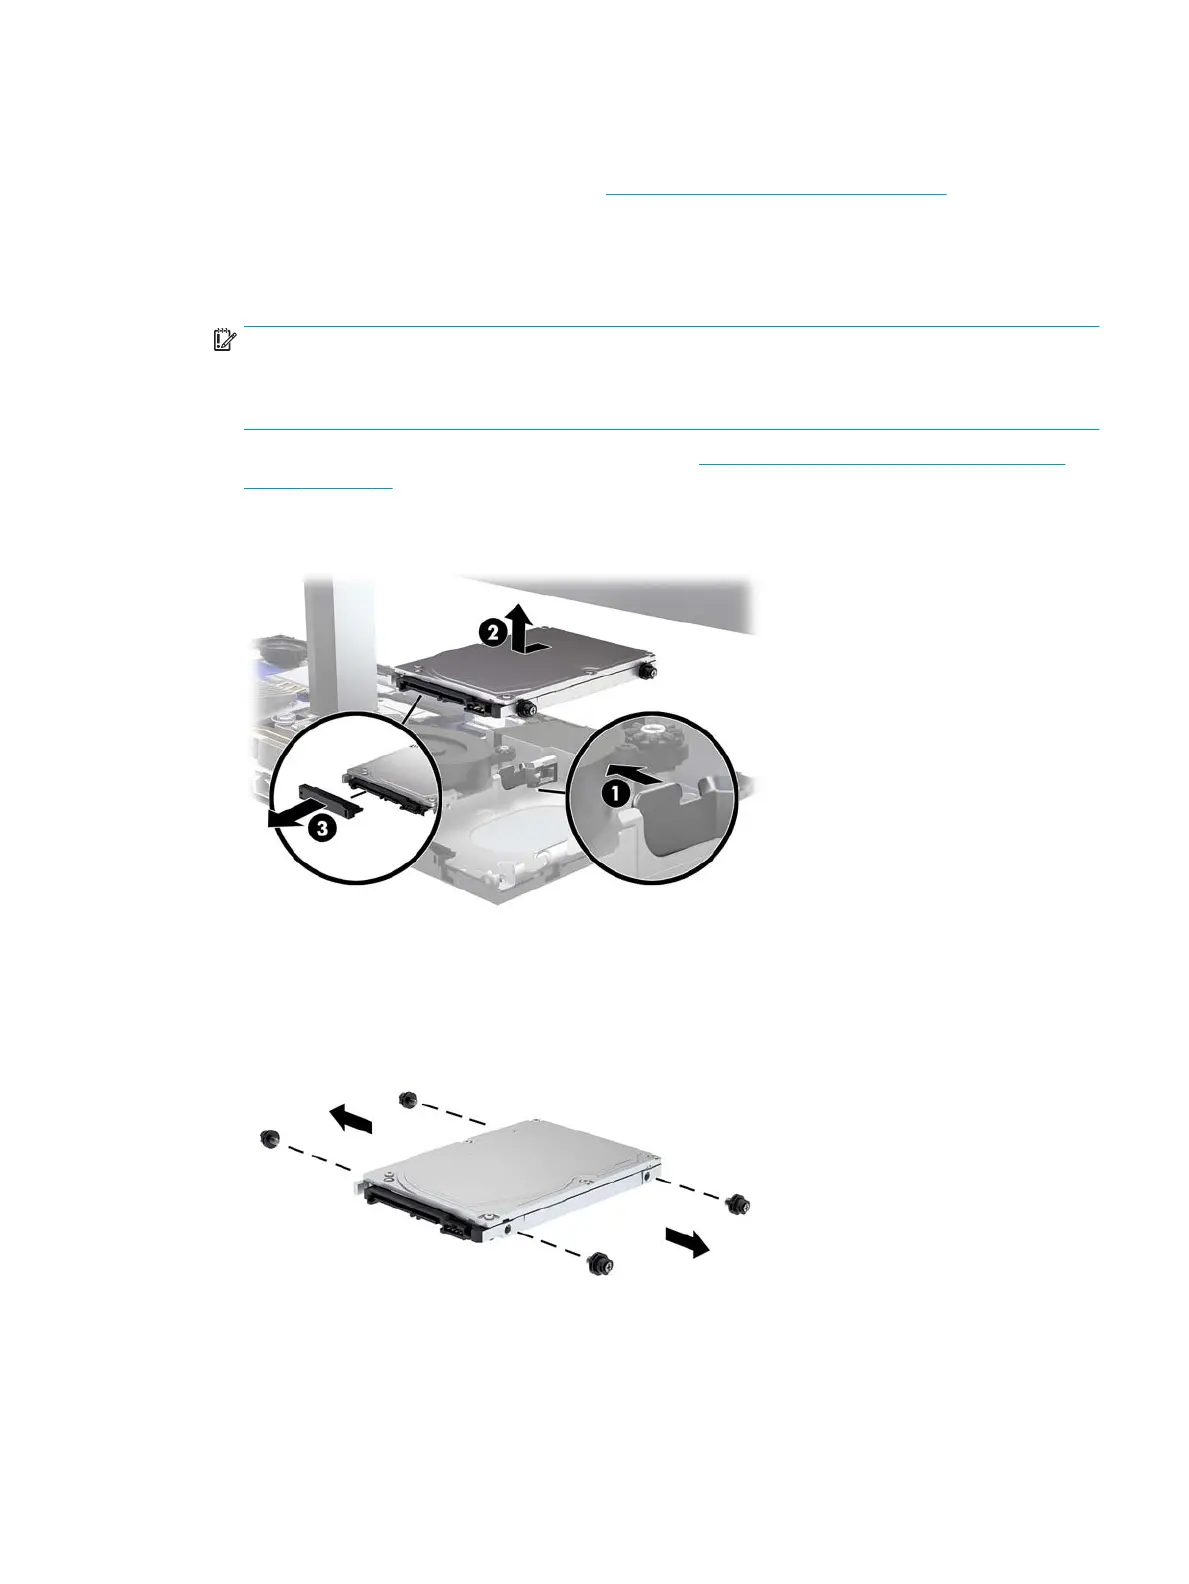
5. Pull the release lever at the front of the drive outward (1). Then slide the drive back until it stops and lift
it out of the drive bay (2). And then disconnect the cable from the rear of the hard drive (3).
6. Remove the four mounting screws from the sides of the hard drive that was removed.
Replacing the hard drive 25

 Loading...