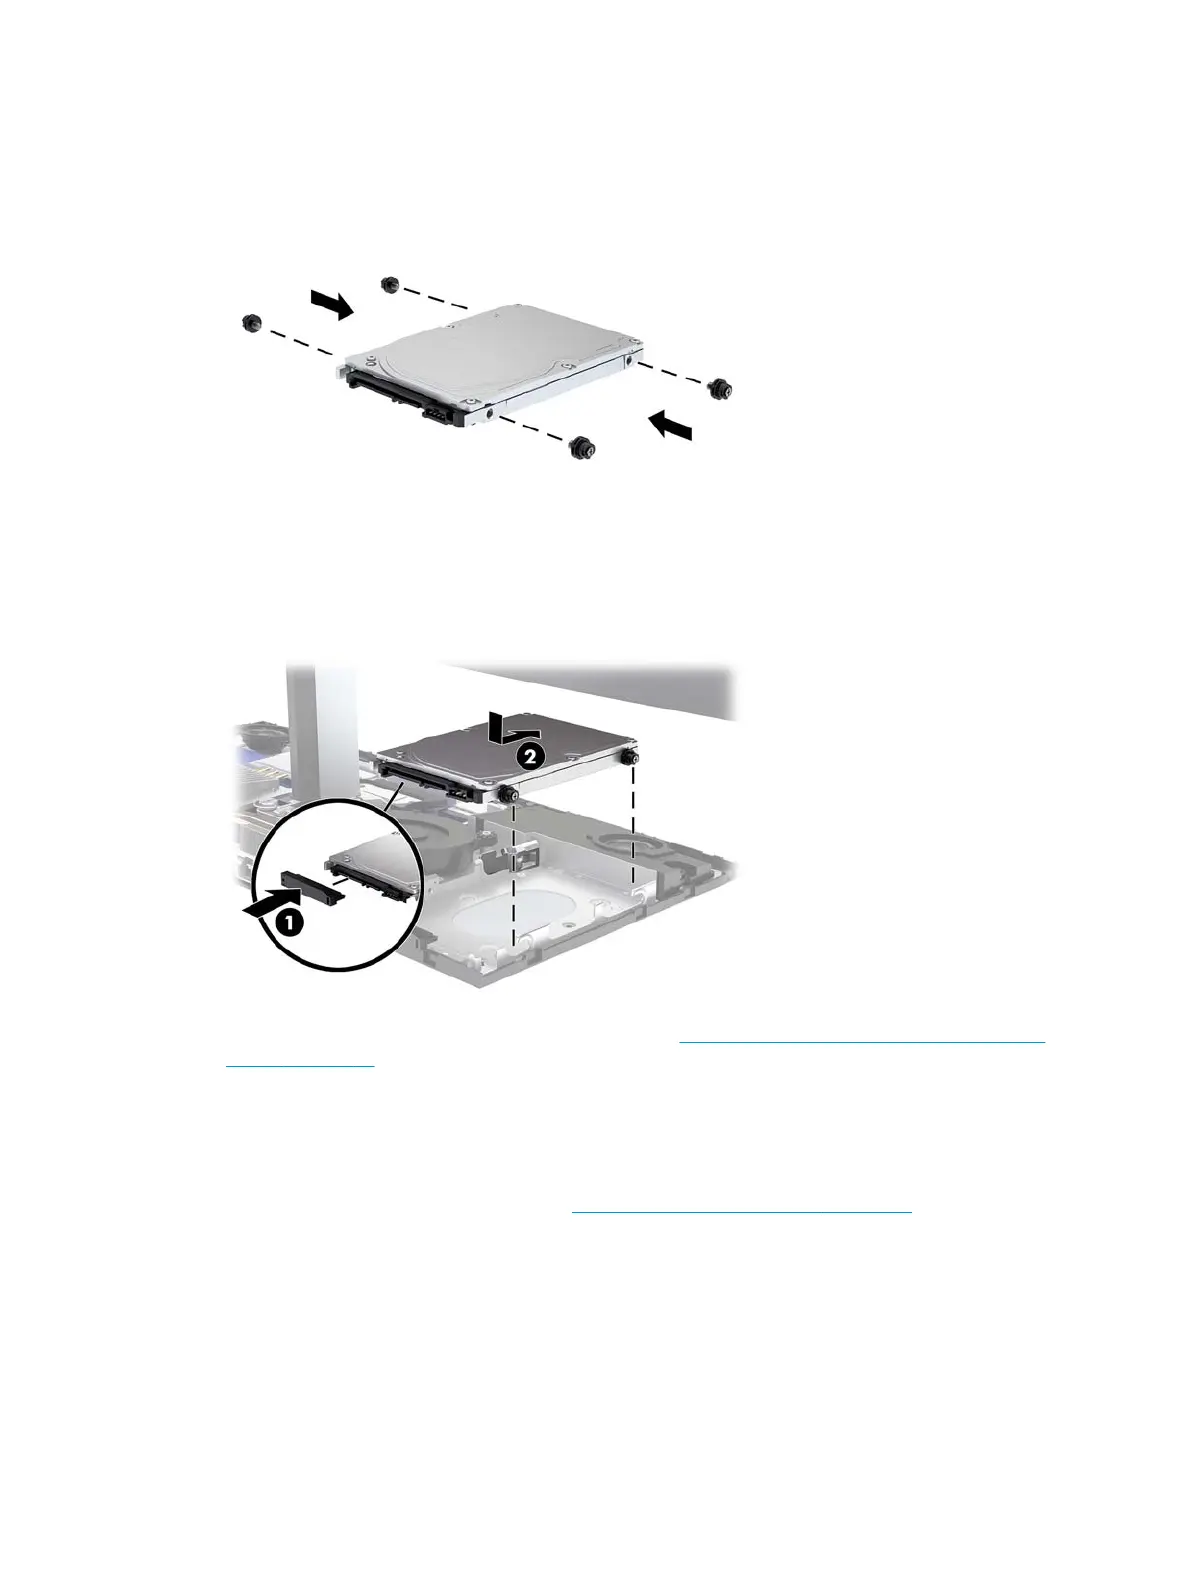
7. Install the four mounting screws that were removed from the old drive in the sides of the new hard drive.
8. Connect the cable to the rear of the hard drive (1). Then align the mounting screws on the drive with the
J-slots on the sides of the drive bay and press the drive into the drive bay. And then slide the drive
forward until it locks in place (2).
9. Replace the base unit front and rear access panels. See Removing and replacing the base unit access
covers on page 15.
10. Reconnect the power cord and any external devices, and then turn on the computer.
Removing or installing an M.2 SSD
To locate the M.2 SSD on the system board, see Locating internal components on page 21.
1. Remove all removable media, such as USB ash drives, from the computer.
2. Turn o the computer properly through the operating system, and turn o any external devices.
3. Disconnect the power cord from the AC outlet and disconnect any external devices.
26 Chapter 3 Hardware repair and upgrade

 Loading...