Do you have a question about the HP ML330 - ProLiant - G3 and is the answer not in the manual?
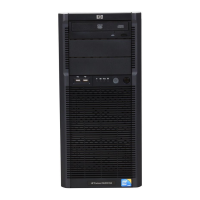
Overview of the HP ProLiant ML330 Generation 3 server's performance, memory, and expansion capabilities.
Identifies and describes the buttons and connectors on the front of the server.
Explains the status indicators (LEDs) on the server's front panel.
Details the server's media bays and installed drives like CD-ROM and diskette.
Identifies and describes the ports and connectors on the rear of the server.
Explains the status indicators (LEDs) on the server's rear panel.
Identifies key components and connectors on the server's main system board.
Details the settings and functions of the system configuration DIP switch.
Explains the purpose and usage of the system ID switch.
Provides information on jumper settings for SCSI and IDE devices.
Explains the status indicators (LEDs) located on the server's system board.
Describes the SCSI controller and its connectors.
Details the components of the SCSI cable used for device connections.
Details the components of the ATA cable used for device connections.
Instructions on how to start the server.
Instructions on how to safely shut down and power off the server.
Step-by-step guide to detach and remove the server's front bezel.
Step-by-step guide to detach and remove the server's access panel.
Describes available HP services for system installation and configuration.
Specifies environmental requirements for optimal tower server operation.
Specifies environmental requirements for optimal rack server installation.
Details required clearances for proper server airflow and servicing.
Specifies the recommended operating temperature range for the server.
Outlines electrical compliance and power requirements for installation.
Details the necessary procedures for proper electrical grounding of the server.
Provides information on installing the server into HP and third-party racks.
Lists the items included in the server's shipping carton and necessary tools.
General guidance before starting server installation or configuration.
Step-by-step instructions for installing the server with a pre-installed OS.
Instructions for installing an operating system purchased separately.
Guide to using RBSU and SmartStart CD for server configuration.
Instructions on how to register the server with HP.
Essential steps to perform before installing any internal hardware options.
Detailed steps for installing a processor into the server.
Guidelines and steps for installing memory modules (DIMMs) into the server.
Procedures for installing various storage devices like hard drives and media bays.
Instructions for installing tape drives or other removable media devices.
Guide for installing the optional two-bay hot-plug SCSI drive cage.
Step-by-step instructions for installing expansion boards into PCI slots.
Overview of the RBSU for server configuration and setup tasks.
Explains keyboard commands and navigation within the RBSU interface.
Describes primary menus and options available within RBSU.
Configures basic I/O, OS selection, serial number, and embedded ports.
Displays and modifies PCI device configurations and IRQs.
Configures the Initial Program Loader (IPL) device search order.
Allows viewing and assigning the current controller order.
Used to set the server's date and time.
Configures automatic server restart and shutdown features.
Configures administrative and power-on password protection.
Customizes server-specific text for asset tracking and information.
Configures advanced system settings like MPS Table Mode and POST speed.
Configures serial port for remote POST messages and RBSU access.
Sets the display language for RBSU.
Explains the automatic system configuration during the first boot.
Describes the screen that appears before system boot for OS installation.
Explains the server's redundant ROM feature for safe firmware upgrades.
Information on using ROMPaq for firmware (BIOS) upgrades.
Utility for efficiently upgrading system or controller ROM images.
Details standard and legacy USB support on the server.
Describes the SmartStart CD for loading server software and drivers.
Accesses system software and ProLiant Support Packs via the SmartStart CD.
Utilities for customized, predictable server deployment and replication.
Displays hardware info and tests system operation.
Information on installing drivers for new hardware not on OS media.
Utility to create logical drives, assign RAID levels, and configure spares.
Software for managing server health, configuration, and performance.
Web-based application for administrative tasks and device management.
Feature that automatically restarts the server after a catastrophic OS error.
Gathers critical hardware and software information for supported OS.
Records and stores system events for easy viewing and analysis.
Diagnostic tests that check firmware and assemblies during startup.
Explains Redundant Array of Independent Drives (RAID) and its benefits.
Defines key terms and supported RAID levels for the utility.
Describes RAID 0 functionality, which stripes data for performance.
Describes RAID 1 functionality, which mirrors data for redundancy.
Describes RAID 1+0, combining striping and mirroring for performance and redundancy.
Notes that RAID 5 is not supported by this server or utility.
Explains the use of a spare drive for RAID 1 rebuilds.
Details the ATA RAID utility for configuring arrays and drives.
Lists the capabilities of the Integrated ATA RAID Configuration Utility.
Instructions on how to access and use the ATA RAID Configuration Utility.
Displays and allows creation/deletion/editing of configured drive arrays.
Displays properties of physical drives connected to ATA/100 controllers.
Provides hints on options and keys for performing tasks in the utility.
Automatically creates a striped array based on installed drives.
Automatically creates a mirrored array based on installed drives.
Automatically creates a RAID 1+0 array based on installed drives.
Creates a drive array, allowing customization of properties like type and size.
Rebuilds an array using a spare drive. Applies to RAID 1 and 1+0.
Clears configuration information from drives attached to the controller.
Allows deletion of a currently configured array.
Restores the configuration that existed before entering the utility.
Edits physical drive option status boxes like write cache and DMA.
Saves the configuration and exits the utility.
Details the ATA RAID utility for managing arrays and monitoring status.
Lists features like visual array status and automatic rebuilds.
Explains how the utility runs automatically at boot time.
Addresses common issues like inconsistent naming and drive errors.
Provides best practices for connecting drives to RAID channels.
Offers advice on changing array configurations and handling new drives.
Explains the unique series number for product identification and compliance.
Details FCC rules and classifications (Class A/B) for RF emissions.
Compliance limits for Class A digital devices in commercial environments.
Compliance limits for Class B digital devices in residential environments.
Statement of compliance with FCC Rules for products marked with the FCC logo.
Notifies users that unauthorized modifications may void operating authority.
Specifies the need for shielded cables to maintain FCC compliance.
Compliance requirements for digital apparatus in Canada.
Compliance with EMC and Low Voltage Directives for CE marking.
Compliance information specific to Japan.
Compliance information specific to Taiwan's BSMI.
Information on compliance with laser safety standards (IEC 825).
Critical warnings regarding safe operation and servicing of laser devices.
Compliance with U.S. FDA regulations for laser products.
Confirmation of compliance with international safety standards like IEC 825.
Describes the Class 1 Laser Product label found on the device.
Provides technical specifications for the laser device.
Important warnings about handling and replacing the internal battery pack.
Guidelines for selecting and using appropriate power cords for different countries.
Compliance statement related to the mouse peripheral.
Awareness of static electricity discharge and its potential to damage components.
Specific measures to prevent electrostatic damage to sensitive parts.
Describes various methods for grounding to prevent electrostatic discharge.
Directs users to the Servers Troubleshooting Guide for a full list of error messages.
Guide to using appendix sections for diagnosing server startup and installation issues.
Step-by-step instructions for common problems during initial Power-On Self-Test (POST).
Addresses errors occurring after POST, such as inability to load the OS.
Procedures to clear and reset system configuration settings from CMOS and NVRAM.
Steps to perform disaster recovery if both current and backup ROM versions are corrupt.
Details dimensions, weight, input voltage, frequency, current, and power.
Provides operating, shipping, and humidity specifications for the server.
Identifies symptoms indicating the need to replace the real-time clock battery.
Critical warnings about handling lithium battery packs to prevent injury.
Step-by-step instructions to remove the system battery.
| Product Line | ProLiant |
|---|---|
| Model | ML330 G3 |
| Form Factor | Tower |
| Processor | Intel Xeon |
| Processor Cores | 1 |
| Memory Type | PC2100 DDR SDRAM |
| Hard Drive Interface | Ultra320 SCSI |
| RAID Levels | 0, 1 |
| Network | Integrated Gigabit Ethernet |
| Expansion Slots | 6 |
| Operating System Support | Windows, Linux |
| Drive Bays | 6 |